The Presa de Las Niñas reservoir in the heart of the Gran Canaria Biosphere Reserve
The Presa de Las Niñas reservoir is located in the Llanos de la Yerbahuerto at an altitude of approximately 900 meters. This area belongs to the Parque Rural de Nublo, located within the Gran Canaria Biosphere Reserve. In June 2005, UNESCO declared the entire region a Biosphere Reserve due to the grandeur of its landscape, featuring remarkable pine forests and rich biological diversity. In addition to encountering lakes on this hike, you’ll also come across traditional agriculture, small settlements, and terrace cultivation. Furthermore, you can visit the vast caves of Majada.
Hiker at the tunnel exit near the Presa de Las Niñas dam
Map
The starting point of the hike is a large recreational area at Presa de Las Niñas. This rest and picnic area has a capacity for 374 people and belongs to the municipality of Tejeda. The Biosphere Reserve is one of the most visited recreational areas in Gran Canaria, so you’ll find all the facilities needed for a pleasant day with family or friends on the extensive grounds. Naturally, this beautiful spot near Presa de Las Niñas is also suitable for resting before or after the hike, allowing you to leisurely enjoy the impressive landscape.
Ascent path S-60 towards Presa de Las Niñas
Hike around Presa de Las Niñas and Water Scarcity in 2024
On this interesting hike, you start at Presa de Las Niñas, circling around it about two-thirds of the way. Then, you hike over Majada Alta, passing by the caves of Majada. After that, you descend through an impressive gorge to the small village of Baranquillo de San Andrés. From there, you’ll walk along the road to the village of Soria. Here, you can catch a glimpse of the large dam of Soria, where another hike around additional reservoirs begins. Behind Soria, you’ll ascend again through an impressive mountain landscape. You’ll reach the Montaña de las Monjas ridge, from which you’ll descend back to Presa de Las Niñas.
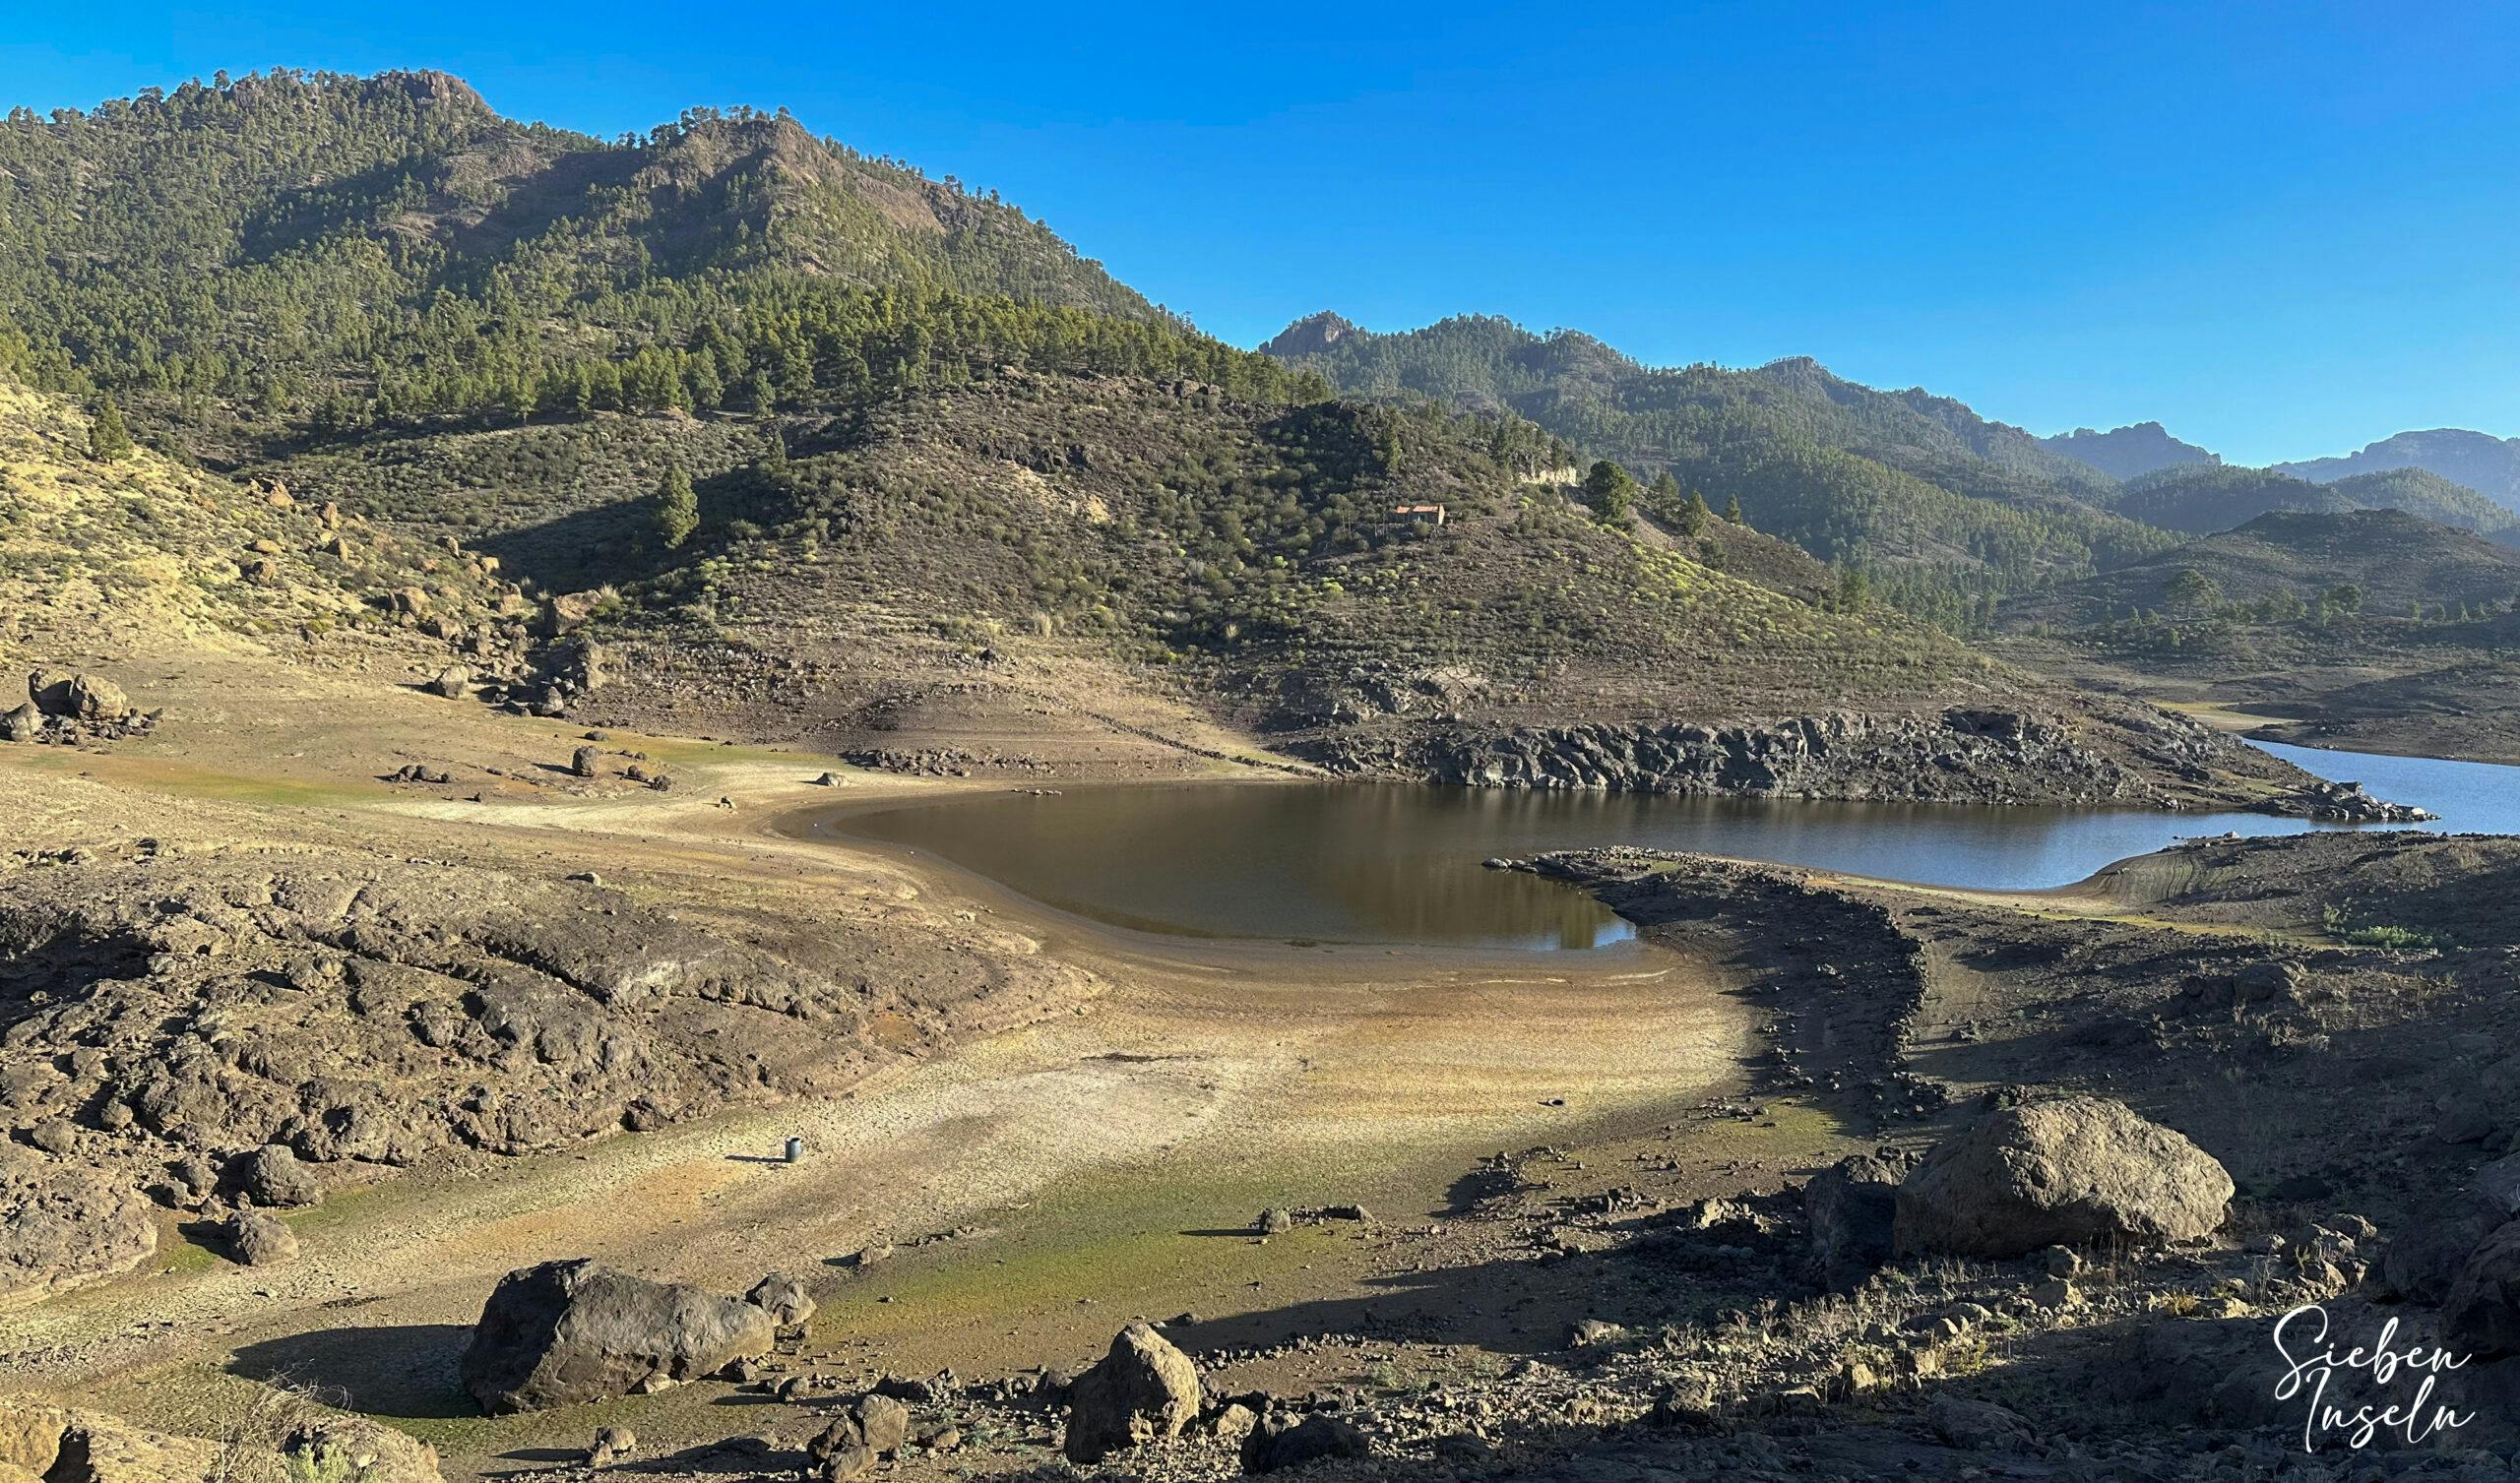
View from the hiking trail back to the Presa de Las Niñas and the now dry areas (2024)
As you can easily see from the pictures, the Presa de Las Niñas (as of February 2024) is quite empty. In fact, we hiked next to the lake over areas where there should normally be water. This is due to water scarcity caused by insufficient rainfall, which affected all the Canary Islands and especially Gran Canaria at the beginning of 2024. Hopefully, there will be some rain before the hot summer arrives to replenish the island’s reservoirs.
Track of the Presa de Las Niñas hike
General Information about the Hike around Presa de Las Niñas
Starting Point and Directions
You start your hike at the Presa de Las Niñas picnic area next to the GC-605 road.
Starting point at the Presa de Las Niñas rest area
Arrival by car
You can reach the Presa de Las Niñas picnic area from both sides only via the GC-605 road. There are ample parking spaces available at the picnic area.
Arrival by bus
According to my research, there seem to be few bus connections. Occasionally, bus line 38 passes near Presa de Las Niñas. For further information, you can look here.
Time
I prefer not to provide specific time estimates, as times can vary greatly. For the hike around Presa de Las Niñas, we needed a little over 4.5 hours.
Elevation profile of the Presa de Las Niñas hike
Elevation Gain and Distance
The elevation difference is just under 500 meters, and the distance was slightly over 13 kilometers.
Article summary and large selection of GPS hiking tracks
Sign up for my newsletter now and get exclusive access to my collected GPS tracks as well as all the brief information about my articles.
The hike mostly follows good trails, paths, and roads. There was a short section near Presa de Las Niñas where the trail was a bit rough.
Refreshment
You have options for refreshments in Baranquillo de San Andrés and in Soria. However, please remember to bring sufficient water and snacks for the hike.
Track of the hike Presa de Las Niñas (top red), hike Cuevas de majada Alta (yellow), hike Mogán-Tauro (green), lake hike (blue)
Hiker on the ascent path towards Presa de Las Niñas
Circular Hike Presa de Las Niñas
Section from Presa de Las Niñas Picnic Area to Tunnel Entrance
You start your hike at the Presa de Las Niñas picnic area. From there, you descend gently towards the lake, initially encountering dried-up areas that you can now hike through. In February 2024, it took some time for us to reach the trail that circles the lake. The lake was quite dried up. By walking close to the lake, we actually hiked over areas that would normally be submerged. Therefore, you can only partially follow the track at this point. Simply check how much water is in the lake when you plan to hike there. If there is a lot of water in the lake, hike a little higher along the shore to make the loop a bit larger.
Hikers at Presa de Las Niñas - water used to flow nearby - now you are hiking in the dry (as of February 2024)
With some ups and downs, you hike along the lake, occasionally spotting birds in and around the water. You hike along the entire length of the lake. At the end of the lake, the trail takes you upward along the transverse side. On the other side of the lake, the hiking trail runs above the lake, offering splendid views of the water and the surroundings. Finally, the trail ends at a tunnel entrance.
Tunnel at the Presa de Las Niñas dam
Section from Tunnel Entrance to Majada Alta
You don’t have to go through this short tunnel. However, we did it anyway to see where it leads exactly and what the view is like on the other side. If you wish, you can climb up to the canal from here and continue following it. Otherwise, you can shorten the route by going uphill to the right before the tunnel. Then, you cross the plateau on a narrow path and then descend to the canal. Whichever way you choose, you need to get onto the wide canal path. This path leads you comfortably along the canal for quite a while. You cross a hill while following it.
Hiking between Charca de las Aneas and the Cuevas de Majada
Eventually, you reach a very small lake, the Charca de las Aneas. This was dry in February 2024. The canal turns left here, but you continue straight ahead along the right side of the lake on the slope. This is the only part of the hike that is a bit unclear due to the reeds and the slope. After the lake, you hike through the wide valley of Majada Alta, steadily climbing upwards. You alternate between walking through bushes and over open areas.
the caves of Majada
Section from Majada Alta to GR-139 Junction
At the end of the path through the valley, you have several options. In front of you are the Cuevas de Majada. This is a mountain with many large caves, which are definitely worth visiting. I will introduce a separate hike to this on SiebenInseln. If you walk to the base of the mountain with the caves, you follow the hiking trail to the left from there. However, we followed the hiking trail uphill to the left before reaching the caves.
Hiking trail junction canal path in the direction of Baranquillo de San Andrés
Article summary and large selection of GPS hiking tracks
Sign up for my newsletter now and get exclusive access to my collected GPS tracks as well as all the brief information about my articles.
This trail takes you over the ridge, and you continue around the mountain with the caves, then further along the slope. Eventually, the trail descends, and you reach another canal. However, you cross this canal to the left shortly afterward. Signposted for Baranquillo de San Andrés, the long-distance hiking trail GR-139 with red and white markers leads downhill into the gorge.
Hiker on the descent path towards Barranquillo de Andrés
Section from GR-139 Junction to El Montañón
Initially, the hiking trail takes you downhill in some switchbacks into the gorge. However, after some time, the trail turns right and descends along the slope. The Barranco offers beautiful corners with impressive rock walls, palm trees, and various plants. The actual greenery depends on the weather and the season. After a while, the trail leads you into the bottom of the gorge. You cross it.
View of Barranquillo de Andrés
On the other side, the hiking trail ascends along the cliff wall. Once you reach the top, you descend for a while and then reach a dirt road. You follow this road to the left. This leads you to an even wider dirt road. You can’t get lost if you follow the signs for Barranquillo de San Andrés. This road, which you follow for quite some time, runs downhill along the mountainside of the impressive rock El Montañón. Even now, you can enjoy magnificent views of the small villages ahead.
Hiking trail through Baranquillo de San Andrés
Section from El Montañón to Soria
Below the front of El Montañón, you reach a small road near some houses and gardens. You follow this road in switchbacks downhill. After a while, you reach the charming village of El Baranquillo de San Andrés. If you like, you can take a look around or take a break here. Otherwise, you walk past the church downhill to GC-505 road. You then follow this road to the left. It might not be so pleasant to walk on the road for a while.
the dam near Soria
However, there is little traffic, and you mostly descend towards Soria with wonderful views of the vast landscape and the Soria dam. Then, after crossing small barranco streams on the road, you eventually reach the village of Soria. The hike to Soria and Chira Lake starts at the dam here. There are shops and restaurants, so it might be time for a break. You follow the GC-505 road through the entire village. Even here, the reservoir was alarmingly low in February 2024.
Hiking trail road through Soria
Section from Soria to Montaña de las Monjas Ridge
After walking a bit further along GC-505 to Soria, the S-60 hiking trail branches off to the left uphill. Initially, you hike uphill on a wide dirt road. This road takes you in several switchbacks above the houses below. If you prefer to continue along GC-505, you can also take the S-60 trail, signposted uphill at the houses. Whichever option you choose, the trail eventually takes you up the massive slope.
View from the ascent path Presa de Las Niñas back to Soria
You continue with beautiful views into a notch. This gorge is called Cascada Bonita de Soria. Perhaps there is a waterfall or at least water here at certain times of the year. When I was there, there wasn’t. You cross the gorge and then continue uphill on steep switchback paths on the other side. Eventually, the trail flattens out a bit under the rugged cliffs. And then you’re at the Montaña de las Monjas ridge.
Ascent path over Soria in the direction of the Cascada Bonita
Section from Montaña de las Monjas Ridge to Starting Point at Presa de Las Niñas Parking Lot
At the ridge, you have two options. You can follow the hiking trail to the right. This takes you along the slope and then downhill to a small road. Alternatively, you can walk directly onto the road from the ridge and follow it to the right. Whichever way you go, you eventually walk downhill on the road for quite a while. Along the way, you can once again enjoy the view of Presa de Las Niñas and the beautiful surroundings.
Mighty rock faces on the ascent path to Presa de Las Niñas above Soria
Then, the hiking trail branches off from the road to the left, leading downhill to the Presa de Las Niñas parking lot. You hike downhill through bushes, dried-up former lake areas, and sandy areas. Finally, there is a small ascent to the Presa de Las Niñas parking lot. But here, you can take a well-deserved break after the hike.
Presa de Las Niñas
And finally
I hope you enjoyed the circular hike around Presa de Las Niñas and to Soria via Barranquillo de San Andrés. Enjoy the beautiful landscape, hopefully with sufficient water in the reservoirs. Wishing you much joy on all your hikes,
Dagmar from SiebenInseln
Thank you for reading!
If you've found my hiking guides on SiebenInseln helpful for your Canary Islands adventures, please consider leaving a small tip. Your support is greatly appreciated and helps cover the costs of maintaining this blog.