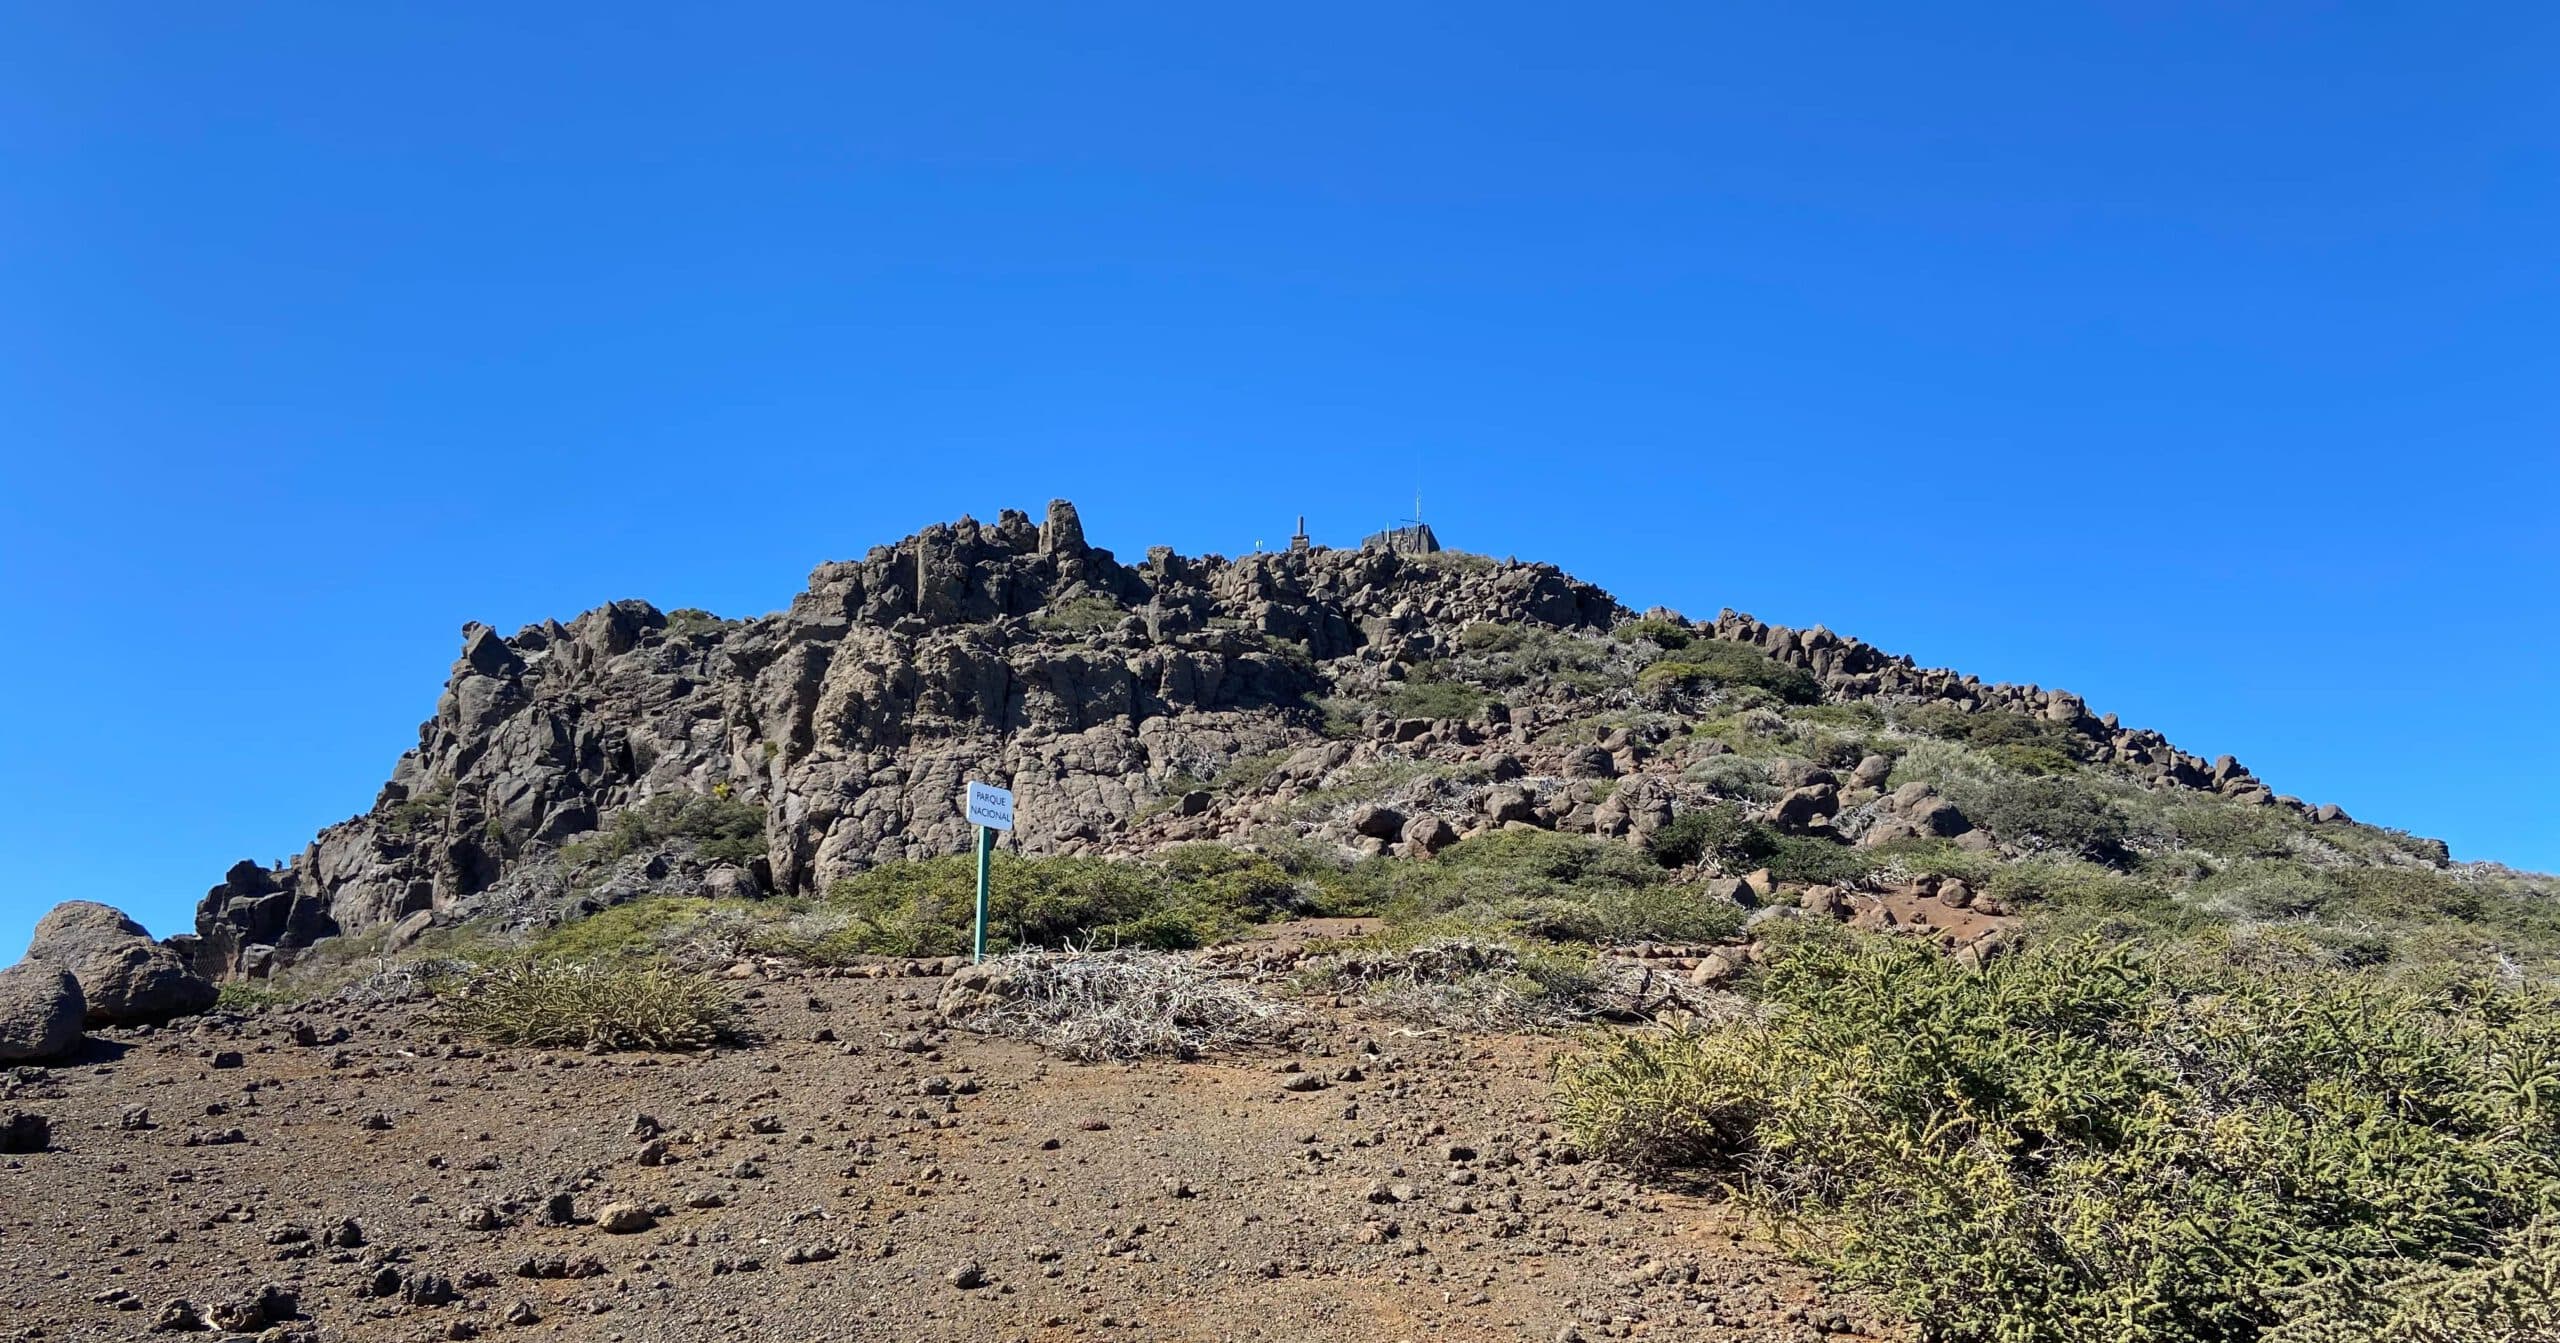
Pico de la Nieve – impressive panoramic peak on the volcano rim
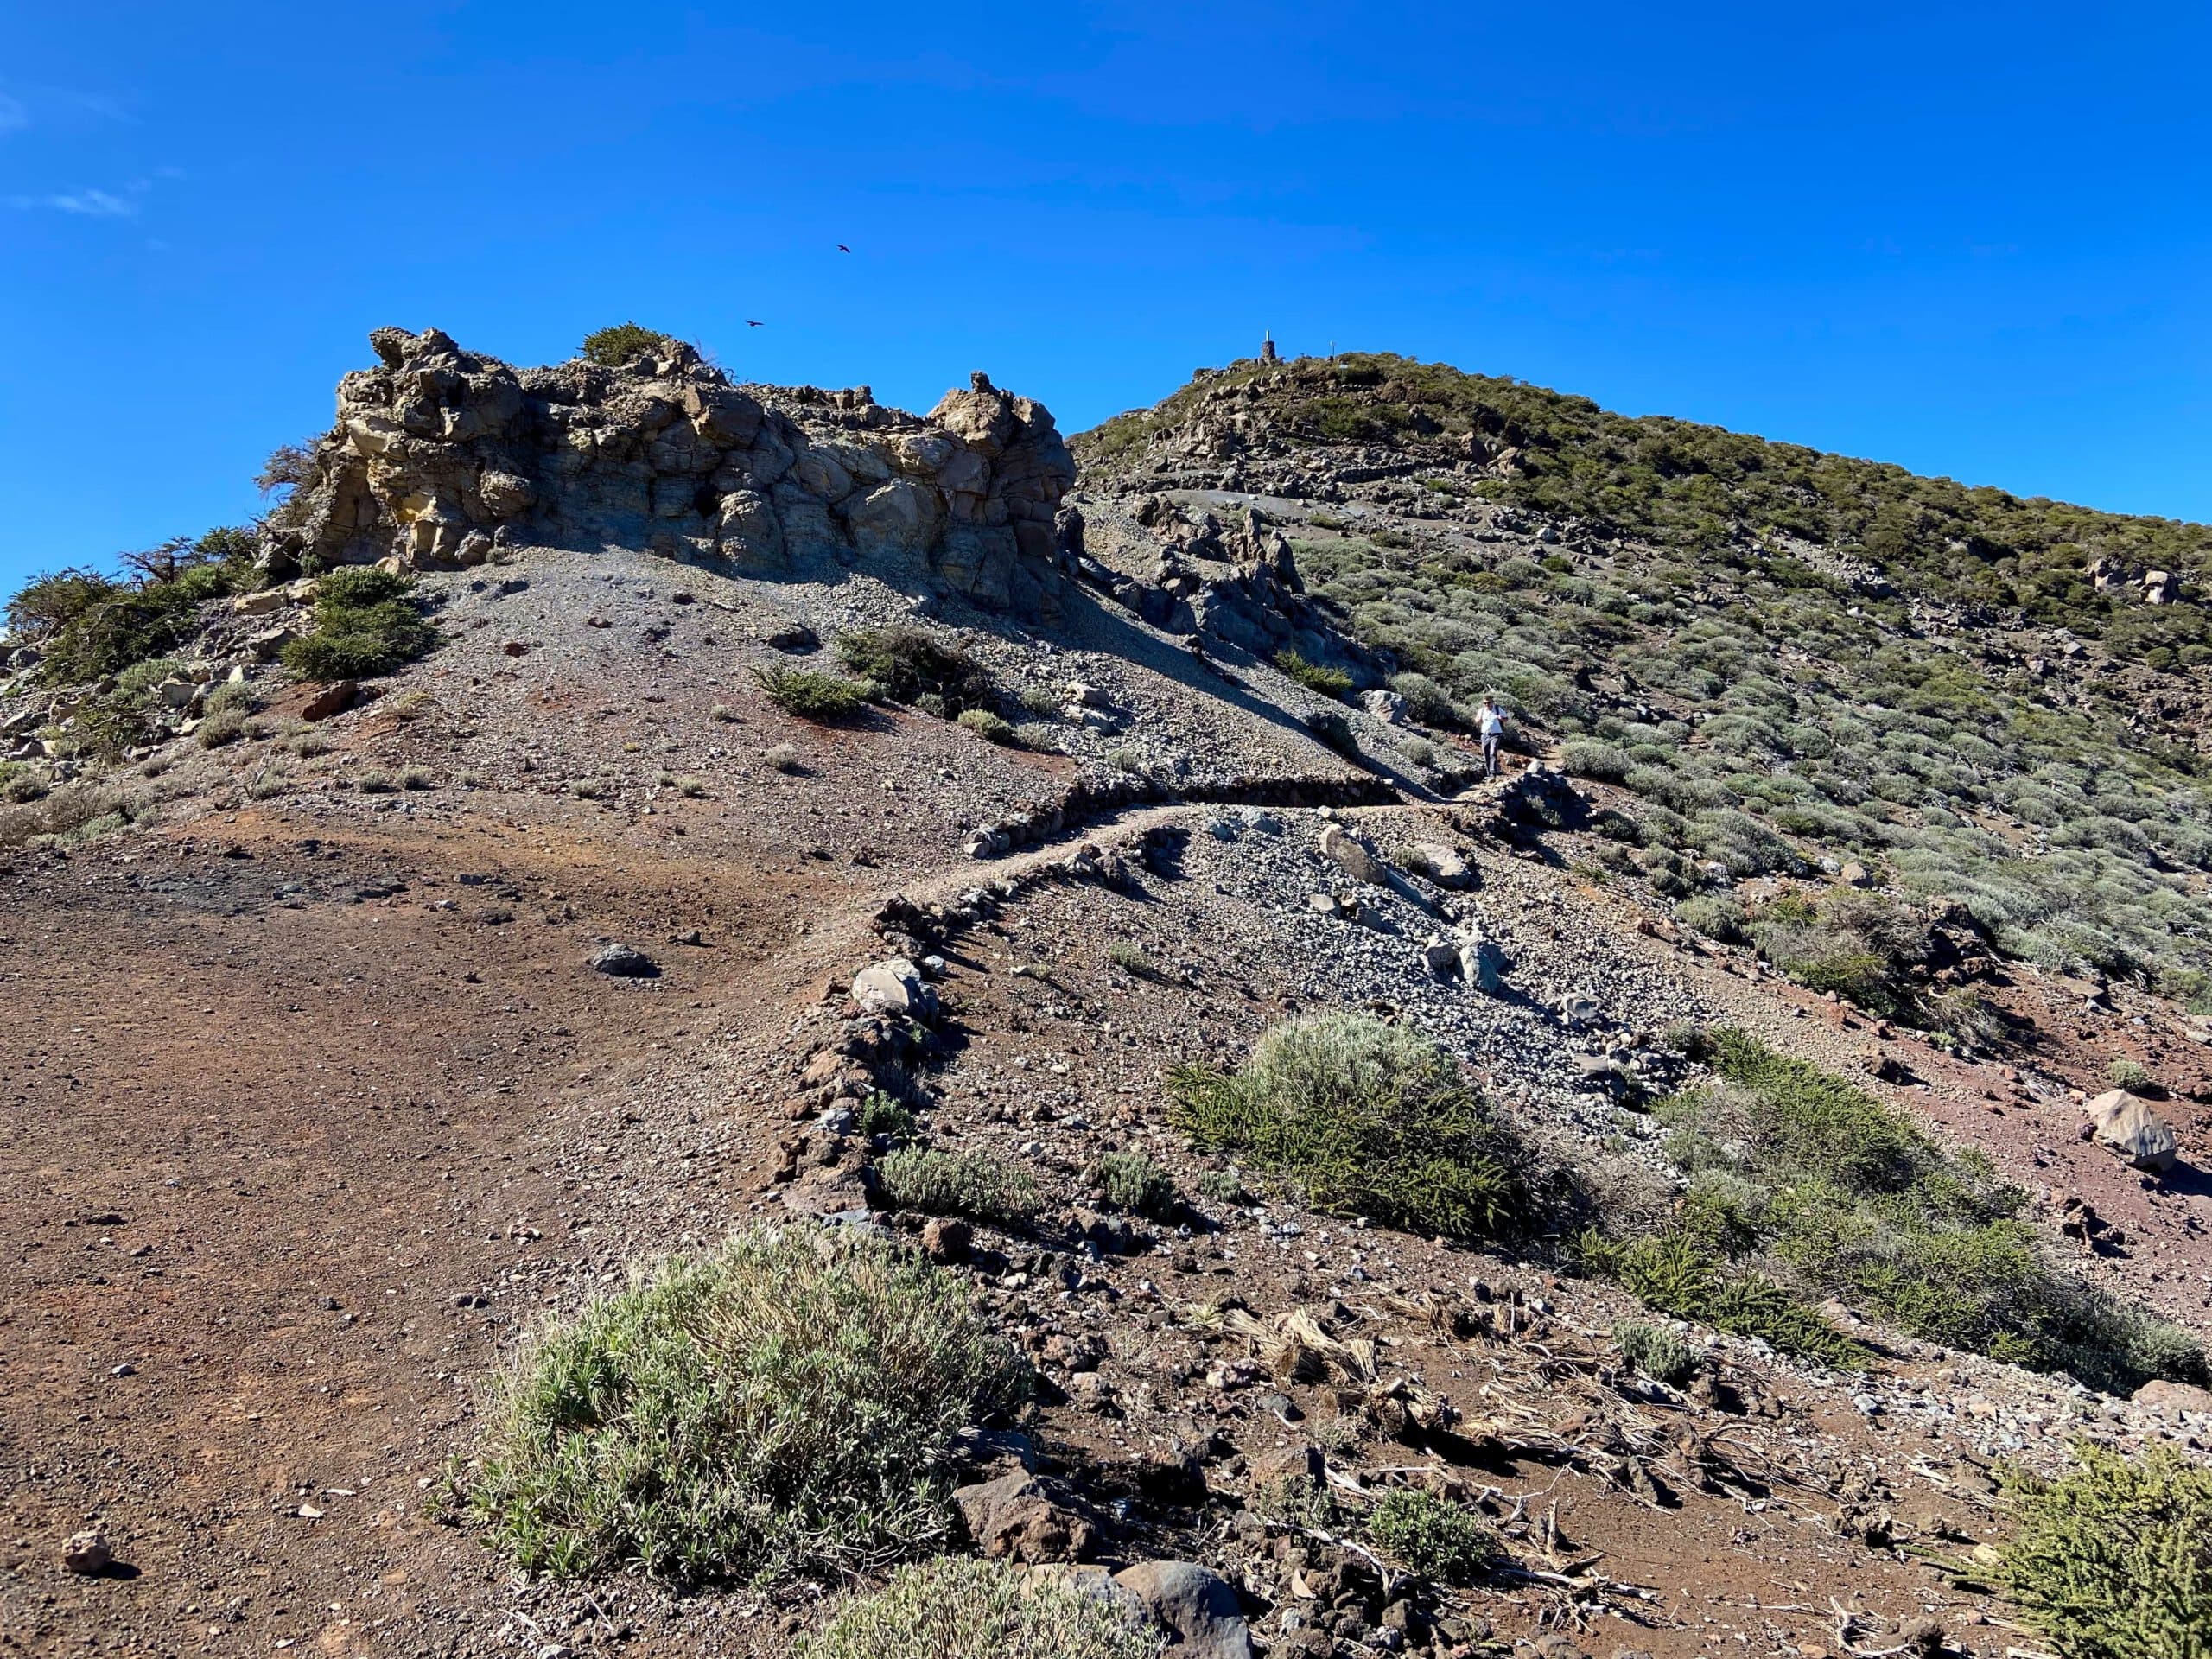
Pico de la Nieve, with its 2,239 metres of altitude, is a huge panoramic peak on the volcanic ridge surrounding the huge erosion crater (Caldera de Taburiente). But even though it is called Snow Peak, it is mostly snow-free in winter. On our hike in February 2022, however, there were small remnants of snow in the shadow of isolated rocks. From the summit of Pico de la Nieve you can enjoy a magnificent view of the entire Crestería (volcanic ridge) of La Palma. From the summit, you can see the crater and the east coast of La Palma in front of you. Map
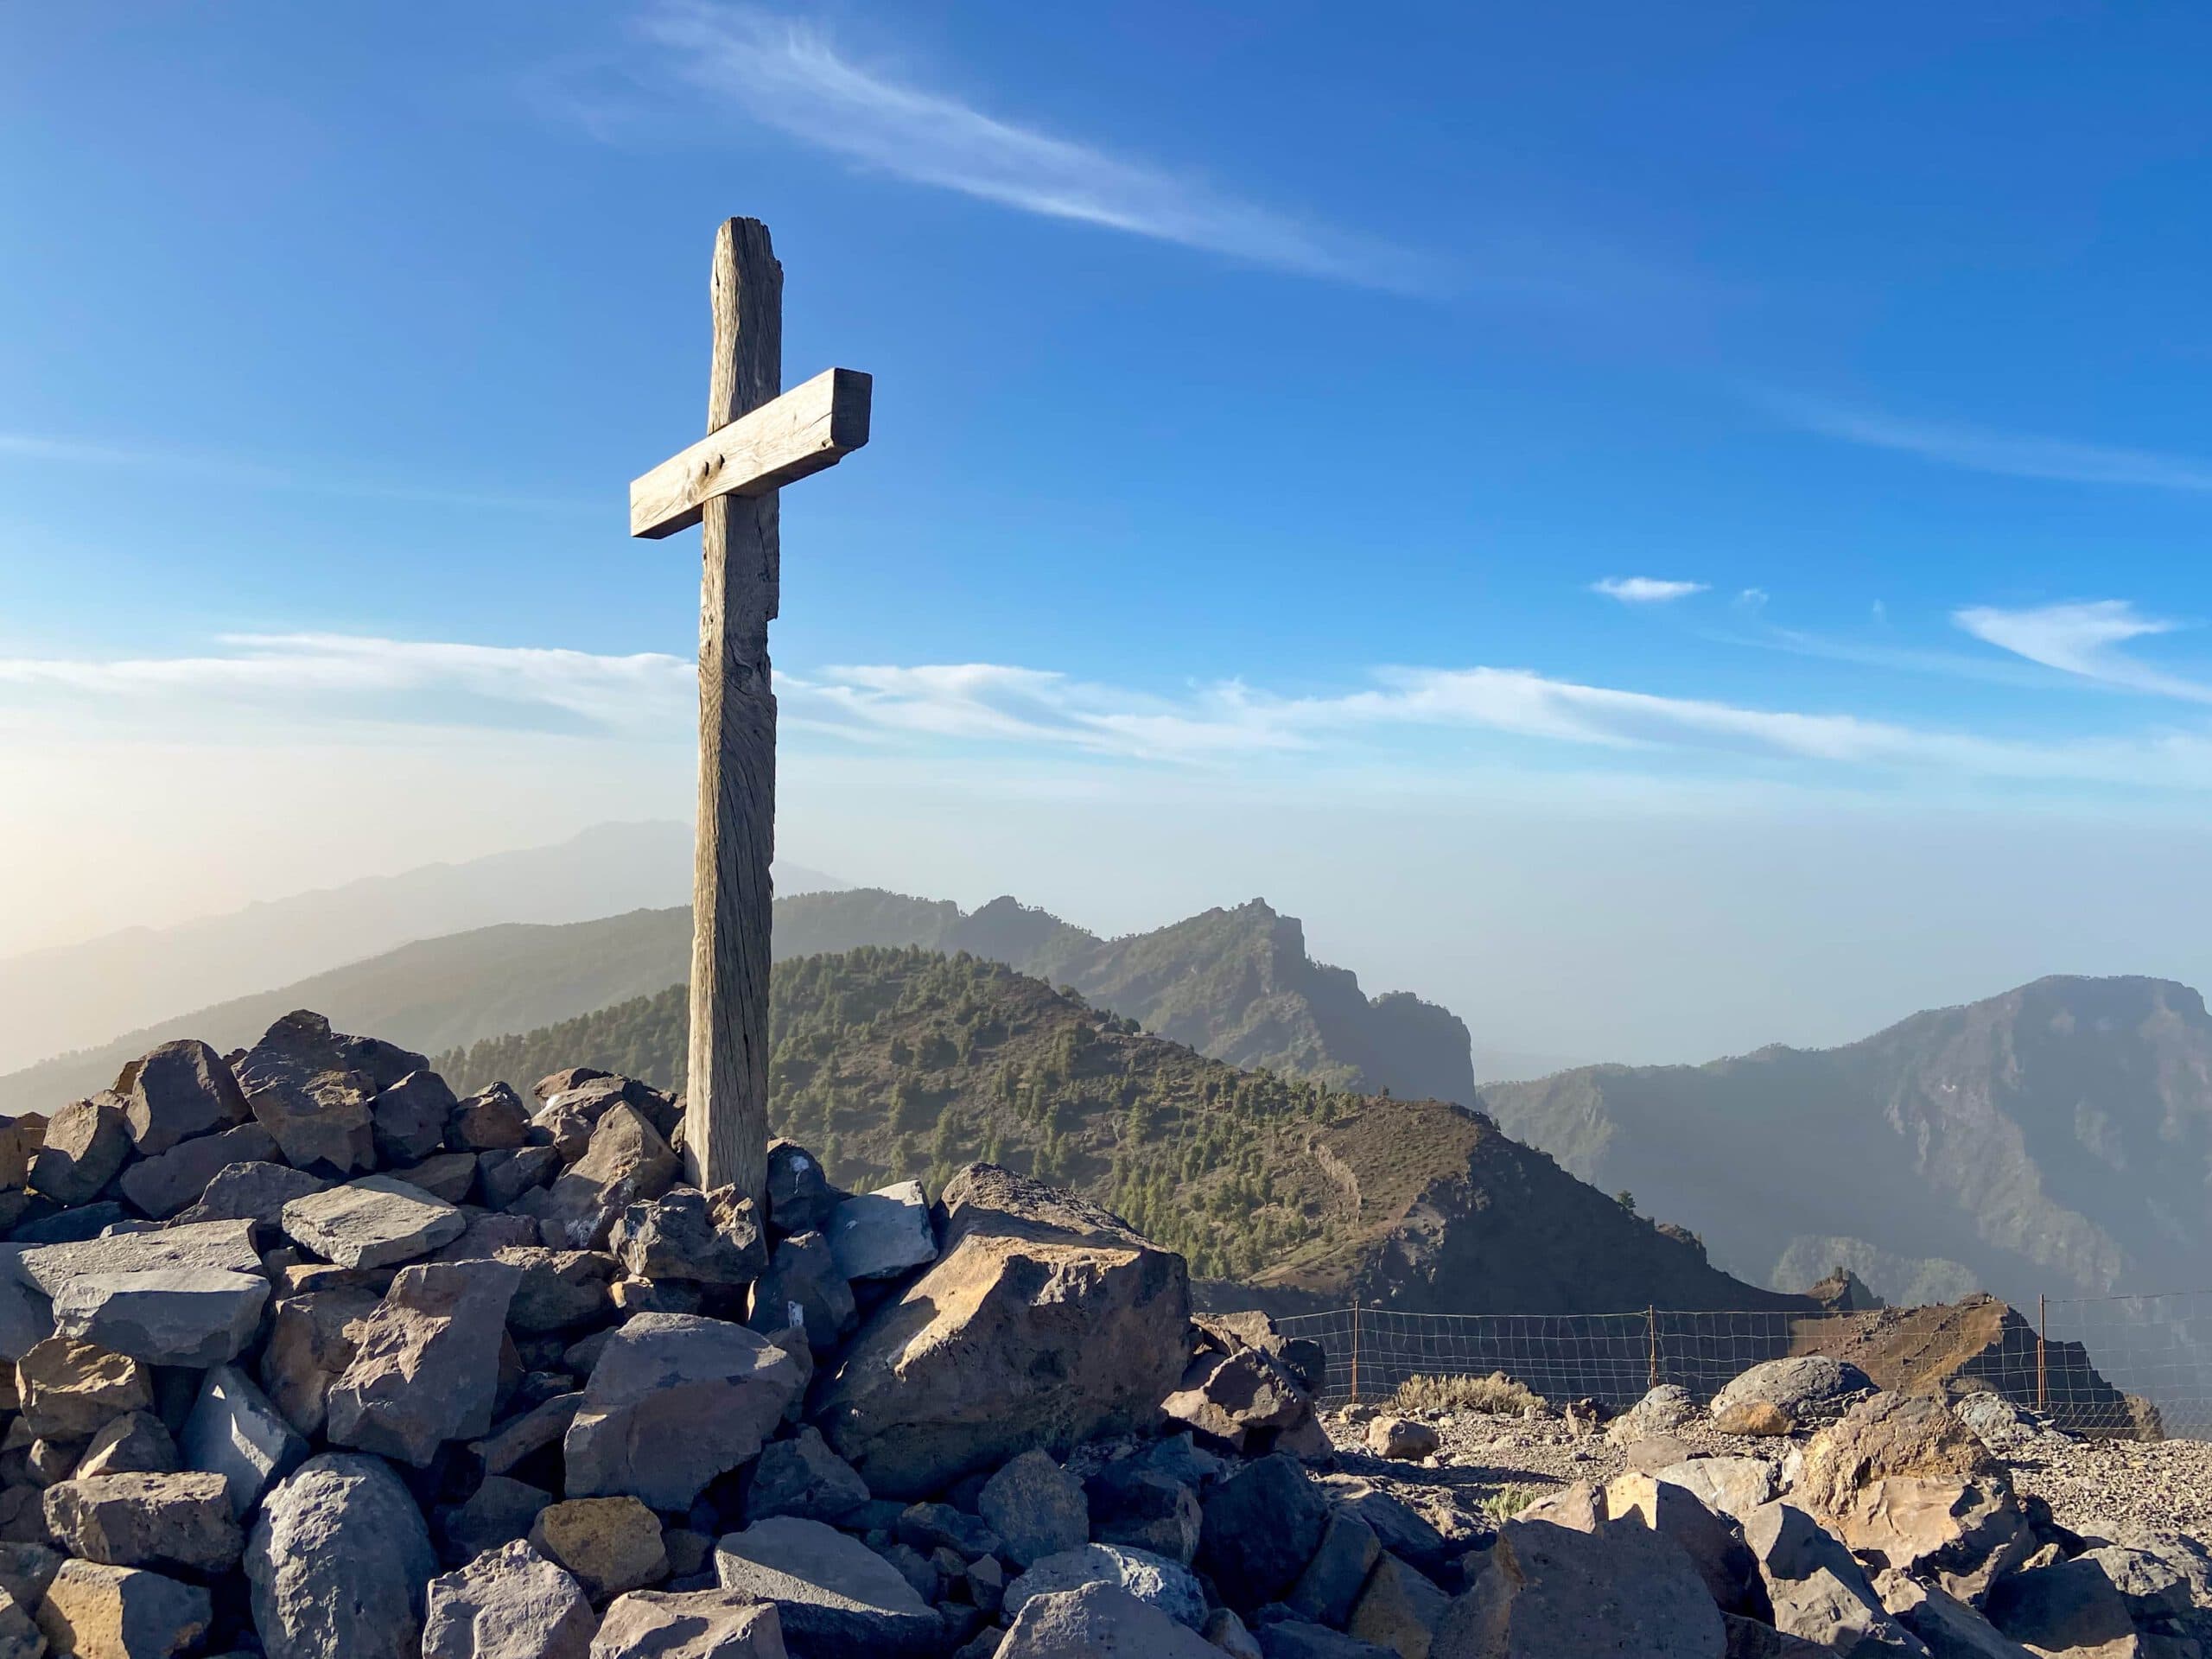
Pico de La Nieve Summit Cross
However, during my last stay on La Palma in February 2022, we had a week with Calima. The weather was persistently warm. However, the visibility was a bit cloudy, so that even the pictures can’t show the really impressive views from time to time. I hope you get clearer days at altitude. Then you will be able to see not only La Palma but also the neighbouring islands of Tenerife, La Gomera and El Hierro as silhouettes from above.
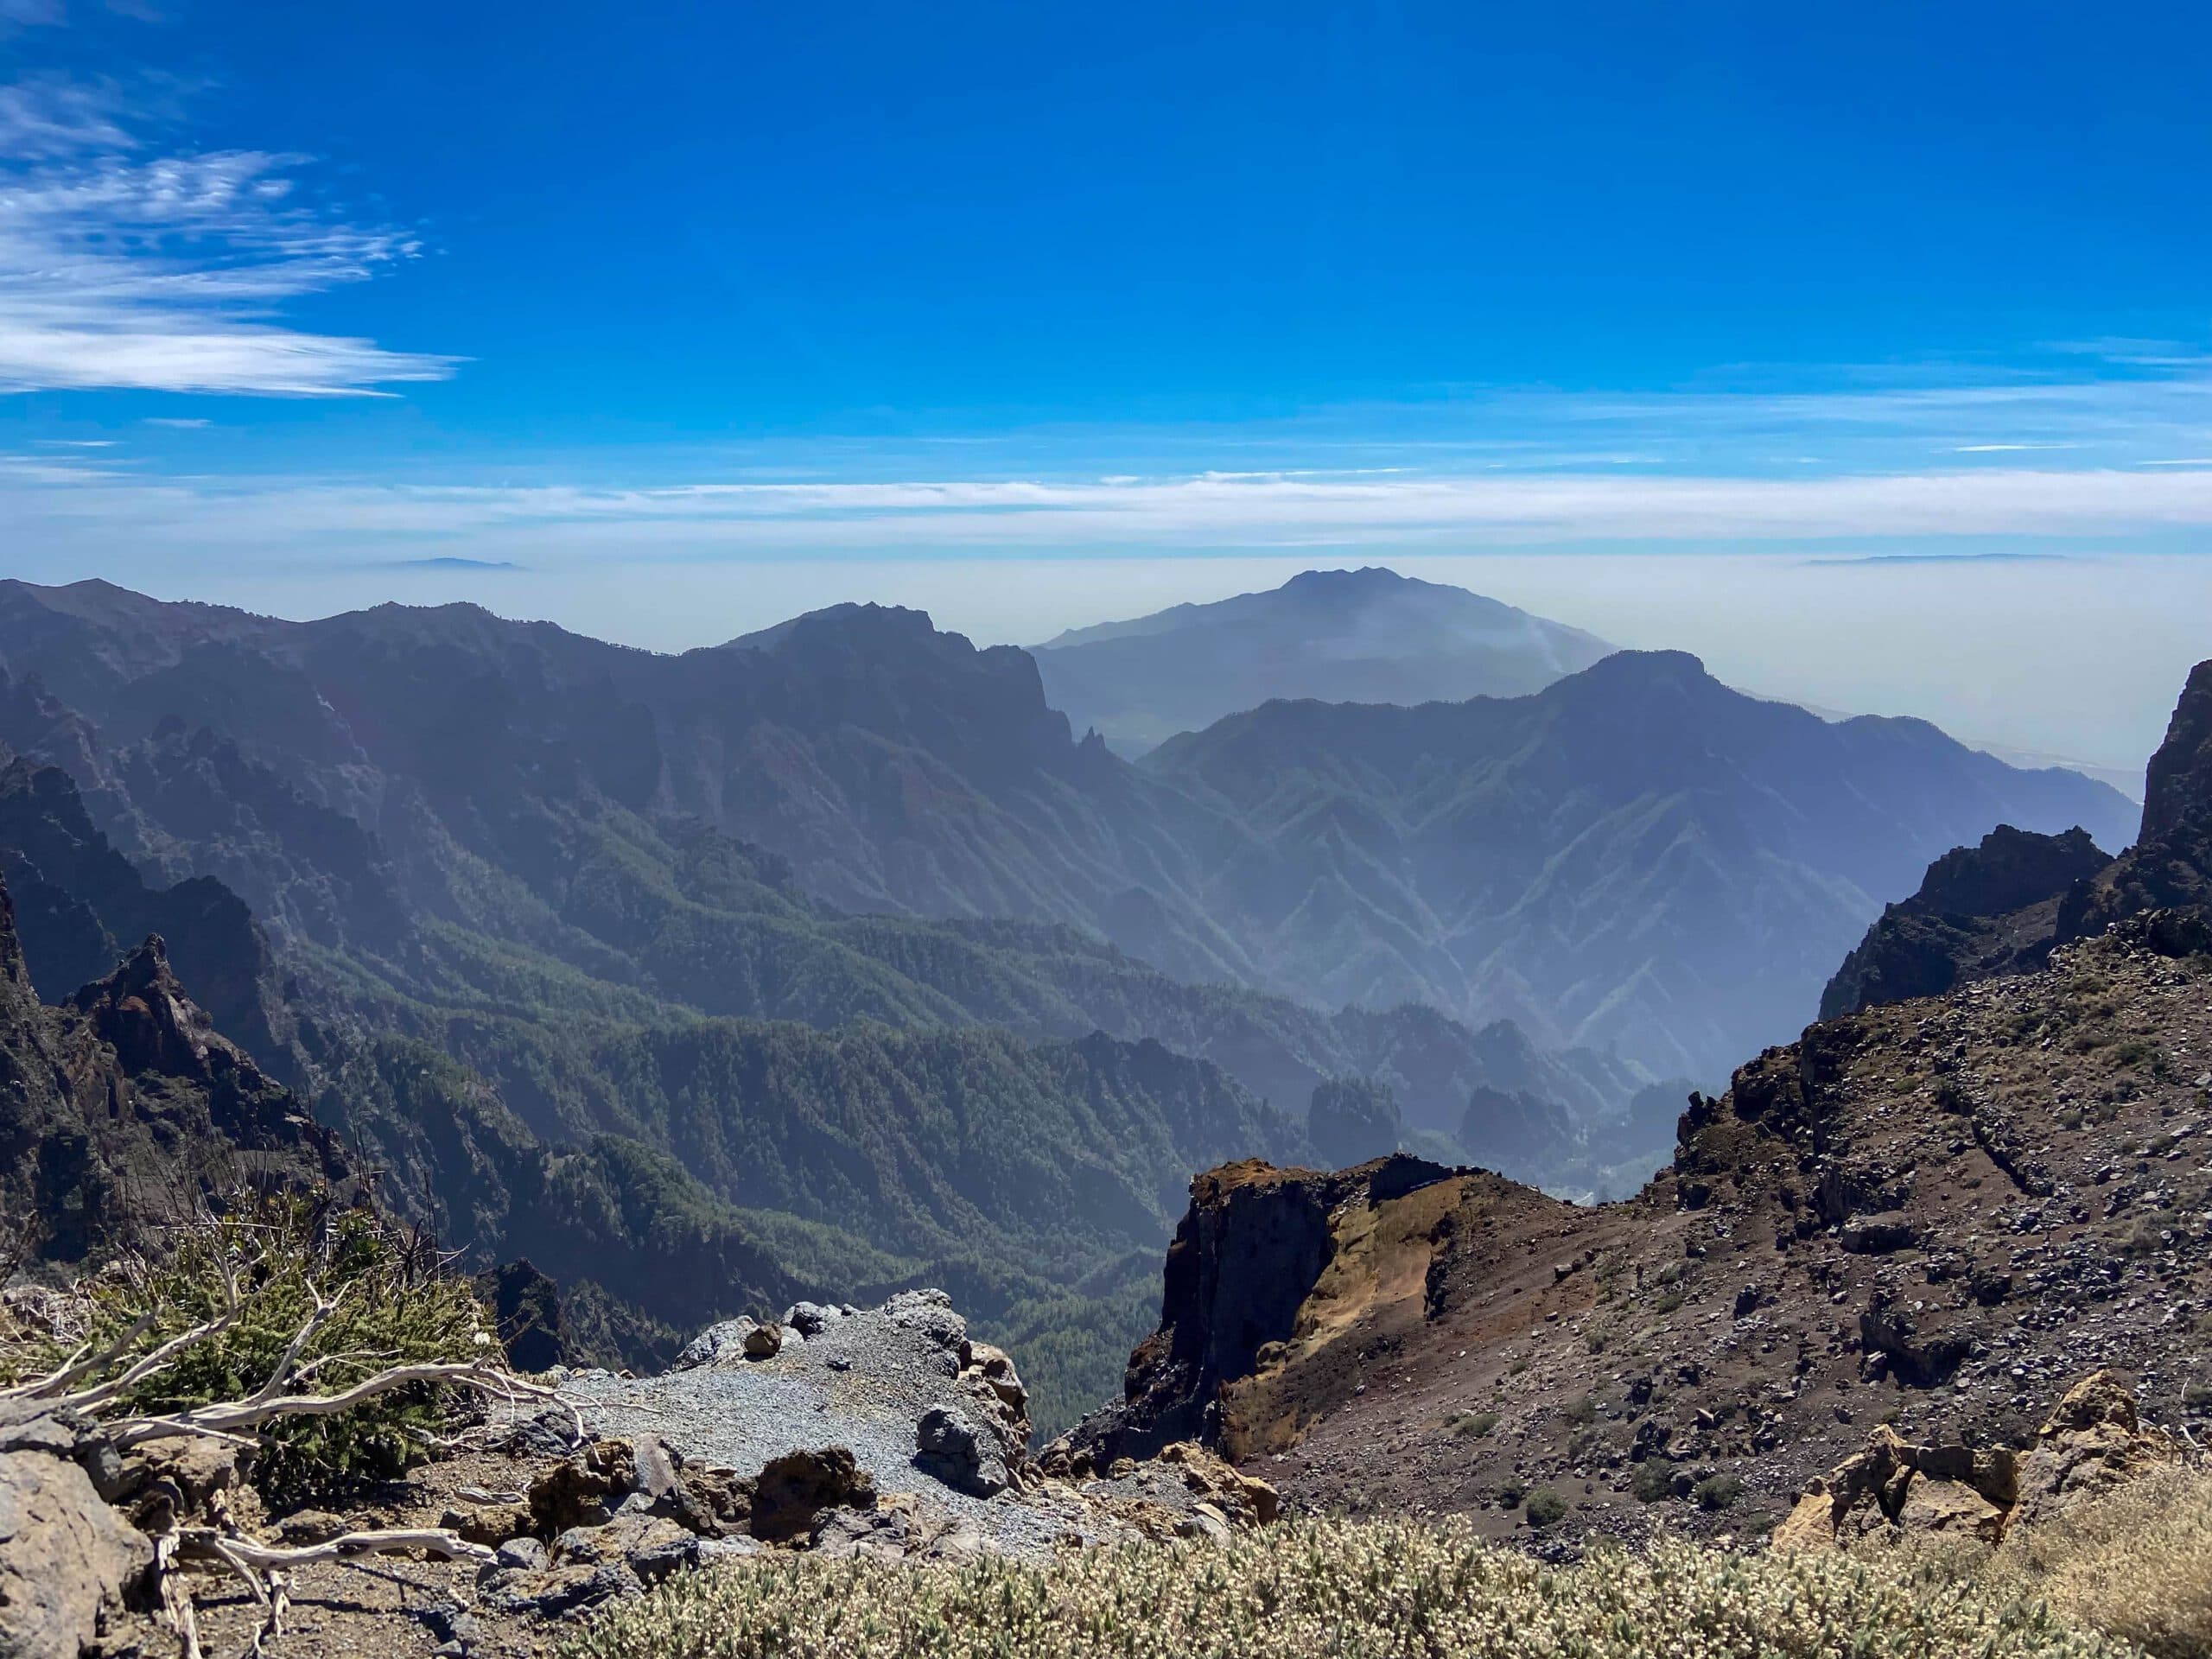
View from Pico de La Nieve into the Cumbre and to Pico de Bejenado
Hike between Pico de la Nieve and Roque de los Muchachos
This hike, which starts below the Pico de la Nieve, is actually quite a strenuous hike. On the one hand, you are at an altitude of over 2,000 metres, and on the other hand, the mountain ridge is not as „straight“ as it might seem from a distance. You first have a strenuous climb to Pico de la Nieve. From there, you continue along the ridge towards Roque de los Muchachos.
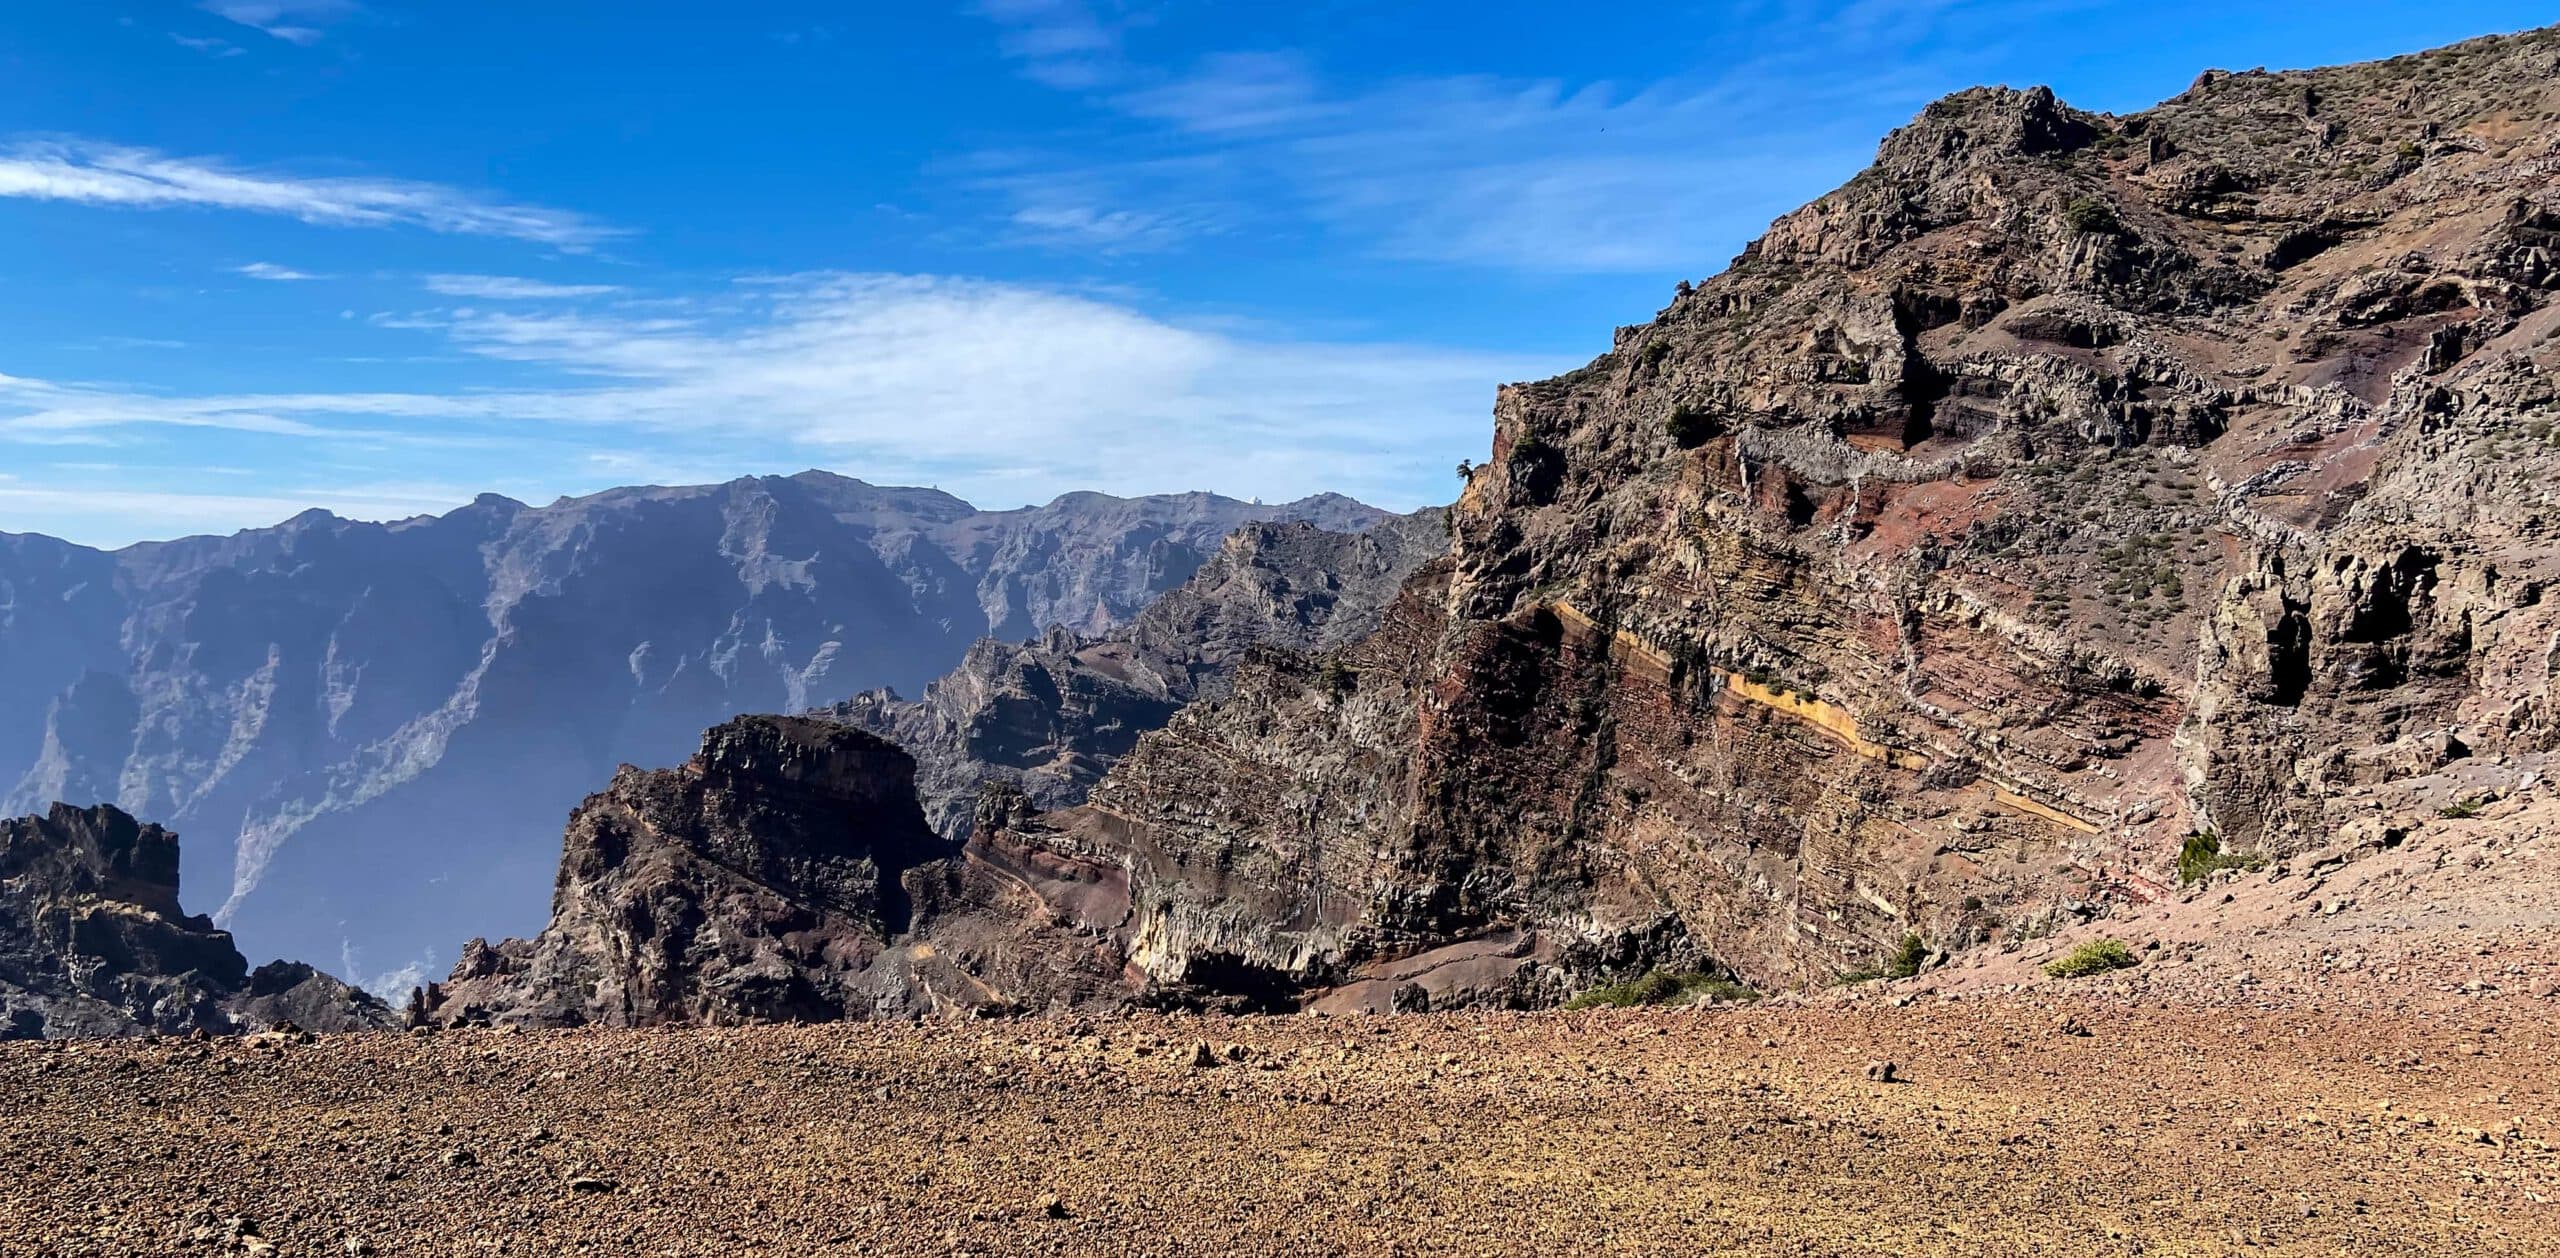
View of the volcanic rocks surrounding the caldera
Walking along the ridge means hiking on the Caldera High Trail in constant ups and downs. Towards Roque de los Muchachos, the gorges and heights to be crossed tend to become even deeper and higher. Even if you only want to walk one way from Pico de la Nieve to Roque de los Muchachos (or vice versa), plan enough time. Since we went there and back and ran out of time, we turned around just before Roque de los Muchachos and went back to Pico de la Nieve. But if you have the time to go on, you will find the rest of the way without problems.
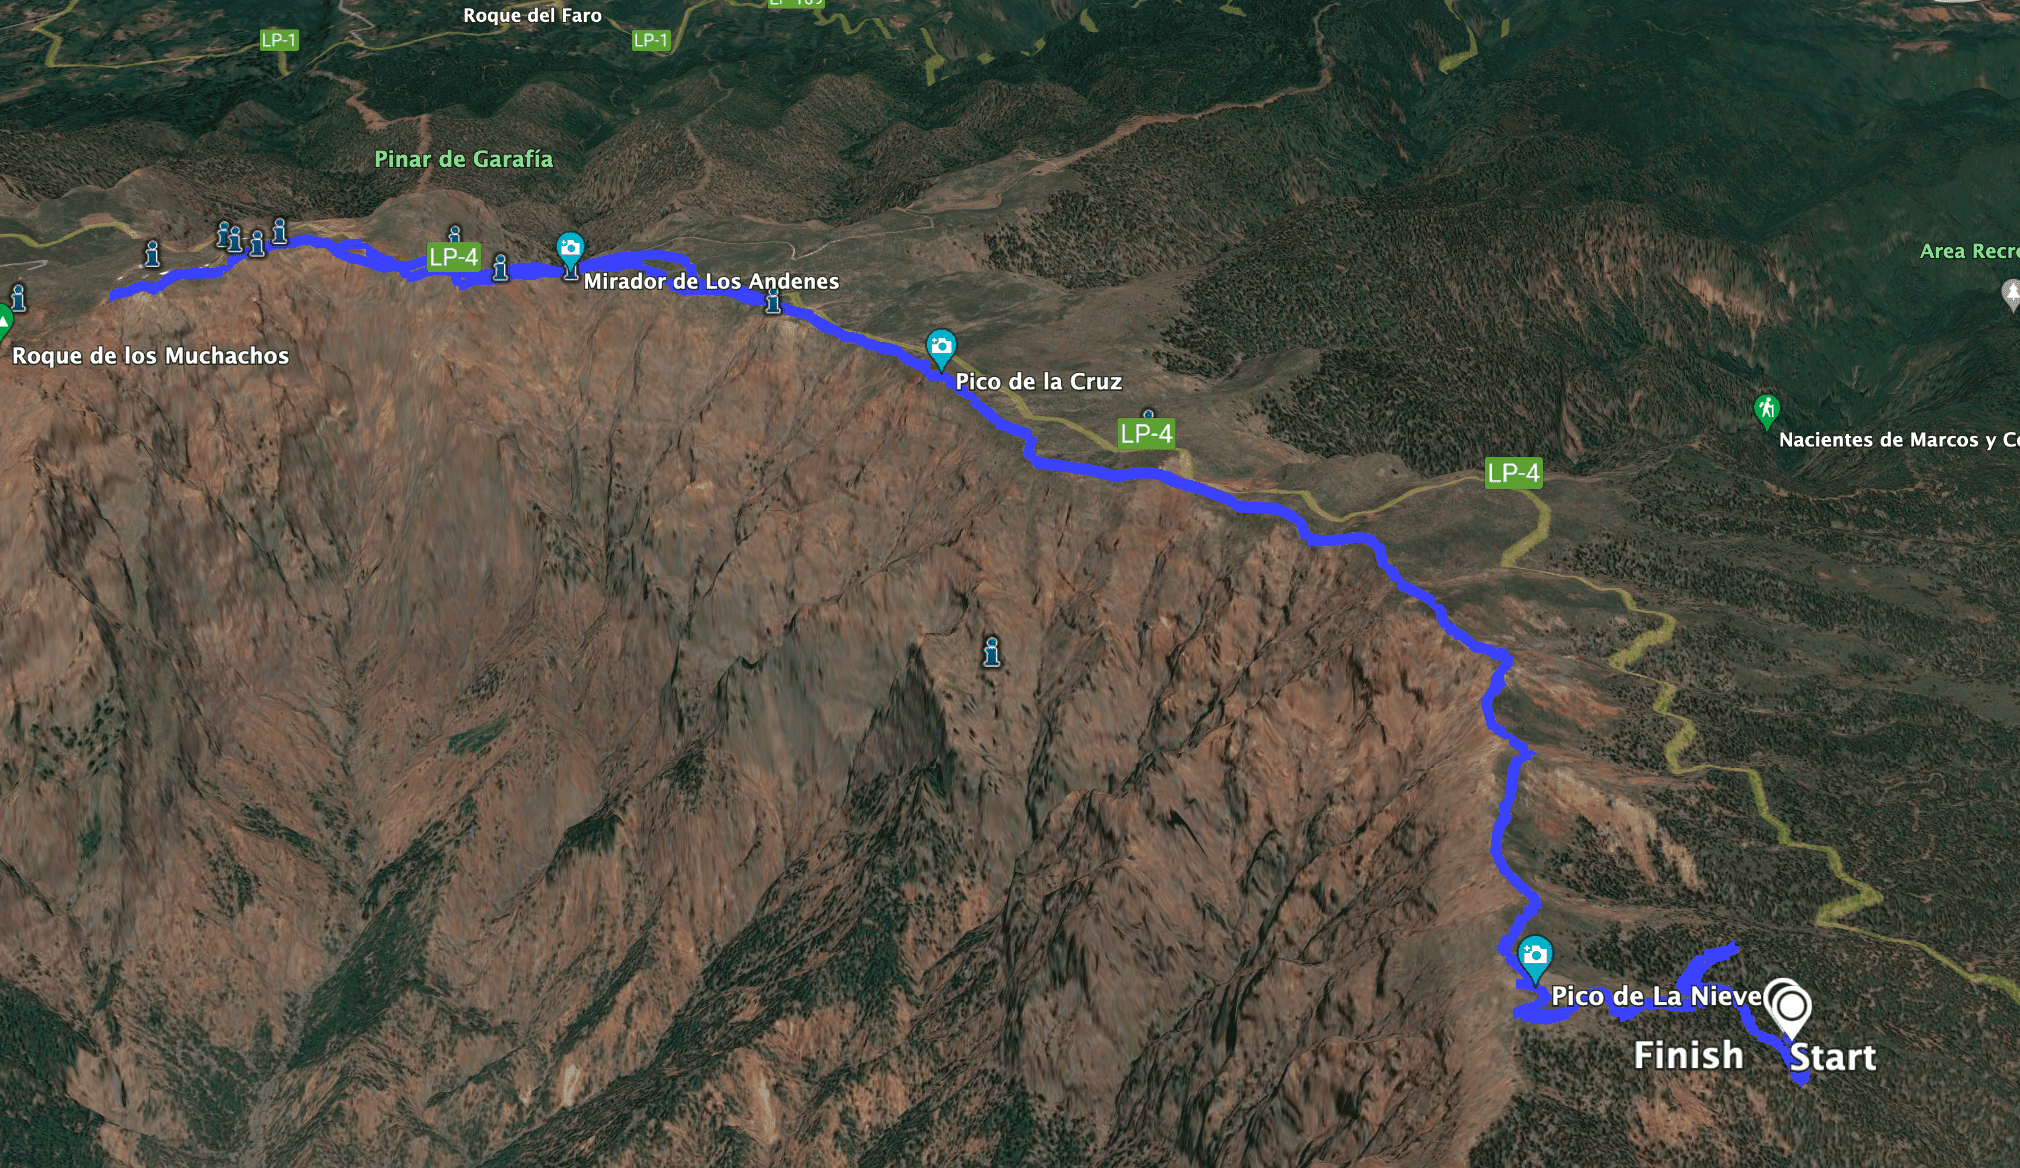
Track Pico de la Nieve- Roque de los Muchachos
General information about the Pico de la Nieve hike
Starting point and approach
The starting point of the hike is a forest track (Pista de la Nieve) that branches off LP 4 at a car park just before kilometre 25. GPS data: 28.732977, -17.822111.
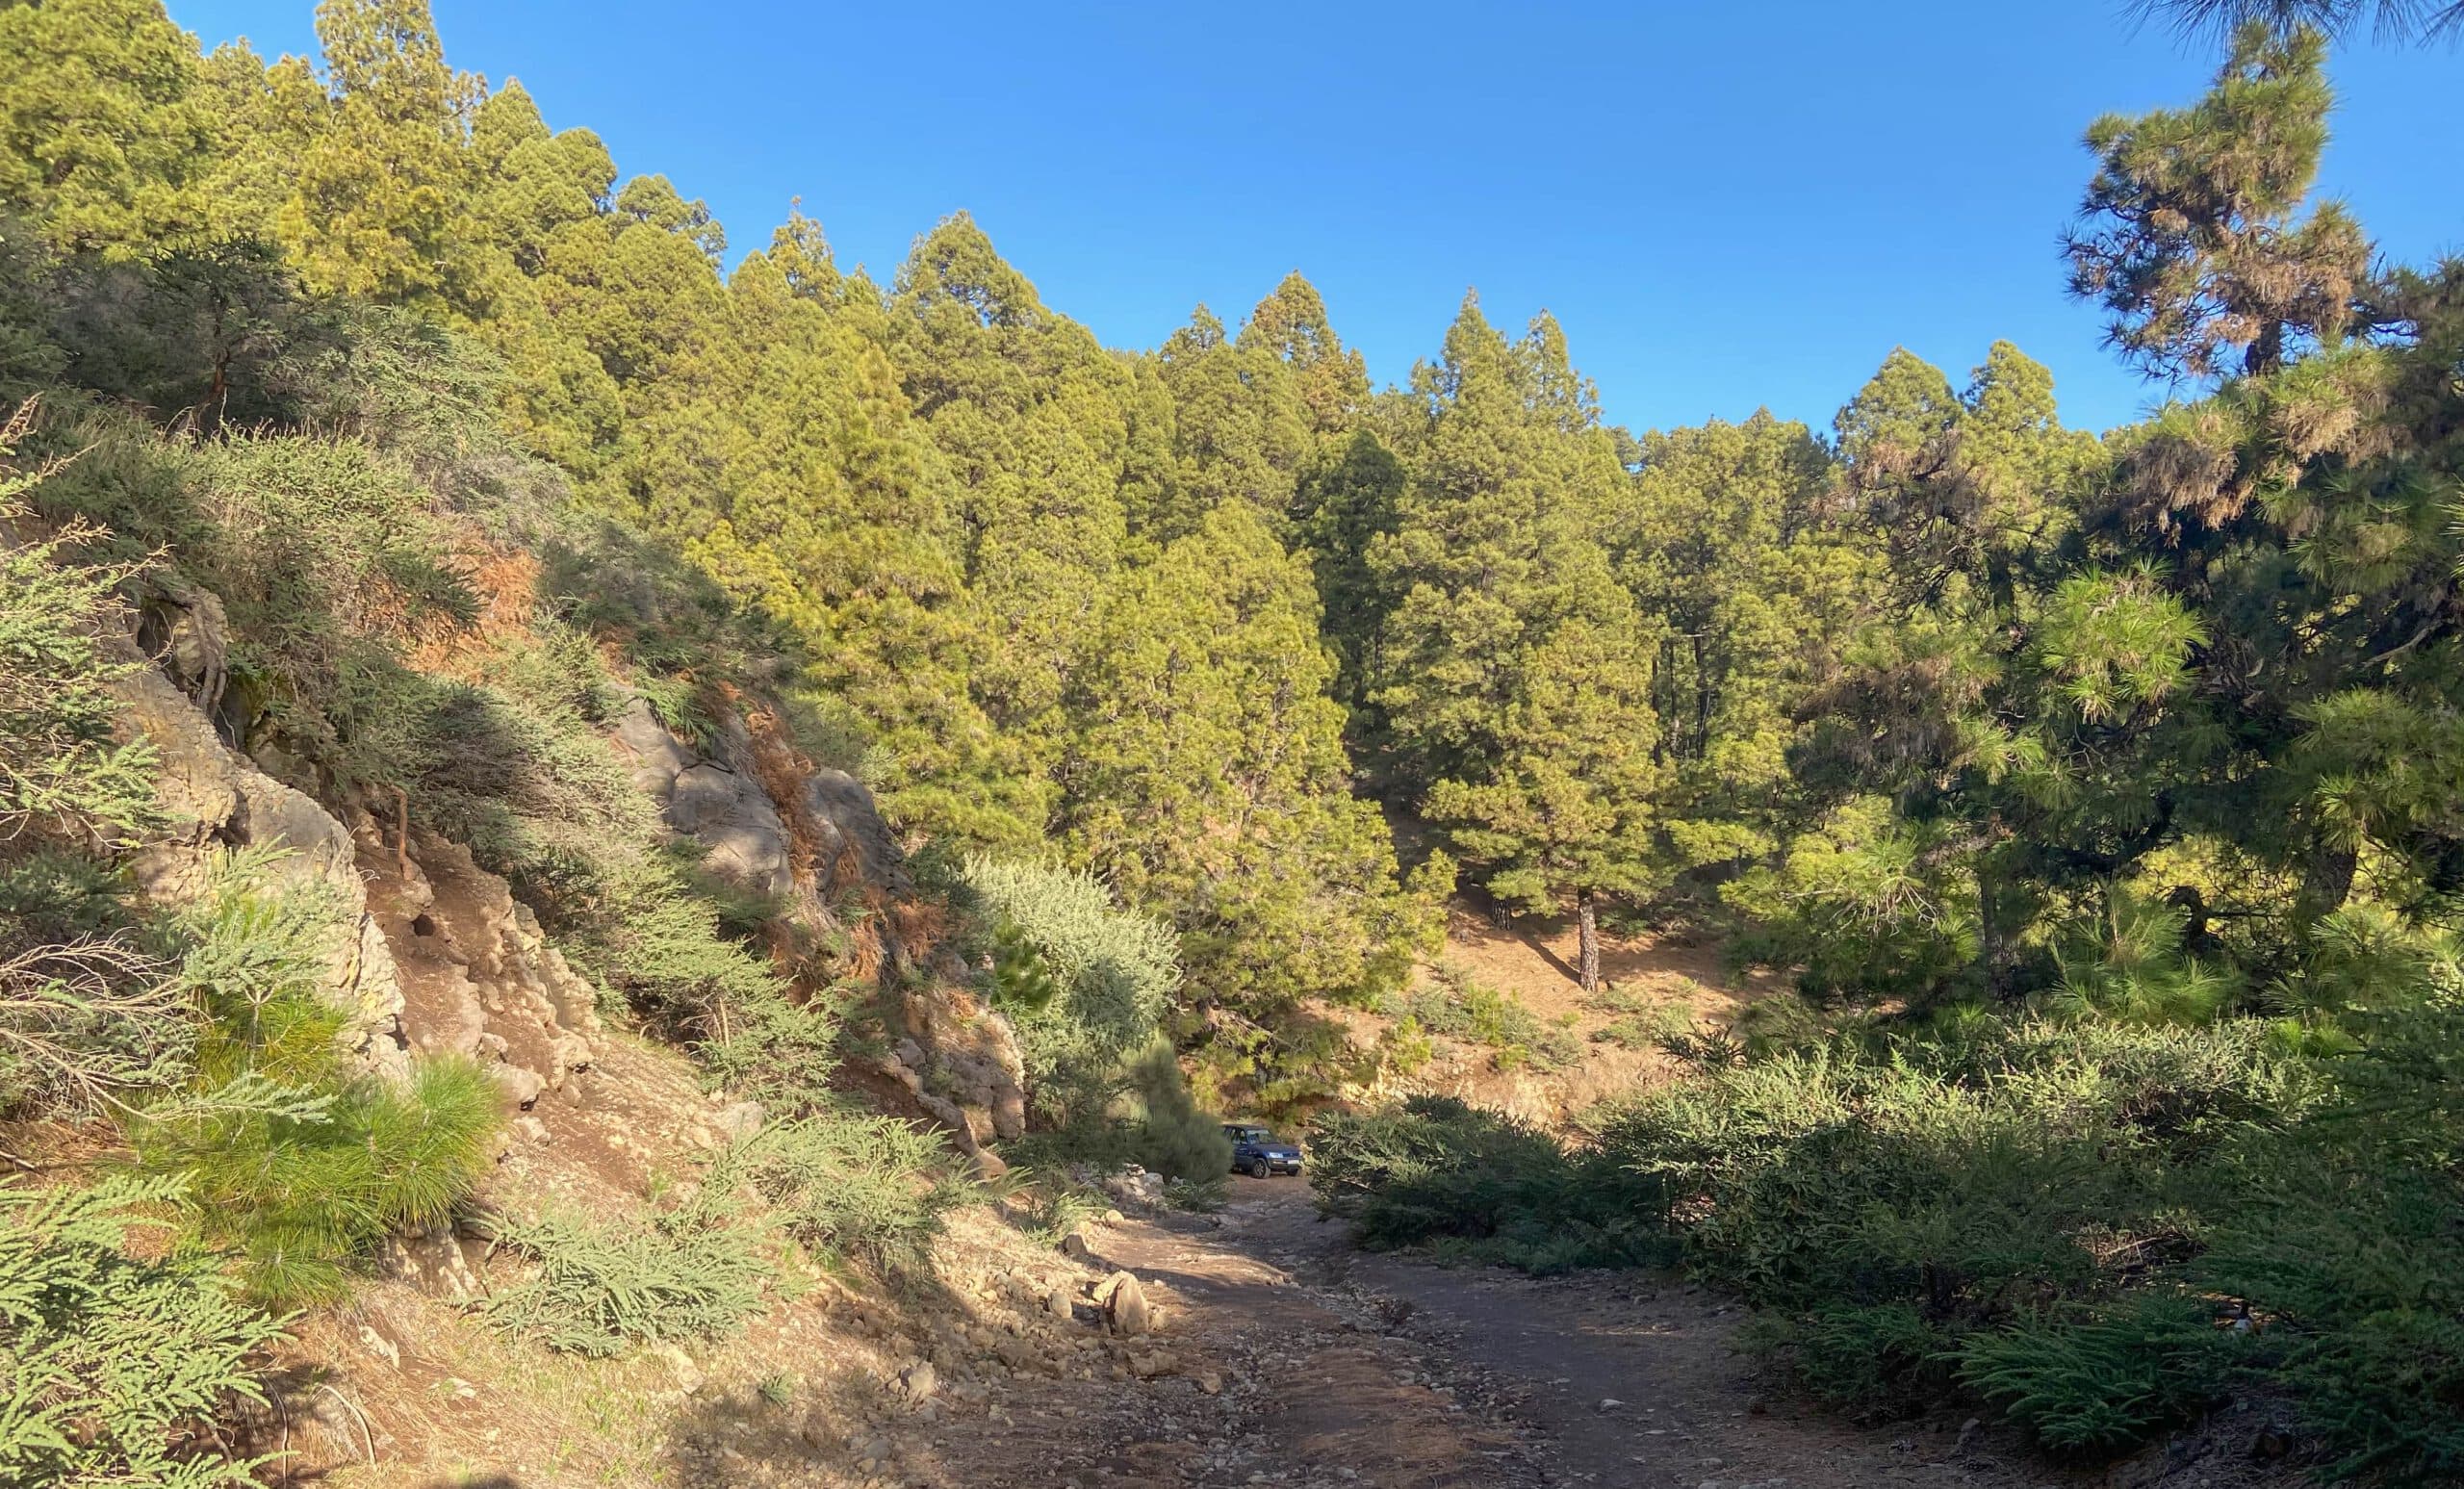
Pista del Nieve road - starting point of the hike
Approach by car
You come via the LP-4 (road starts above Santa Cruz de la Palma and leads to Roque de los Muchachos). At the car park just before kilometre 25, turn off the road. From there, you can continue upwards on a forest path. I stopped at a point that you can still get to in a normal car. If you have an off-road vehicle, you can also drive up a wide switchback and stop at a small car park.
Approach by bus
Article summary and large selection of GPS hiking tracks
Sign up for my newsletter now and get exclusive access to my collected GPS tracks as well as all the brief information about my articles.
Sign up nowThere is no bus service to Pico de la Nieve or Roque de los Muchachos on La Palma.
Time
I don’t like to give general times for hiking tours, as the times are very individual. We needed almost 7 hours for this hike with an extensive rest at the summit. And the journey to the starting point also takes some time. Therefore, plan this tour carefully, taking into account the season, weather and time limit.

Altitude profile of the hike Pico de La Nieve - Roque de los Muchachos
Altitude difference and route length
The difference in altitude is about 1,100 metres and the route is about 22 kilometres long.
View back along the hiking trail from the observatory
Requirement
In addition to surefootedness, this hike requires a very good level of fitness. Furthermore, you have to plan the hike carefully and only do it in good hiking weather. However, you can adapt it a little so that you can return at any time or possibly just visit Pico de la Nieve.
Refreshment
There are no restaurants, bars or shops along the entire route. Therefore, take enough water and food with you if necessary.
Hiker on the ridge trail up and down
Variants
This tour can be varied very well.
For example, you can hike only to Pico de la Nieve and back. You can walk a little more, for example, in the direction of Cumbre Vieja and back. Or you can hike towards Pico de la Cruz or to another peak on the ridge and back. The entire route between Pico de la Nieve and Roque de los Muchachos is demanding. It is very demanding to hike there and back in one day. As you can see from my track, you can shorten the way back quite a bit if you walk parts of the way on the quiet road instead of on the high trail.
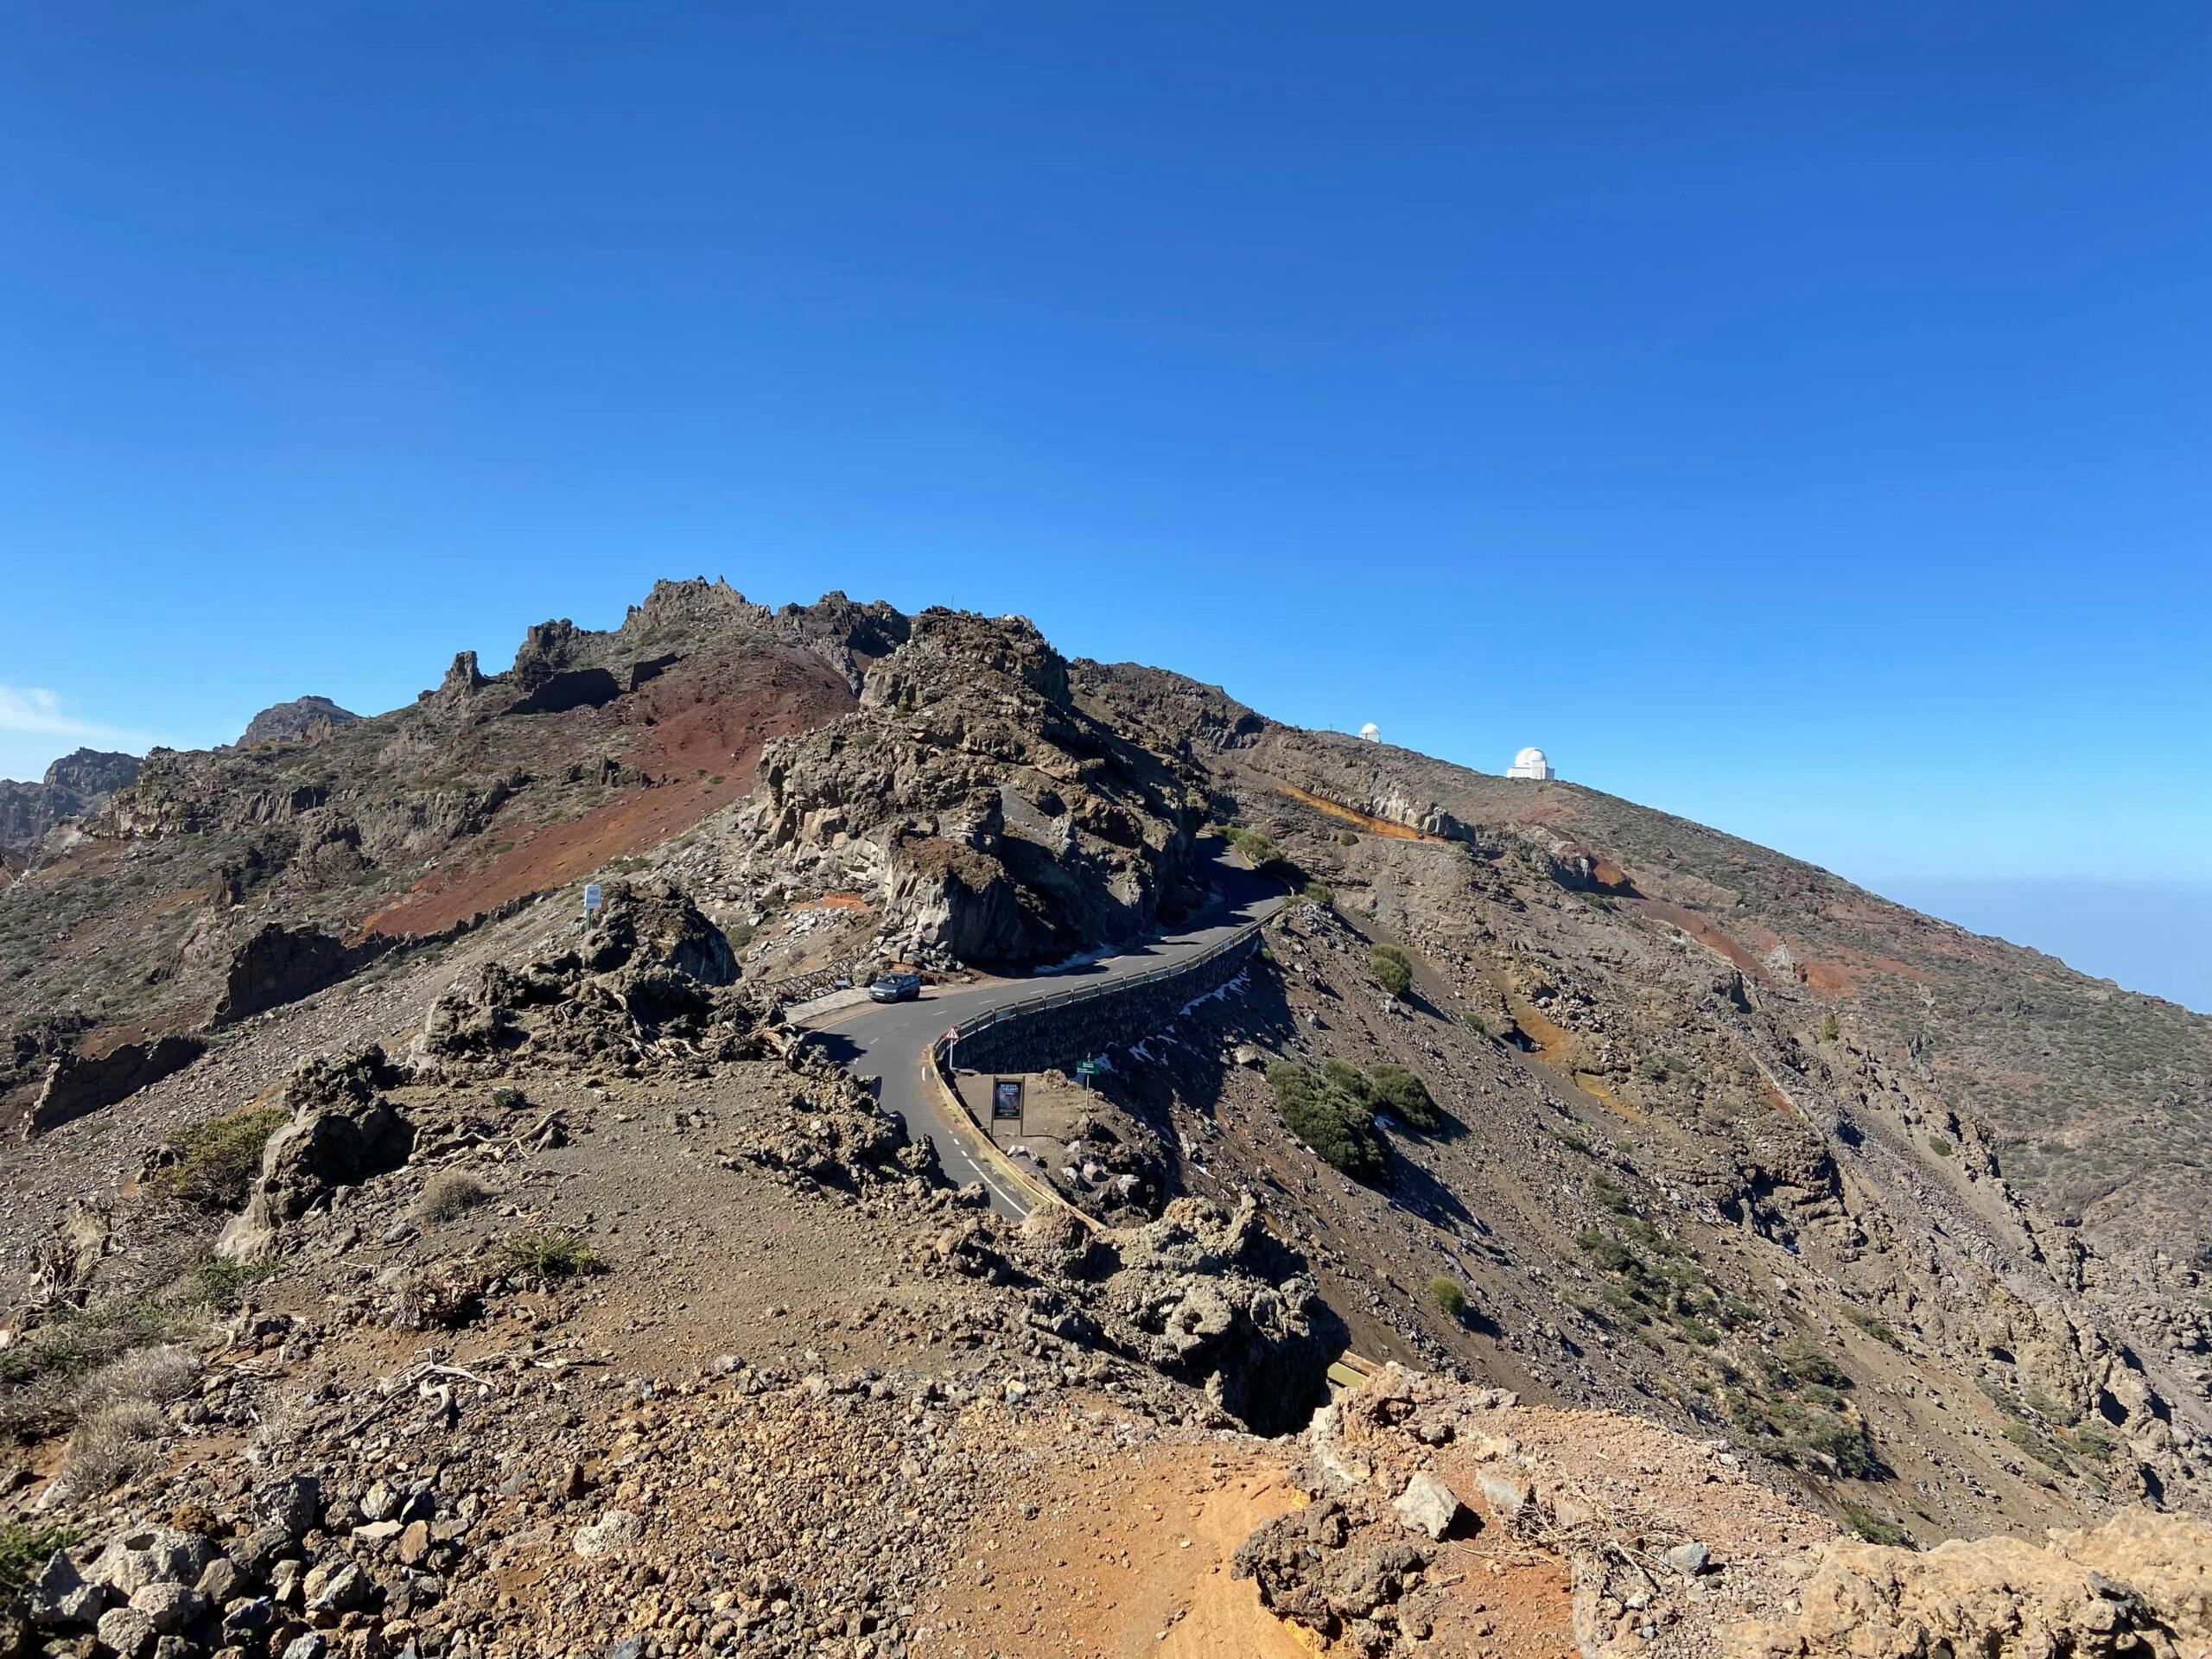
Observatorium vom Wanderweg aus gesehen
If you need a lift, you can of course continue to Roque de los Muchachos on the ridge. Runners circumnavigate the entire ridge from Fuencaliente to Tazacorte (100 kilometres), not only in the famous Transvulcania race. But apart from that, the hike between Pico de la Nieve and Roque de los Muchachos was perfectly adequate for me. 
View of the east coast of La Palma
Article summary and large selection of GPS hiking tracks
Sign up for my newsletter now and get exclusive access to my collected GPS tracks as well as all the brief information about my articles.
Sign up nowHike Pico de la Nieve to Roque de los Muchachos
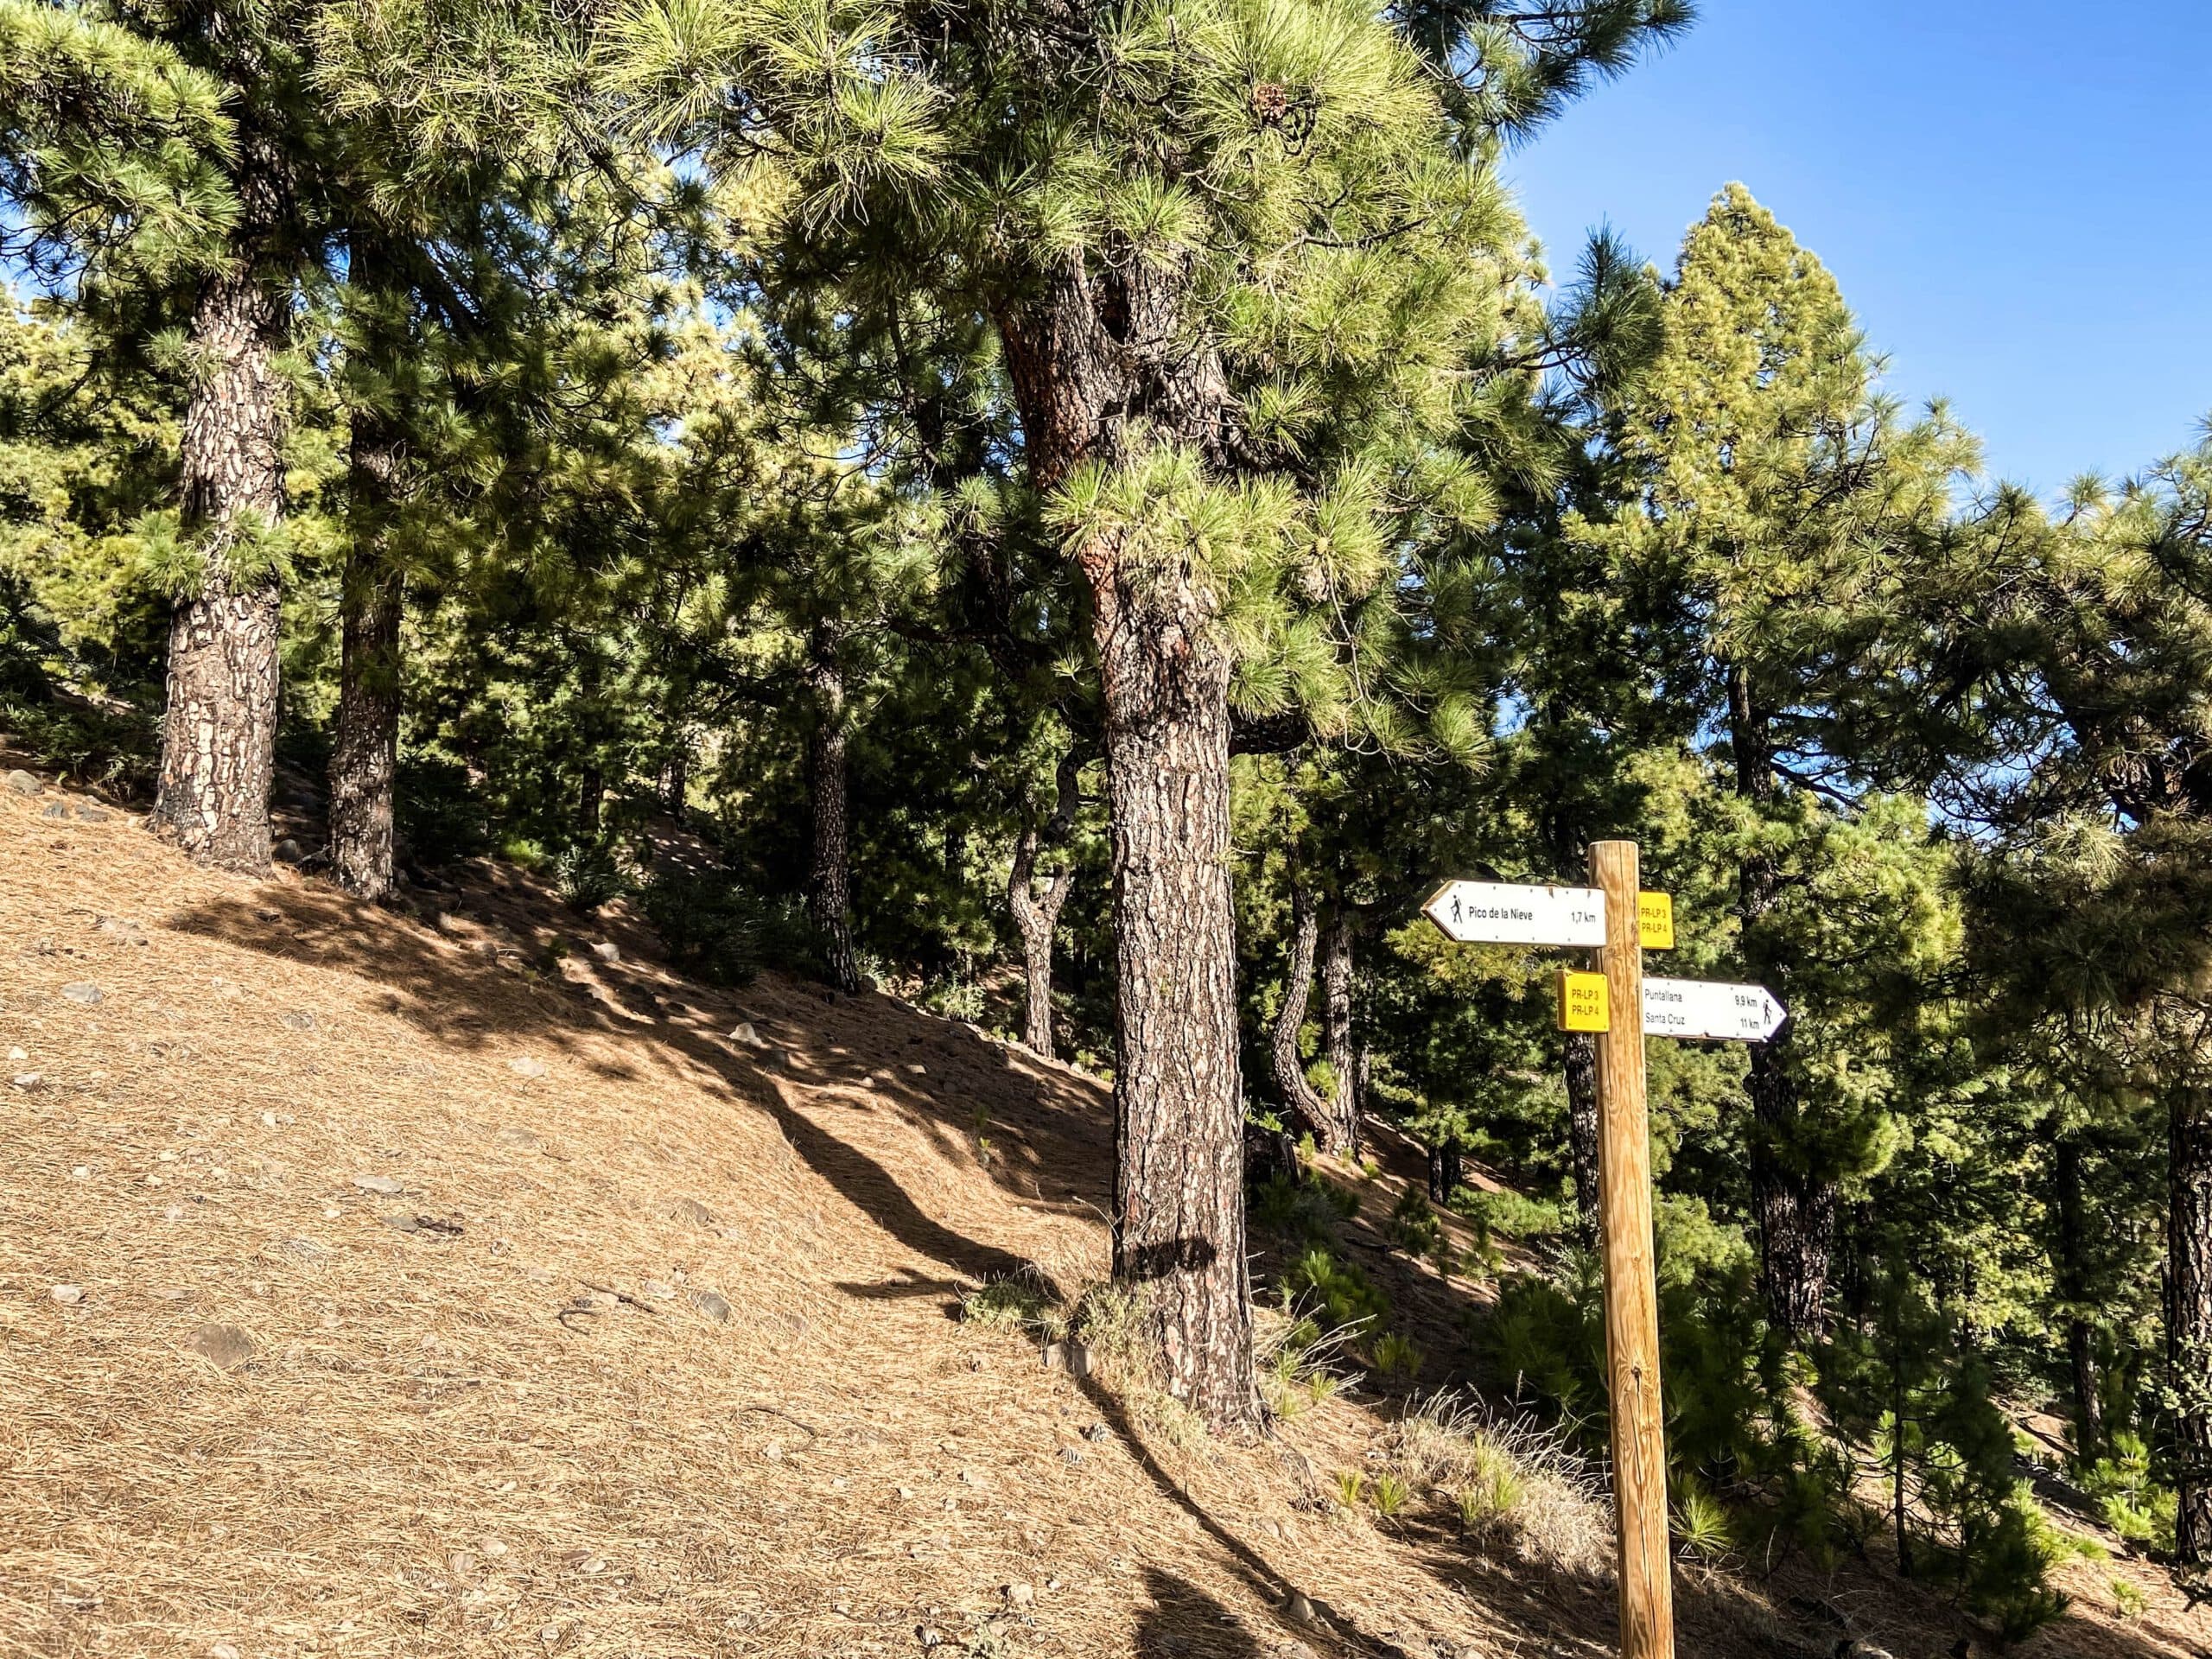
Route section Pista de la Nieve to Pico de La Nieve (2,239 metres in altitude)
You start your hike at the Pista de la Nieve – depending on where you park your car there. Then walk up the road until it ends. There you will find signs for the hiking trail up to Pico de La Nieve (PR-LP3 and PR-LP4). You can also – as you can see on my track – shorten the last serpentine and hike straight up through the barranco. Then you will also reach the hiking trail. From the start of the path, it is 1.7 kilometres up to Pico de La Nieve.
Forest path up to Pico de la Nieve
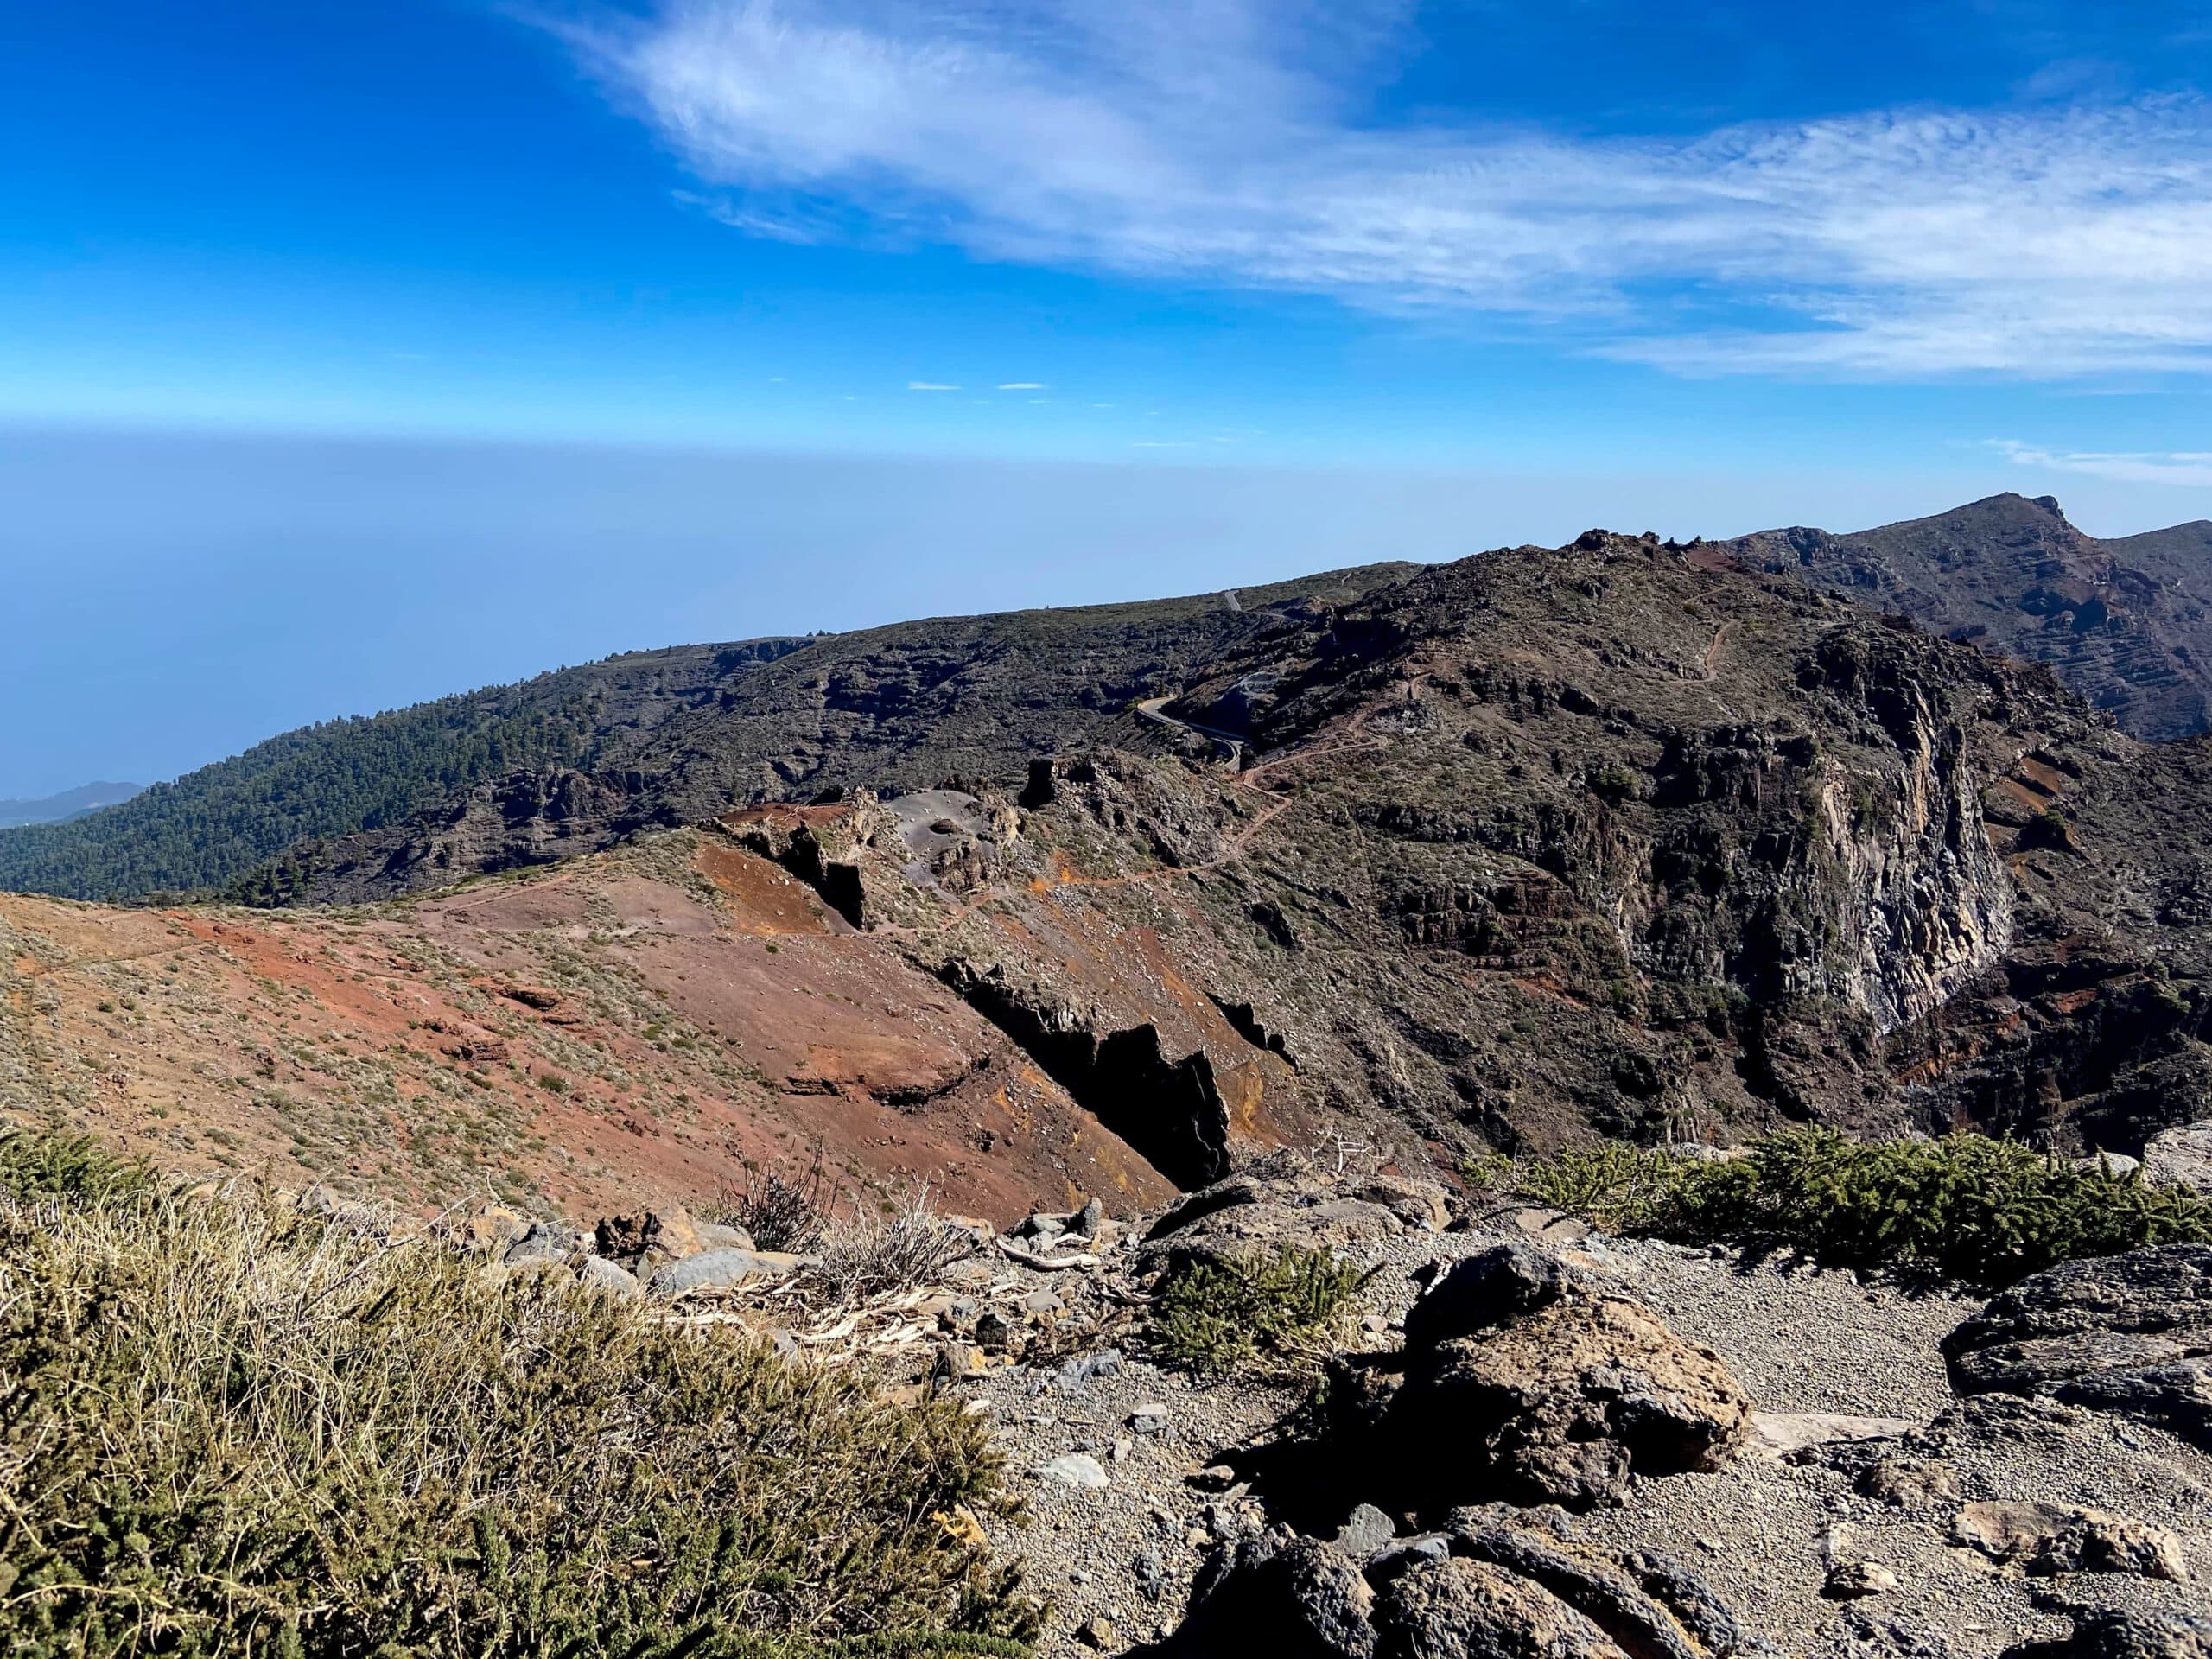
At first, the hiking trail runs along the slope through the forest. Then it continues uphill in serpentines along the edge of the forest. You come out of the forest and follow the path along the slope on the left side of Pico de La Nieve. Finally, you will reach the Caldera high path. Here you can continue around to the left on the high ground towards Cumbre Vieja or down towards El Paso. But you hike around to the right to Pico de La Nieve, which you reach after a short time. A short climb will take you to the top. After enjoying the view, go back to the high trail.
On the ridge trail below Pico de la Nieve
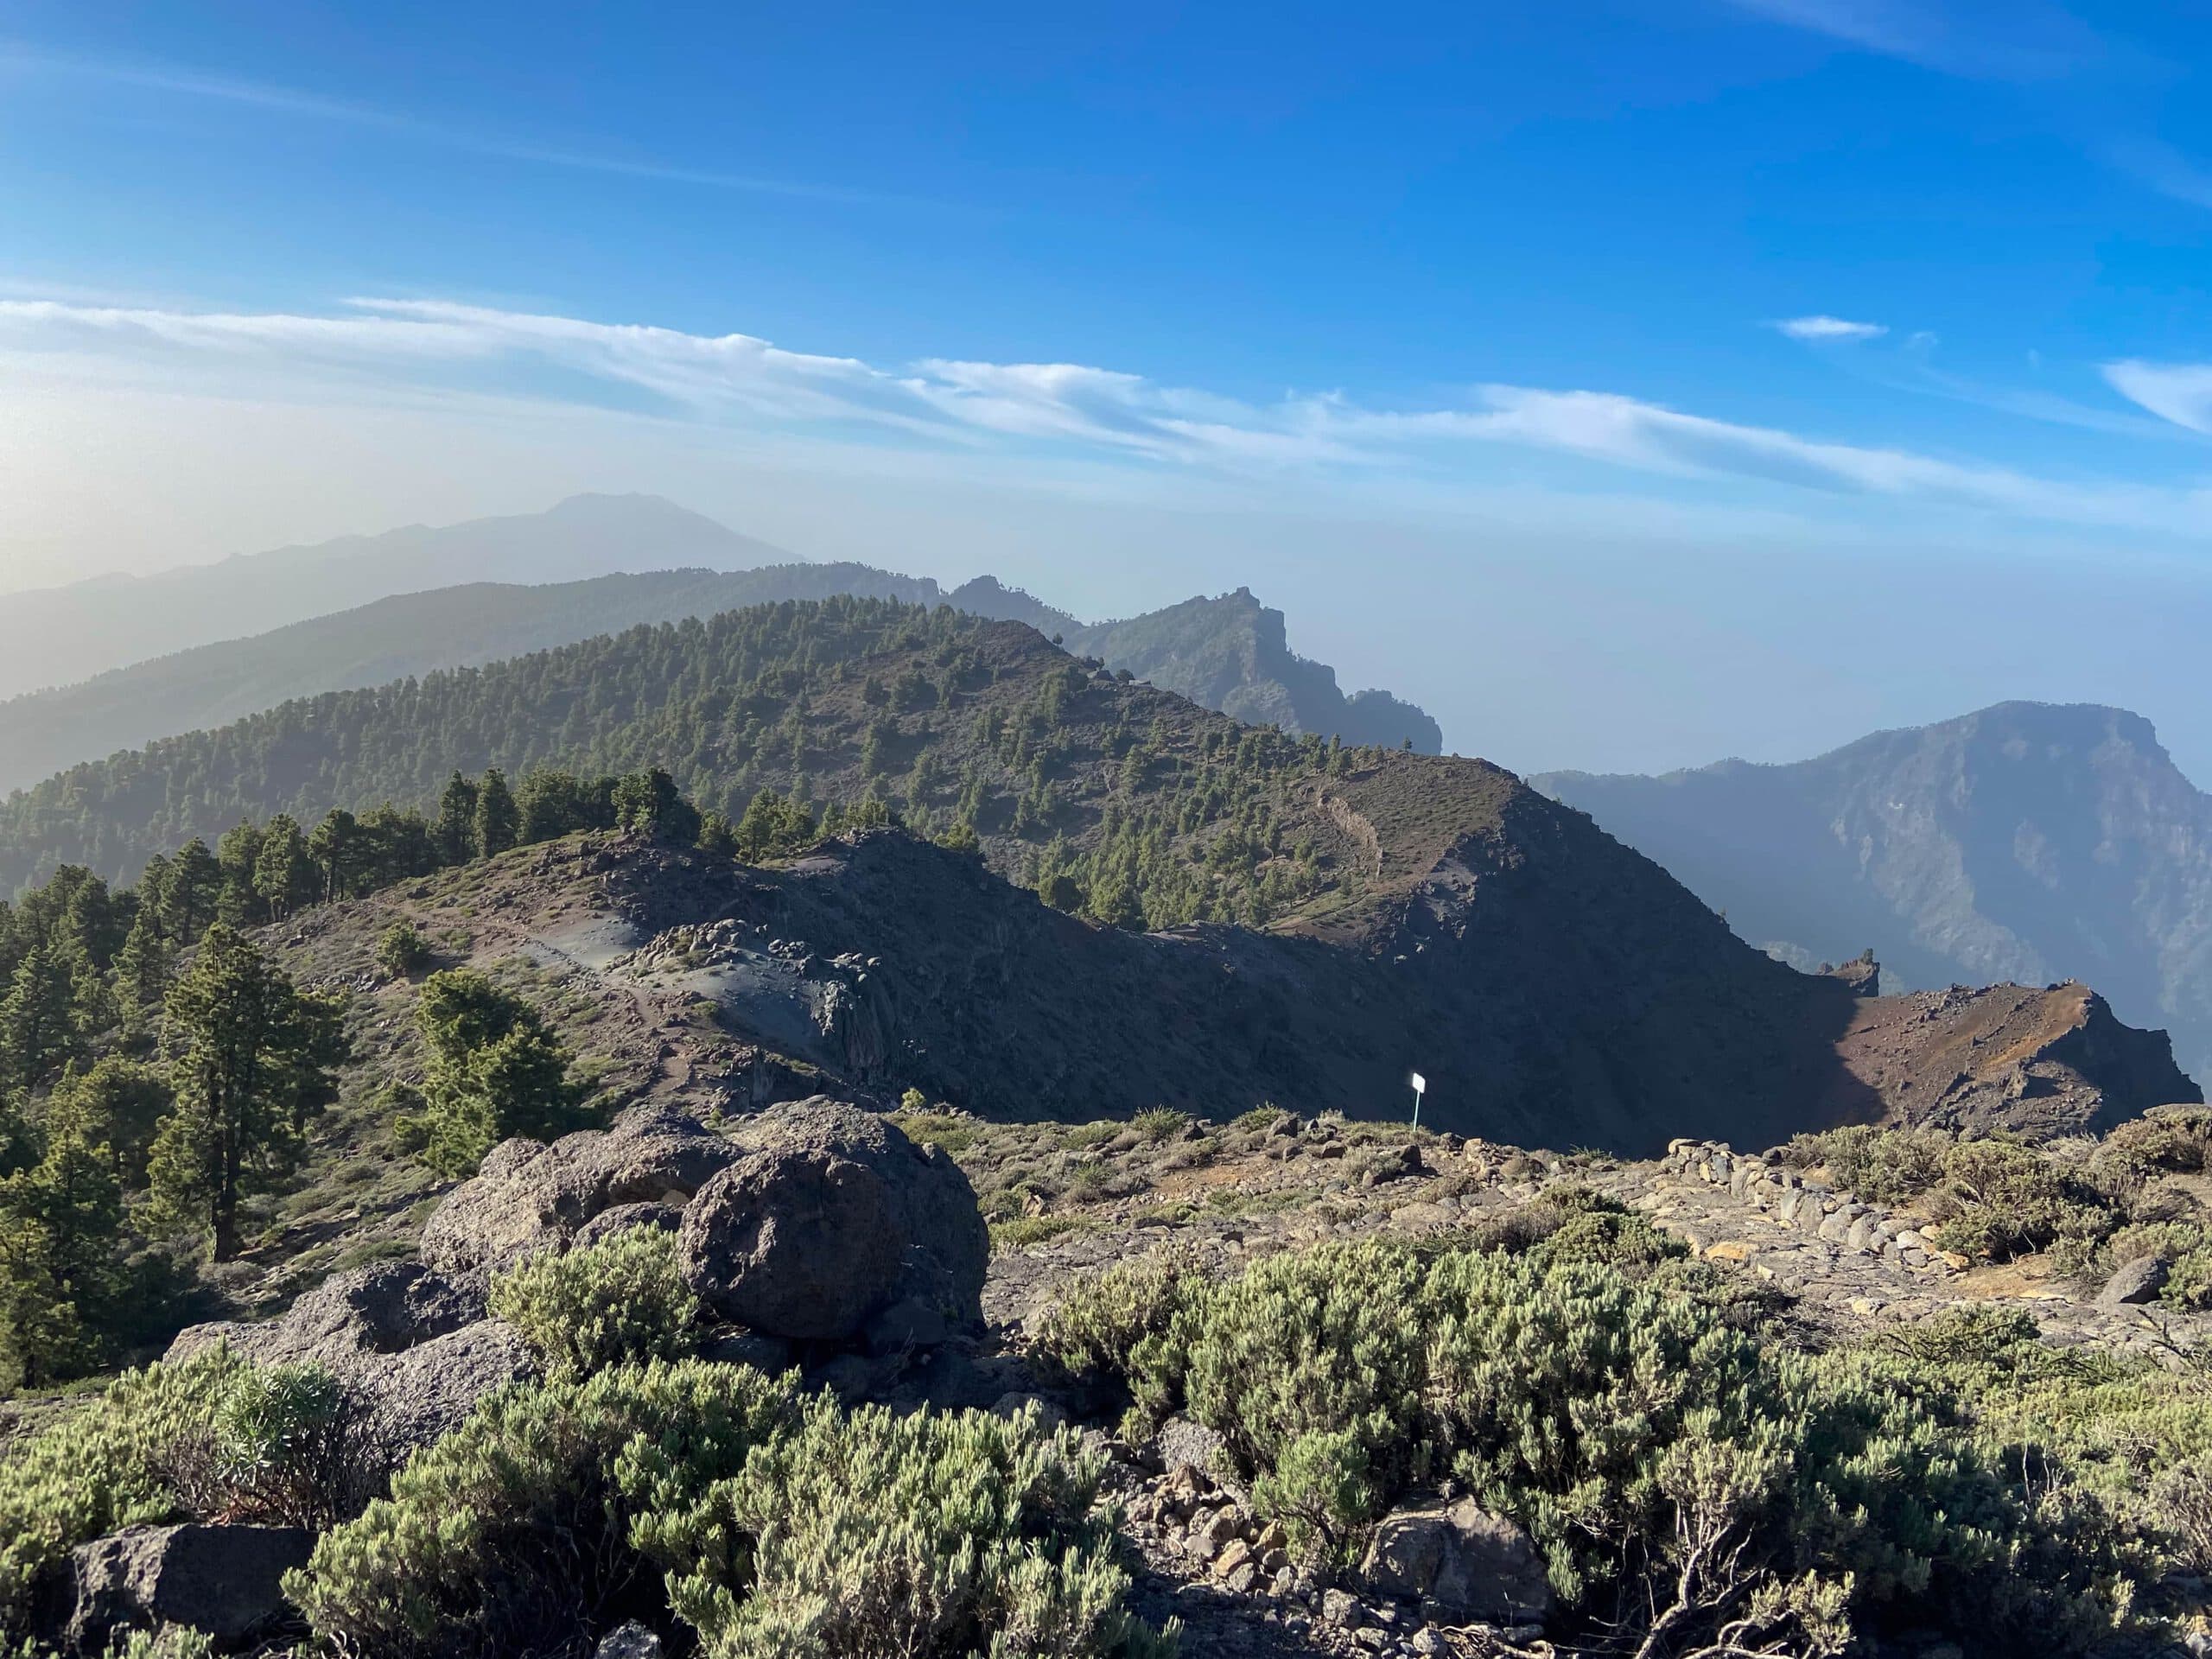
Section Pico de La Nieve to Pico de la Cruz
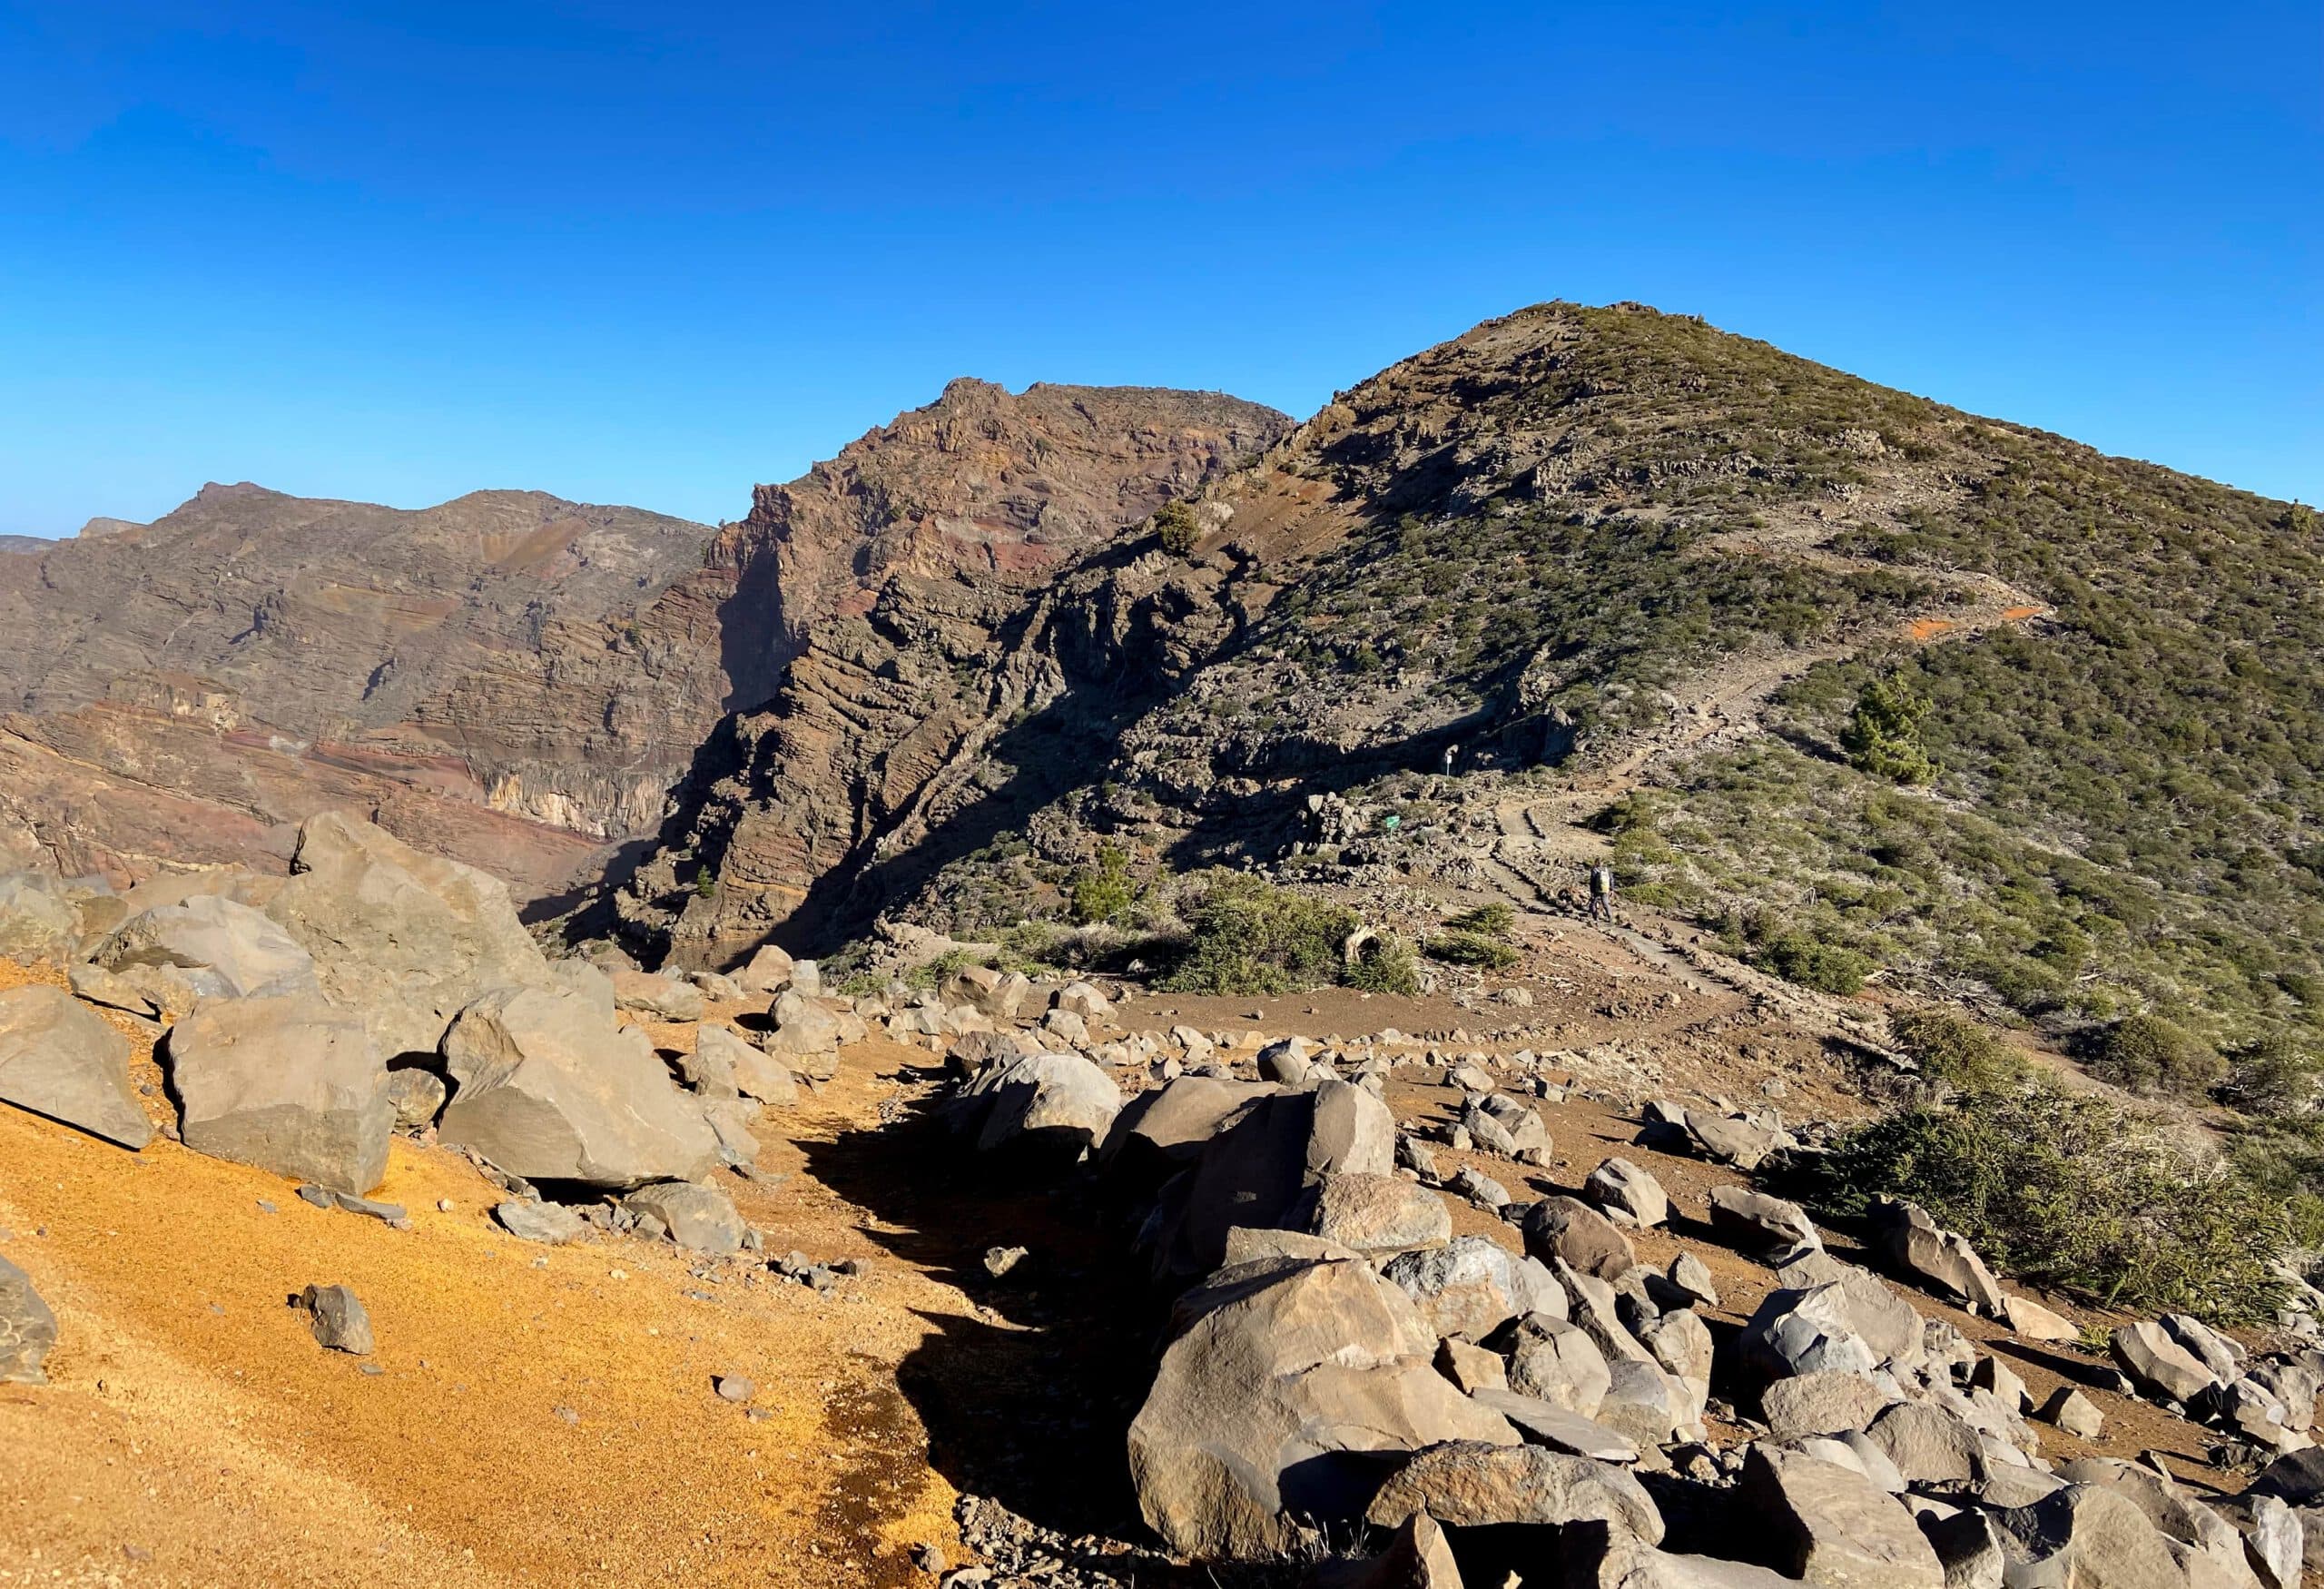
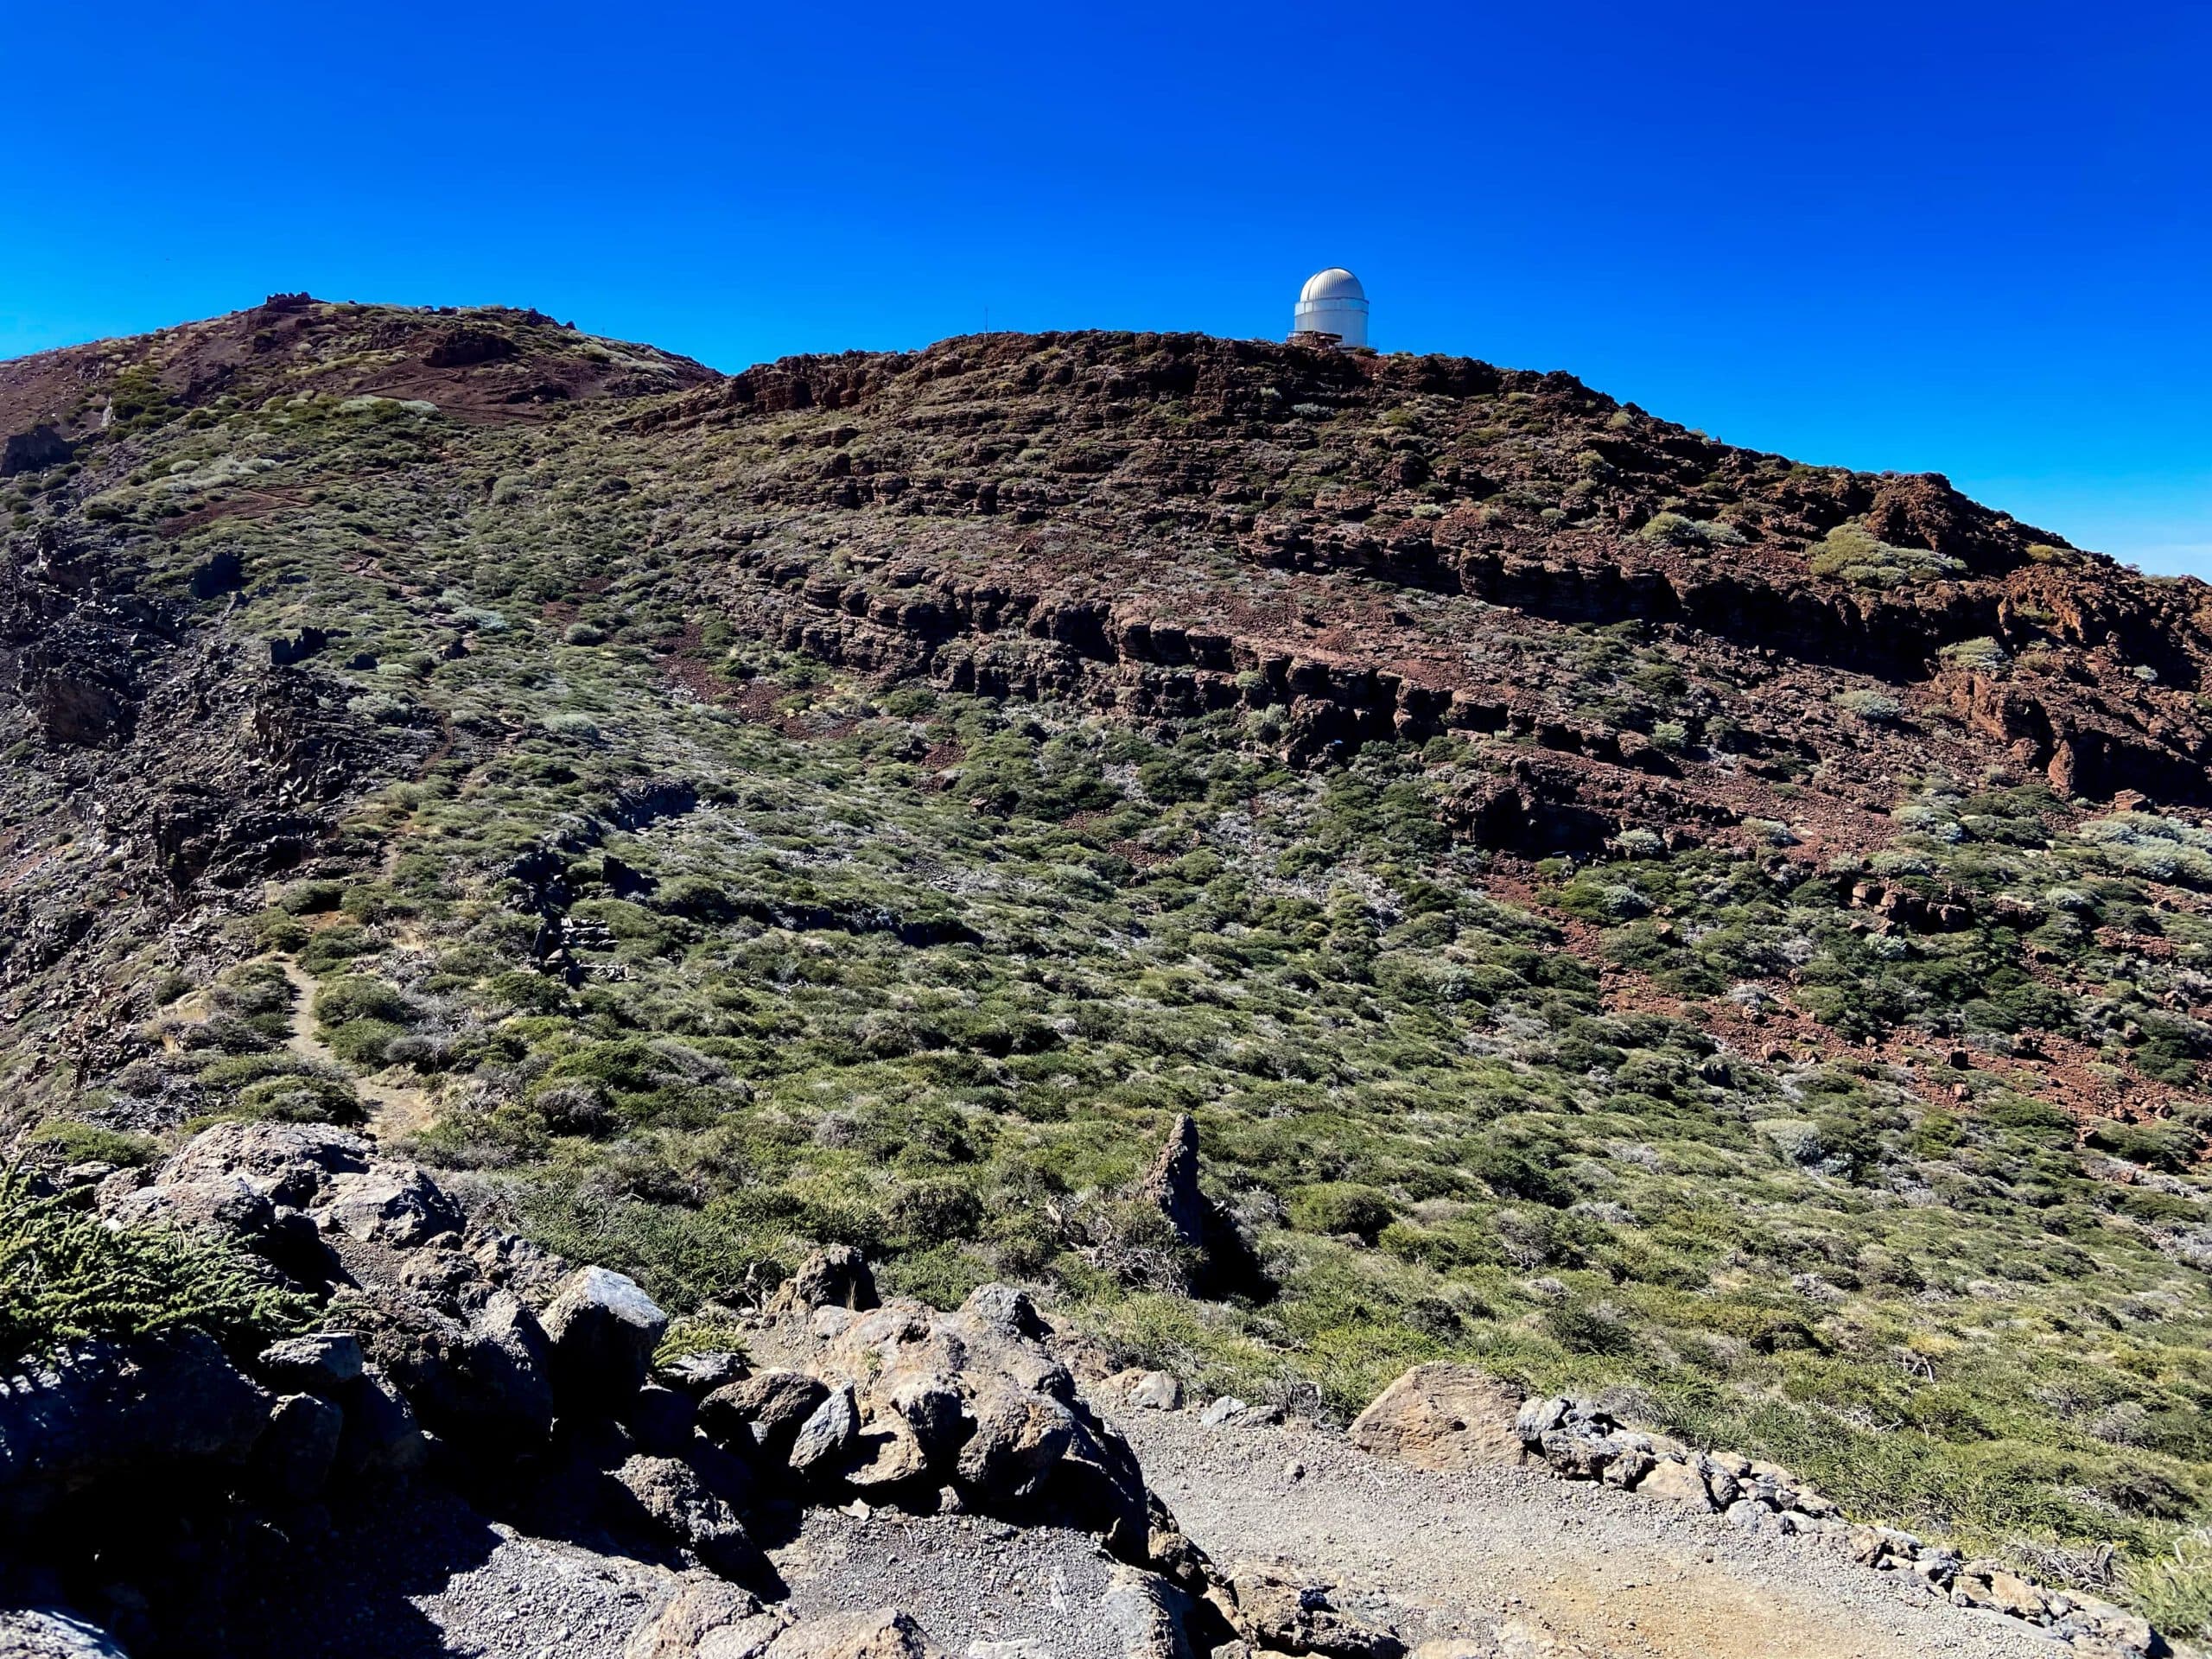
The way ahead is not to be missed. First, you walk comfortably around the summit of Pico del Cedro (2,247 metres altitude). But then it goes uphill to the summit of Pico de Piedrallana (2,321 metres). After that, the path continues up and down. Even though the observatory comes into view after a while, the way there is quite long. On the way down, you will have impressive views of the Caldera de Taburiente, the National Park and Tazacorte. On the other side, you can also see as far as the neighbouring islands of La Gomera and Tenerife.
Hiker on the Caldera High Trail
After a while, the path runs relatively close above the LP-4. After you have conquered another peak on the Caldera high trail, you will climb up to Pico de la Cruz. This is a popular viewpoint, which you can also reach from a small parking area on the LP-4. Therefore, you will probably meet many hikers here. On the horizon, you can already see the observatory on the opposite side of the Caldera high trail a little closer.
Pico de la Cruz
Route section Pico de la Cruz to Roque de los Muchachos
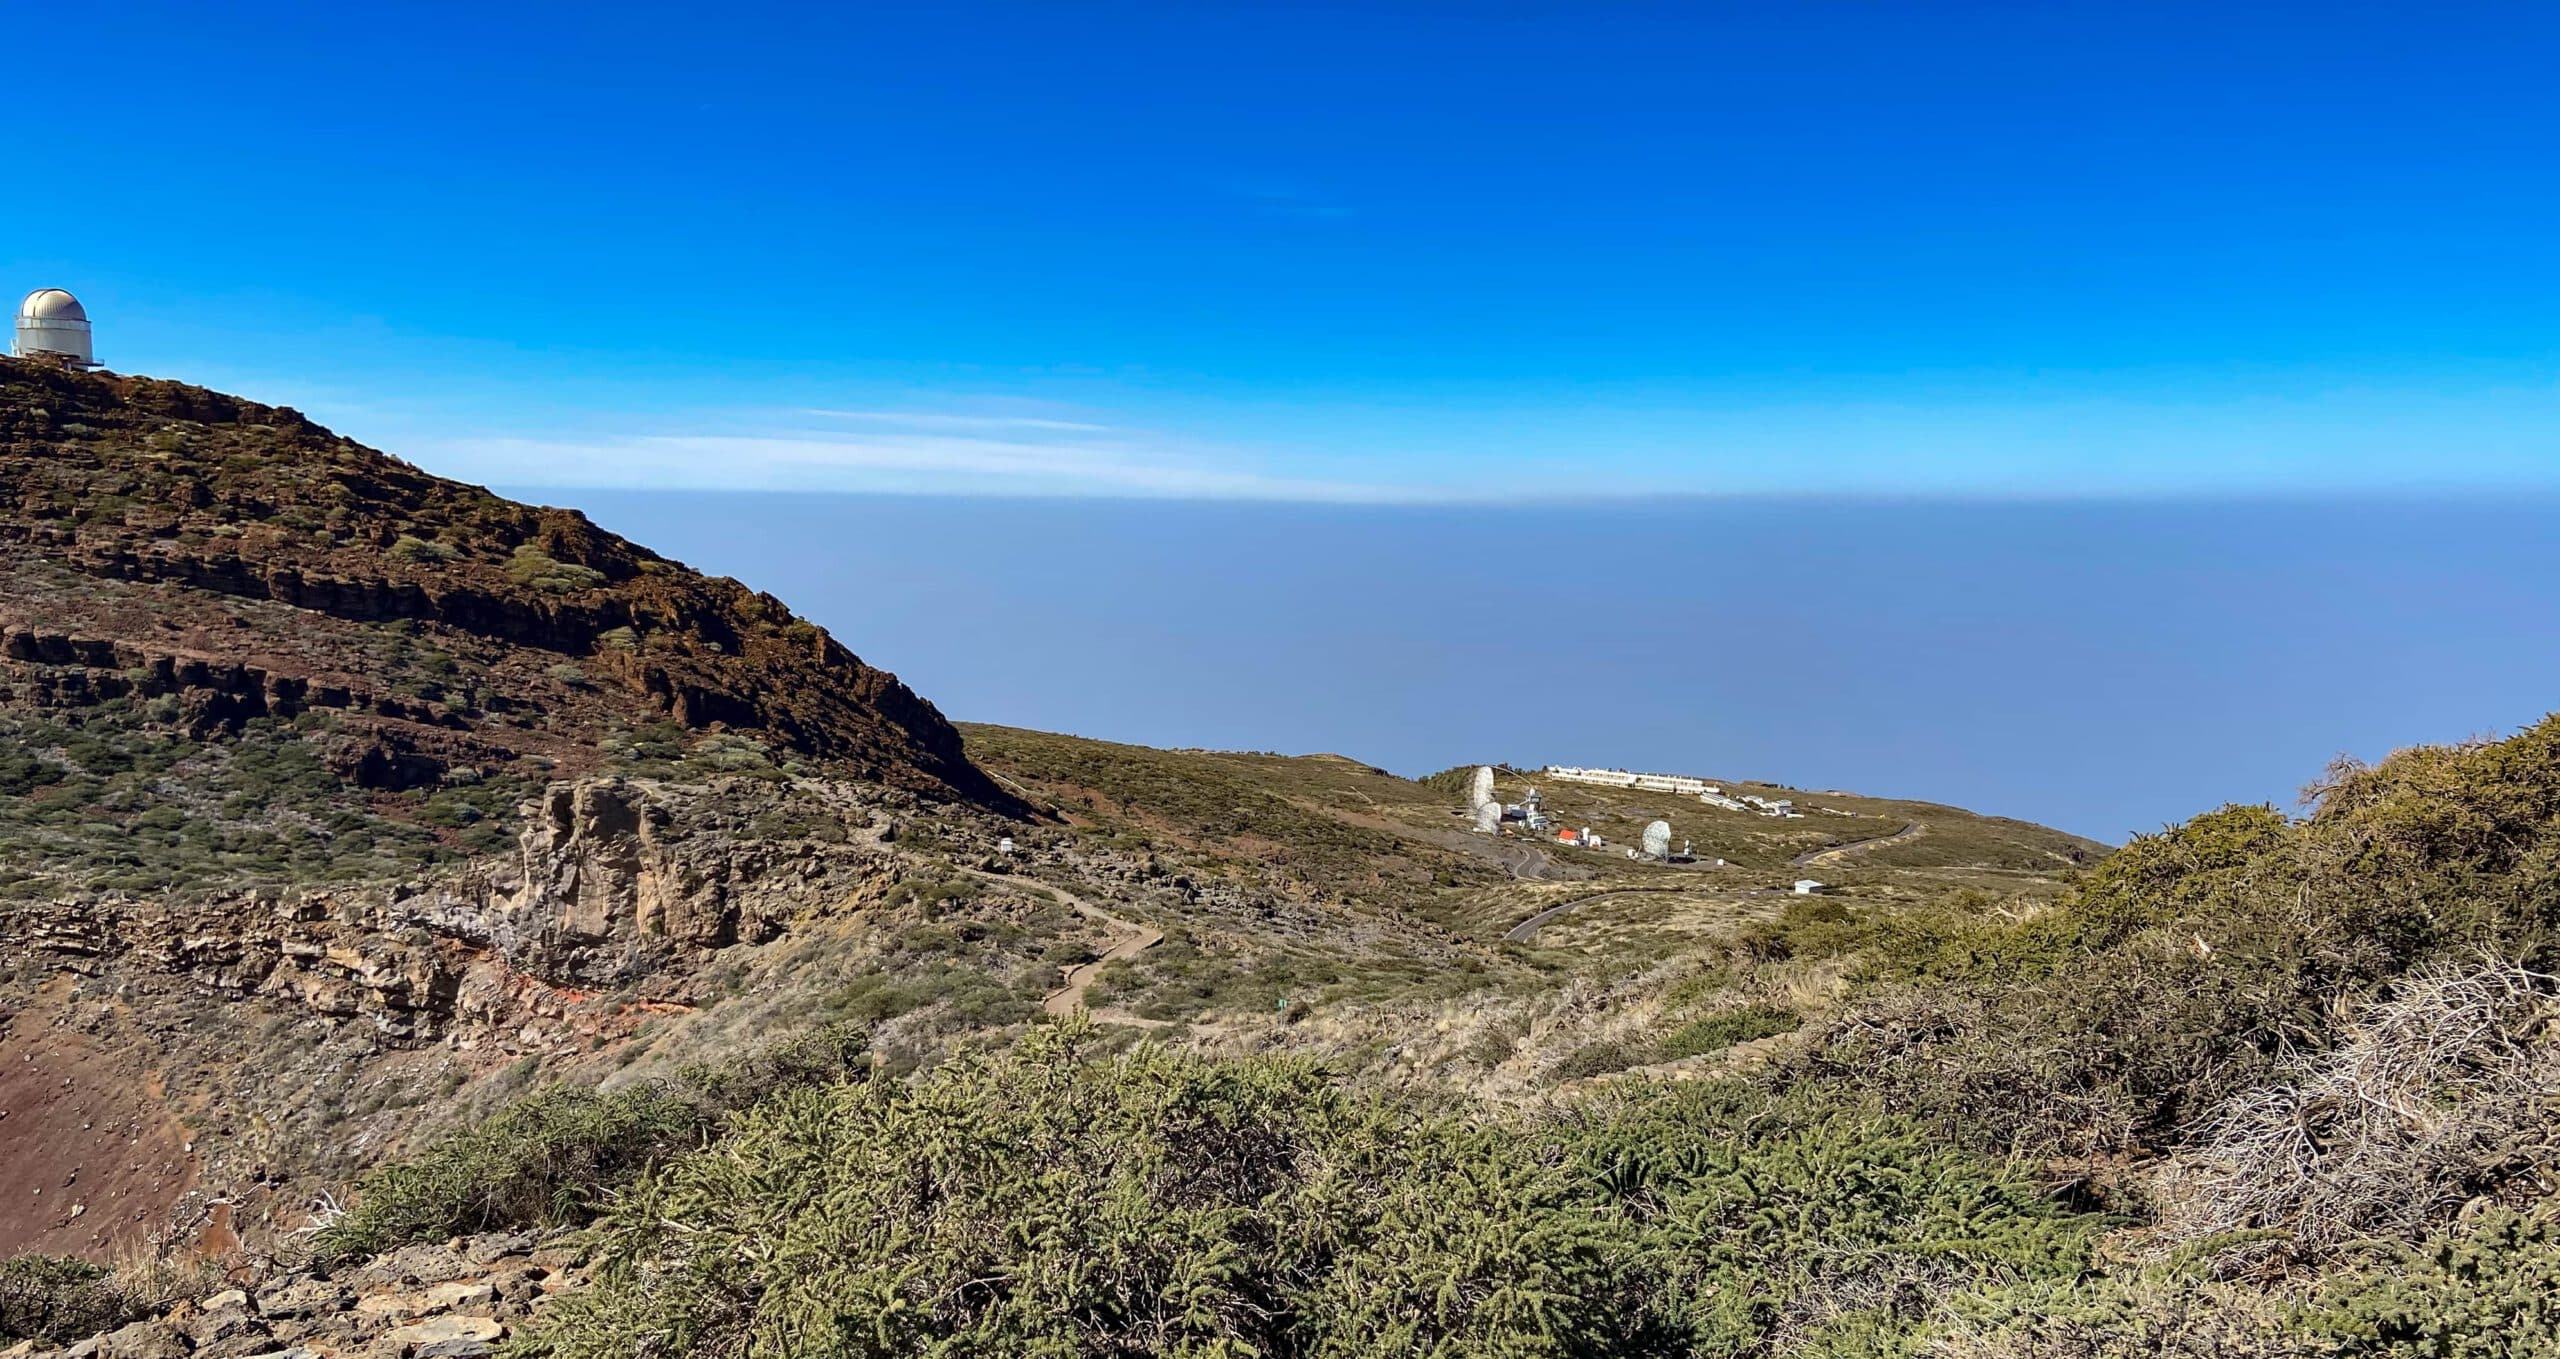
Now continue to the Mirador de Los Andenes. There you will meet the LP-4, where you will once again have a magnificent view in all directions. At this point you probably think you are already relatively close to your destination. But in fact, at the Mirador de Los Andenes, you will once again take the high-altitude path that feels like it goes deep down along the impressive rock face. The path runs along the slope for quite a while and also passes the Pared de Roberto. After that, there is another climb ahead of you. But finally you reach the observatory and pass above the Isaac Newton Telescope.
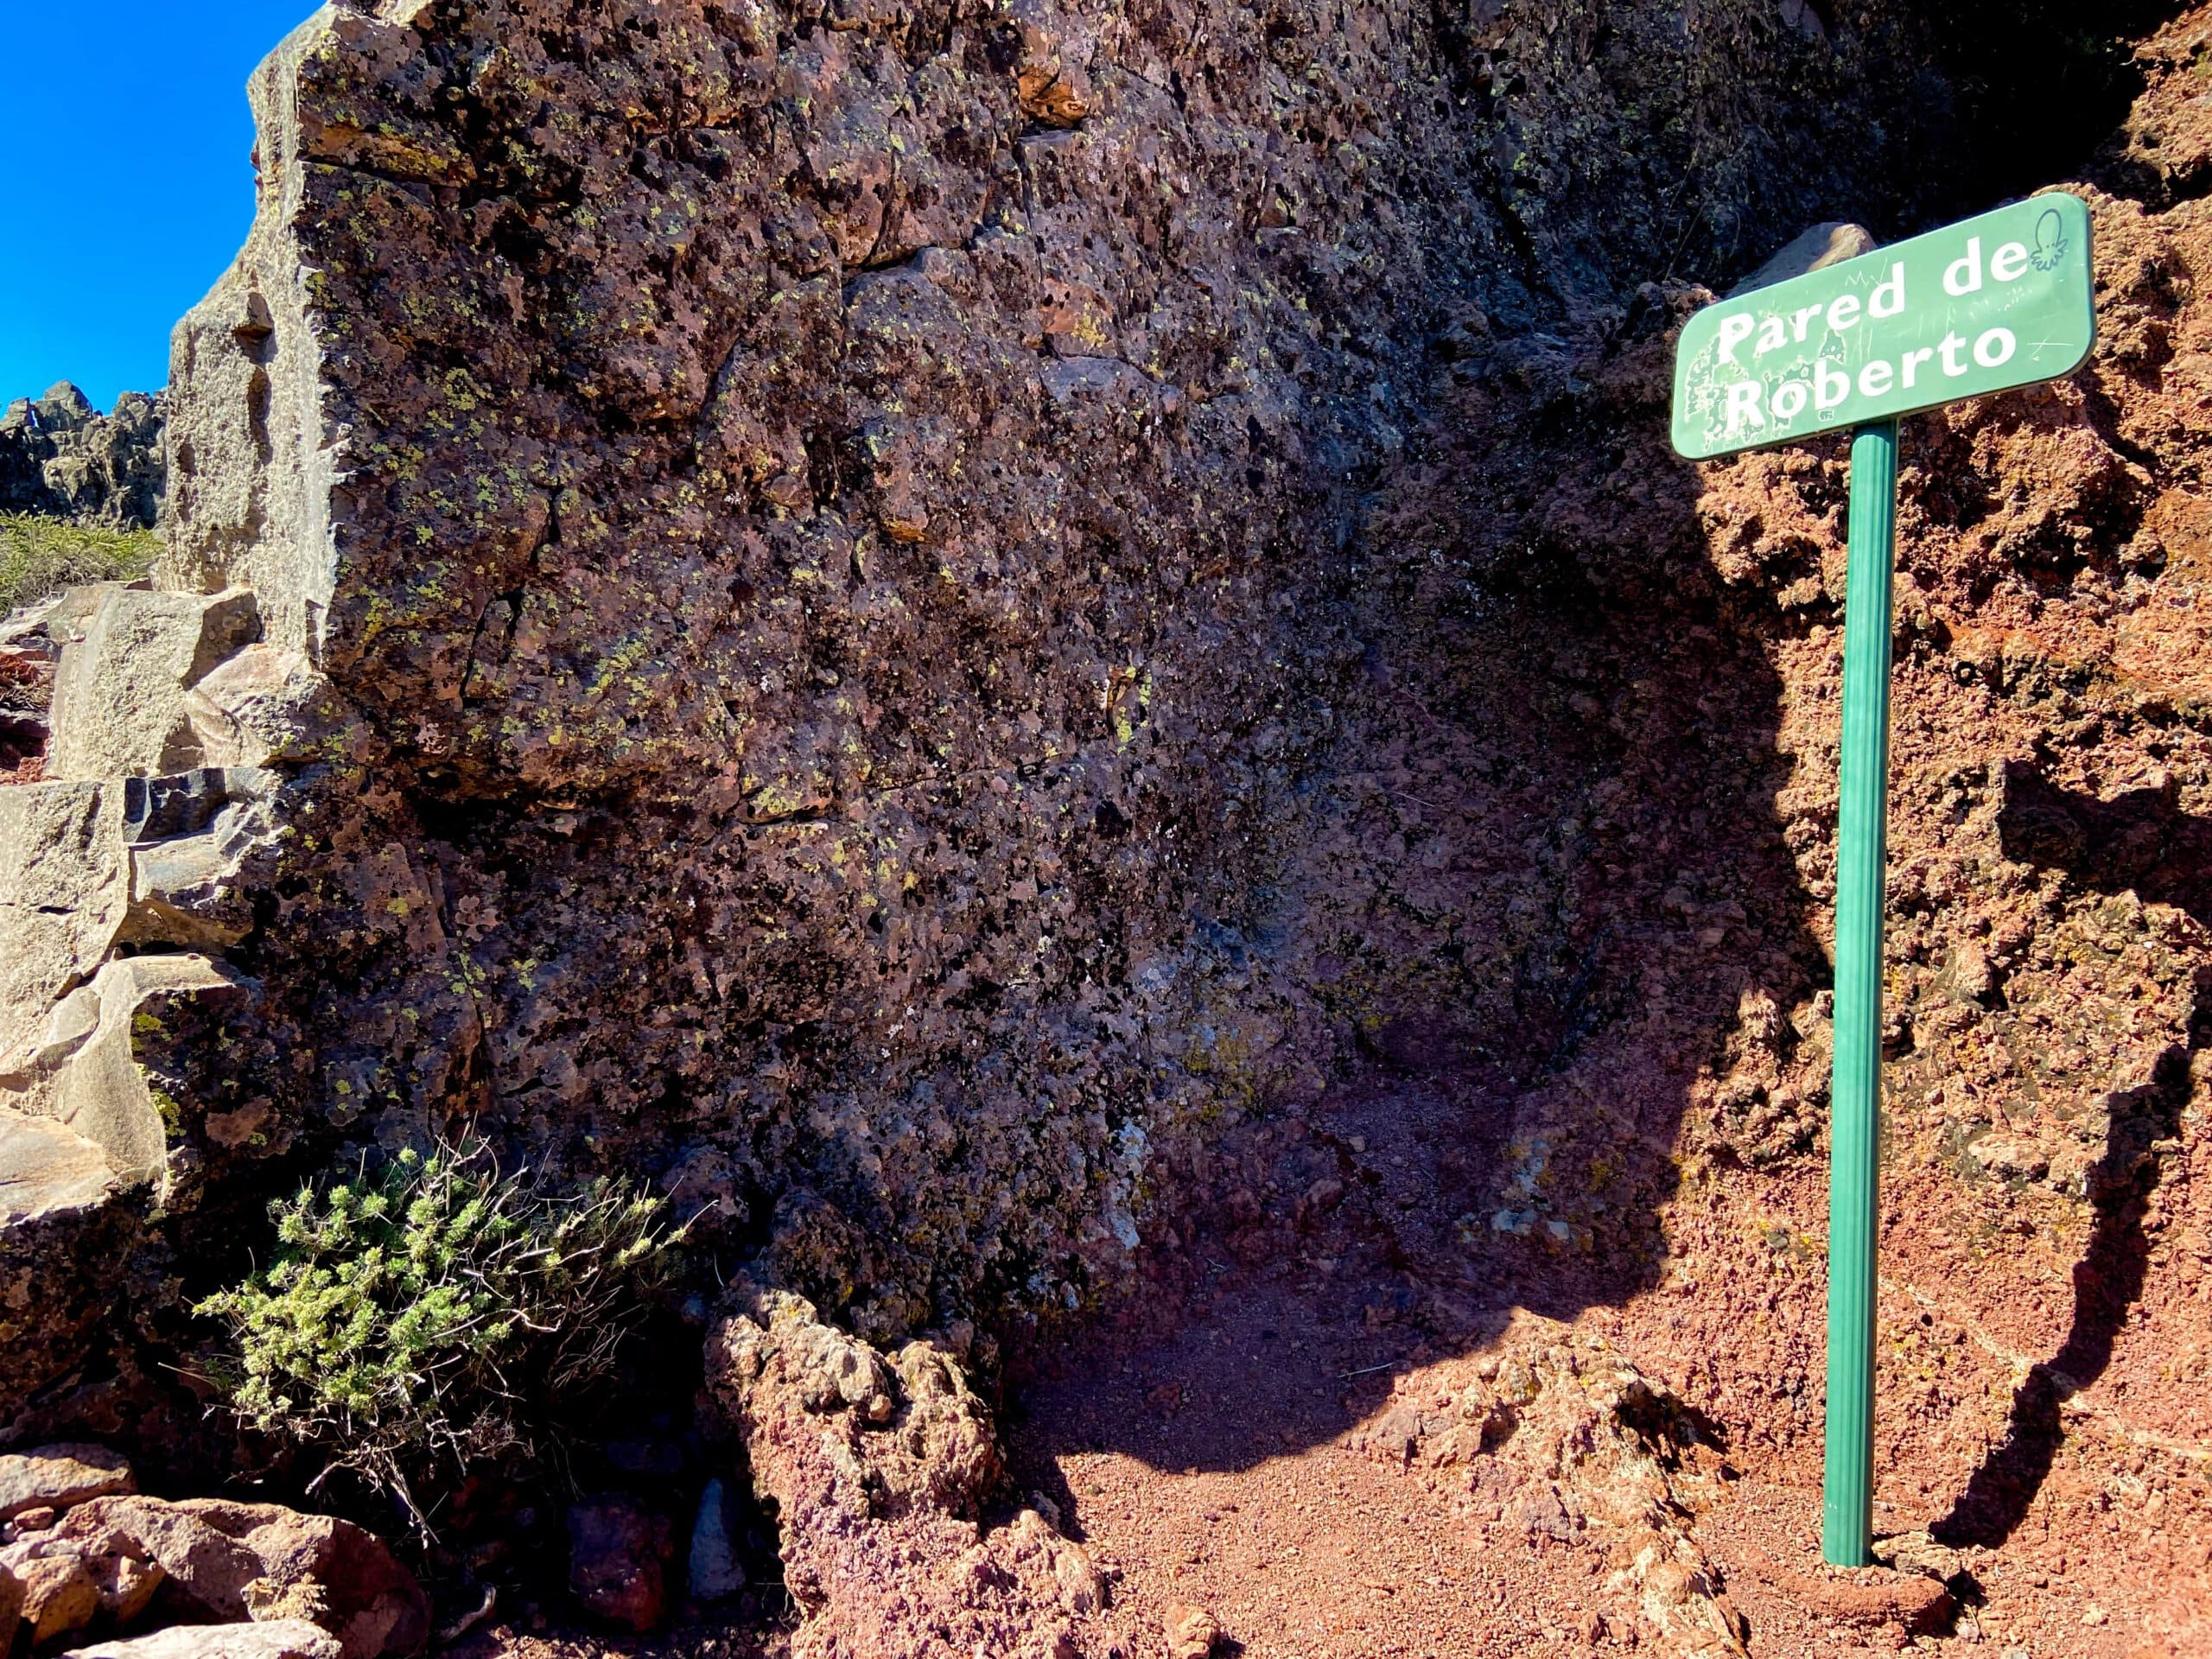
the Pared de Roberto
From there, the hiking trail leads you in several ascents above the many telescope installations. Once you have passed all the telescopes, there is one last climb and then you are on Roque de los Muchachos. As I have been to Roque de los Muchachos several times myself and we were short of time, we turned back before this last climb. If you have enough time, it’s worth going up Roque de los Muchachos to enjoy the view and the beautiful grounds. You can go back the same way or – as you can see on my track – shorten some passages at the beginning of the way back on the road.
Hiking trail below the observatory
And finally
I hope you enjoyed this hike along the Caldera High Trail. I have kept the description short because the trail is really hard to miss. Even though it looks as if the hike is quite easy, you will need a very good physical condition for the entire trail with its many descents and ascents. But because of the proximity to the LP-4, you can also take on just individual parts of the hike. Whatever you decide, I wish you lots of fun on the Caldera High Trail and on La Palma,
Dagmar from Siebeninseln