Pico Viejo – the second highest peak of the Canary Islands

Pico Viejo
After I have already described all possibilities to reach the summit of the Teide, today I go to the Pico Viejo. This is also called Chahorra and forms together with the Teide the Teide-Pico-Viejo complex. But even if only the „little brother“ of the big Teide, the ascent of the second highest mountain of the Canary Islands is an exciting experience. The Pico Viejo has a large crater with a diameter of 800 metres and a depth of 250 metres. You can go for a walk on the impressive crater rim during the highlight of the hike. 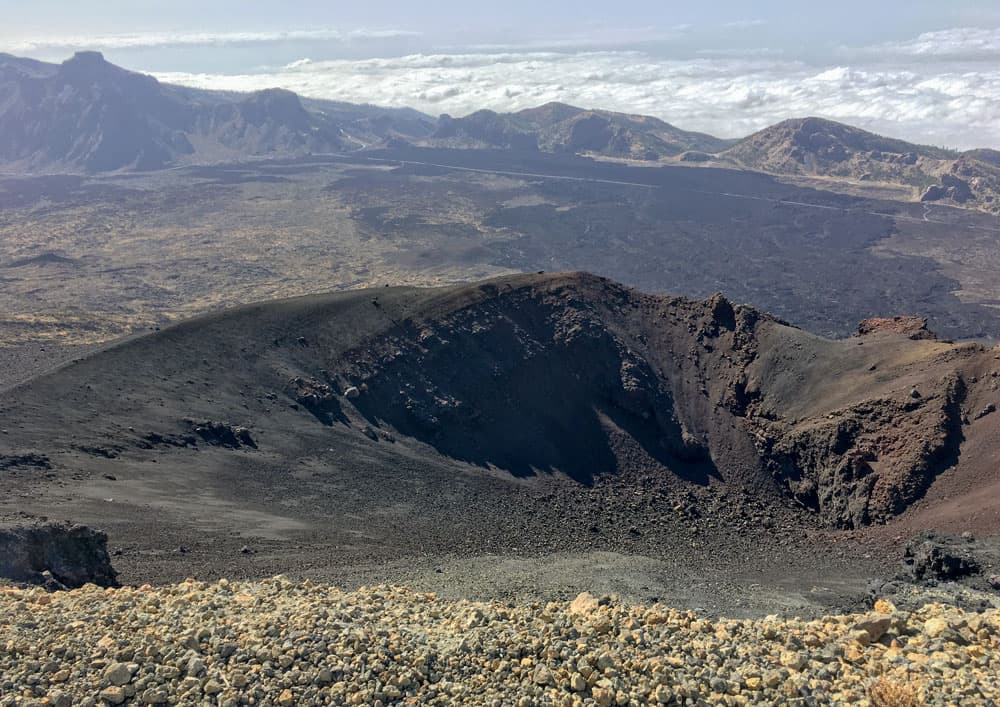
Narices del Teide mit Cañadas in the background
Map
The last eruption at Pico Viejo and the formation of Narices del Teide
In my report about the Chinyero I had already written about the last volcanic eruption on Tenerife. The last eruption at Pico Viejo took place more than 100 years before. The eruption lasted from 9 June to 14 September 1798 and occurred on the western flank of Pico Viejo. A volcanic eruption of magnitude 3 hurled large quantities of lava out of the volcano. The ash was carried 1 kilometre into the air and flew to the neighbouring islands of La Gomera and El Hierro. 
view from the crater rim of Pico Viejo to Pico del Teide
During this eruption craters were formed, which are today called Narices de Teide (nostrils of Teide). The hike passes these craters. There the lava was hurled outwards during the eruption. An extensive lava flow formed on the western slopes of Pico Viejo. This wide black stripe is already visible from afar. And also you will not only see the lava flow during the hike from the Narices del Teide, but you will also be able to cross it.

Track hike from Mirador Narices del Teide to Pico Viejo
Today I present two ways to get to Pico Viejo. One is a round trip from the Mirador Narices de Teide and the other is the ascent from the Parador.
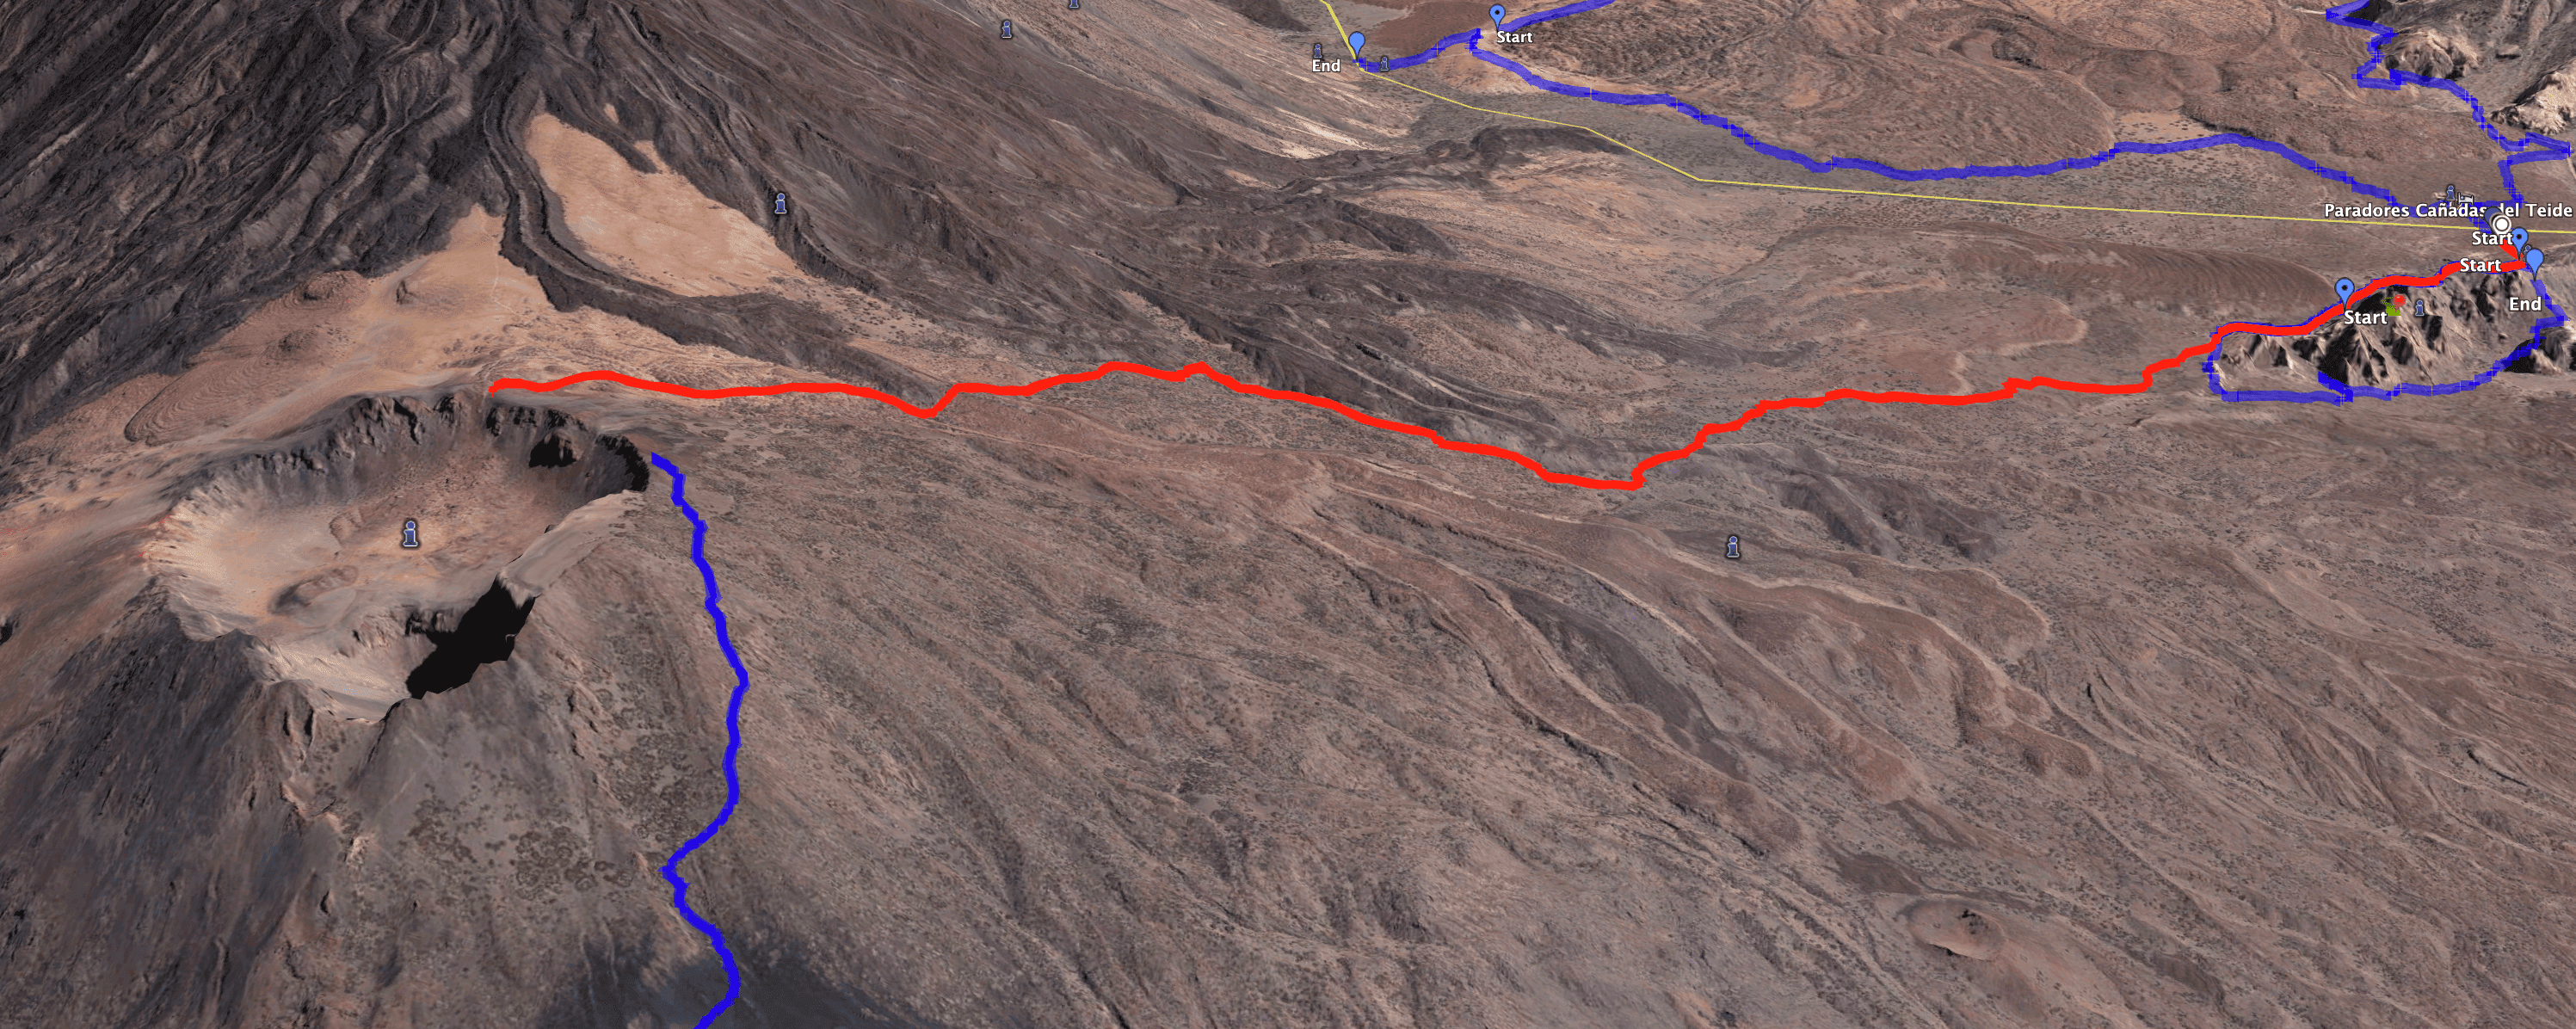
Track of the hike Parador (Roques de García) - Pico Viejo
General information about the hikes
Starting point and approach
1. Circular walk: Mirador de Chío (Narices del Teide) car park on TF-38 (kilometre 3.3).2. Parador: Car park at the Parador or Roques García.
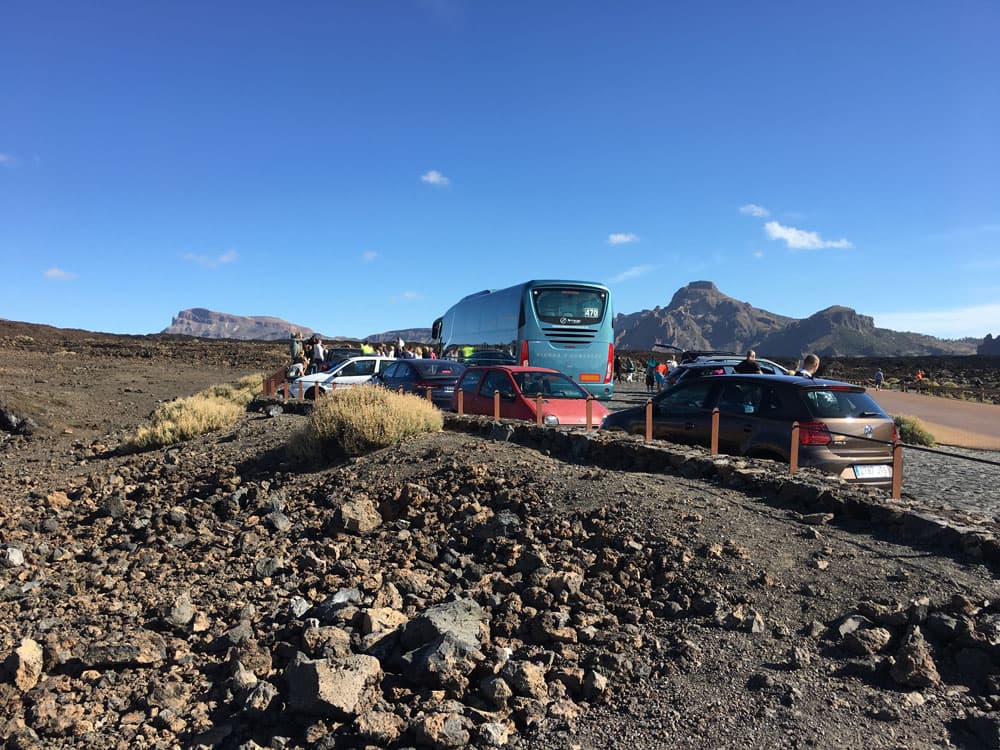
Starting point Mirador Narices del Teide or Mirador Chío
Access by car
If you are coming from the south of Tenerife and also from the north on the TF-1 motorway, take the Guía de Isora or Chío exits. Then take the TF-38 towards Teide National Park. Stop at Mirador de Chío for the circular walk or continue to the Parador car park. If you come from the centre of the island via the Cañadas road TF-38, stop at the Parador or continue towards Chío or Santiago del Teide for the circular walk. Since the starting points are car parks, you have the option of parking the car there. However, if you are very late, parking can be tight because of the many tourist buses that stop there for a photo opportunity. Also, please do not leave valuables in the car, as cars are often broken into in the car parks around the Teide.
Arrival by bus
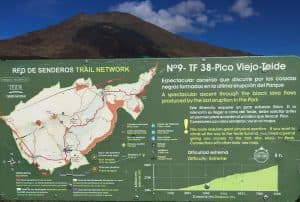
hiking board for the hike No 9 to Pico Viejo
You cannot get directly to the starting point of the circular walk at Mirador de Chío by bus, as there is no Titsa bus that runs this route. However, the Titsa bus number 342 stops about 2.7 kilometres away at the Boca Tauce road junction. You could therefore walk to the starting point from Boca Tauce. For the hike from the Parador, you can take the Titsa 342 bus. You can find more details on the Titsa homepage. In the tour variants, however, there is also the option of climbing Pico Viejo directly from Boca Tauce with the hiking trail/Sendero 28. Time
I don’t like to give general times for hiking tours, because the times are very individual. Hiking is supposed to be fun and relaxing. And I also need sometimes more and sometimes a little less time for each tour. For the round tour from Mirador Chío, you should allow at least six hours. If you want to hike from the Parador on the crater rim, it can take almost 6 hours.

Elevation profile from Mirador Narices del Teide to rim of Pico Viejo
Difference in altitude and distance
The circular hike from Mirador de Chío starts at 2,048 metres altitude. And the crater rim of the Teide lies at 3,080 to 3,135 metres altitude. The difference in altitude with cumulative up and down is just under 1,200 metres. The route is 11.5 kilometres long.

Elevation Profile Parador - Pico Viejo
On the hike from the Parador, you climb a little over 950 metres in altitude and the route is 13.5 kilometres long in total.
Requirement
Both are strenuous hikes that require a good level of fitness and should only be undertaken in calm weather. In general, the paths are well marked. However, on the way back during the circular hike, there is no clear signposting on the last section of the trail. Especially when crossing the lava flow, there is no clear marking or wayfinding. There you have to search a little or work with GPS.
Sendero 9 - hiking crossway in the little pine wood
Article summary and large selection of GPS hiking tracks
Sign up for my newsletter now and get exclusive access to my collected GPS tracks as well as all the brief information about my articles.
Sign up nowRefreshment
There are no refreshment stops along the way. You can only buy food and drinks at the Parador starting point. Therefore, take enough water and, if necessary, food with you.

different tracks to Pico Viejo
Variants
These tours can be combined well with various other hiking and circular walks in the vicinity.
On the one hand, there is another ascent route in addition to these tours, which already present three different ascent or descent routes to Pico Viejo:
The Sendero/Hiking Trail 28 Chafarí from Boca Tauce to Pico Viejo.Furthermore, this tour on the Sendero/Hiking Trail 9 can be extended so that you can go via the Mirador de Pico Viejo to the cable car station on the Teide. Of course, this also works the other way round, if you have been on the Teide, you can descend via the Mirador de Pico Viejo. This is a good way to combine the Teide and Pico Viejo hikes. The prerequisite is that you are fit enough and have enough time.
Of course, you can also go the described round tour the other way around. However, I advise against this because of the unclear route. Or you can walk along the crater of Pico Viejo and possibly use the descent path on the other side.
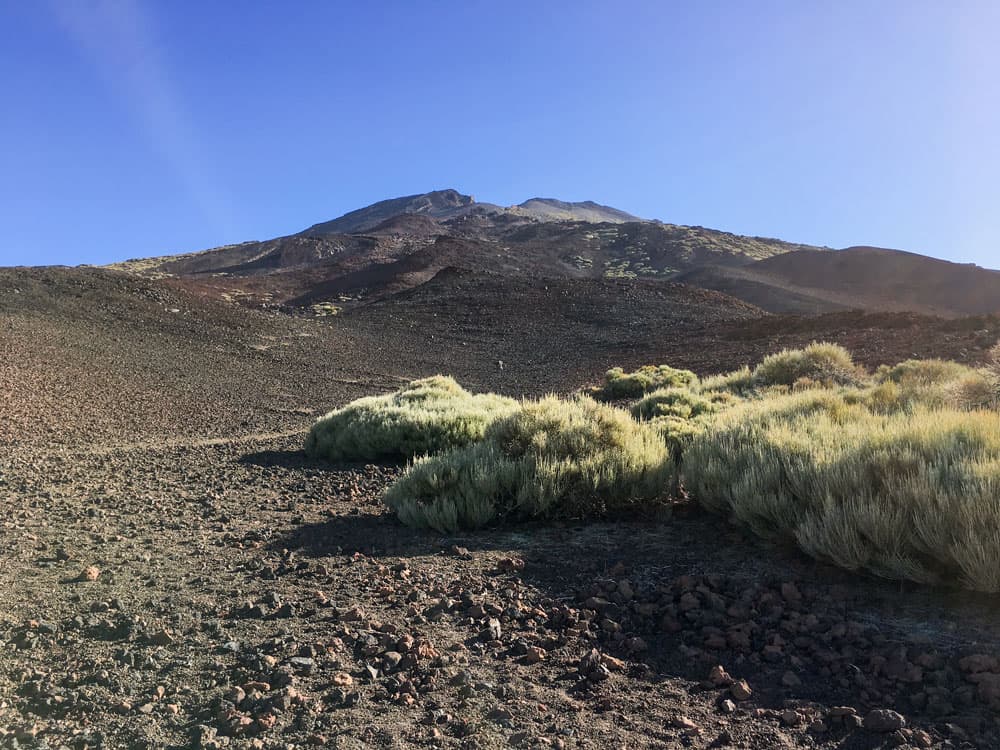
sparse vegetation to the crater rim of Pico Viejo
Finally, this circular path can also be combined with other tours at the foot of Pico Viejo. To mention here for example is the Samara Tour already described by me. Hike to Pico Viejo from Mirador Narices del Teide
Section Mirador Narices del Teide – crossroads pine forest
At the Mirador Narices del Teide begins this wonderful and at the same time challenging hike. As the way back through the lava flow is quite confusing, I recommend not to start the hike on the right but on the left. To the left at the parking place there is a big hiking board that marks and describes the hiking path number 9. There, the hiking path partially bordered with stones starts first parallel to the TF-38.

Start of hiking route behind the Mirador Narices del Teide
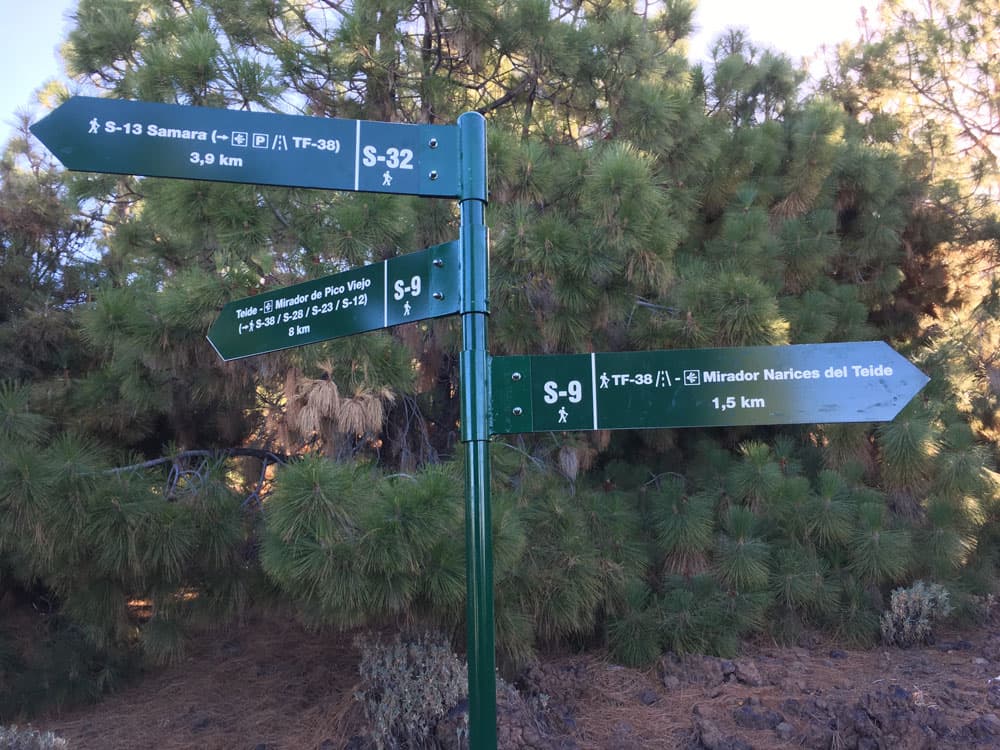
In the easy up and down it goes relatively parallel beside the road. The Pico Viejo, your destination can be seen to your right. Then it goes over small lava fields slightly downhill. In front of you you can already see from a distance a small pine forest. Your path leads into a driveway and then takes you across this small forest. In the pine forest, after 1.5 kilometres from Mirador, you come to a crossroads. The hiking trail S 32 leads straight on to the starting point of the hike around Samara.
crossroads for hikers Sendero 9
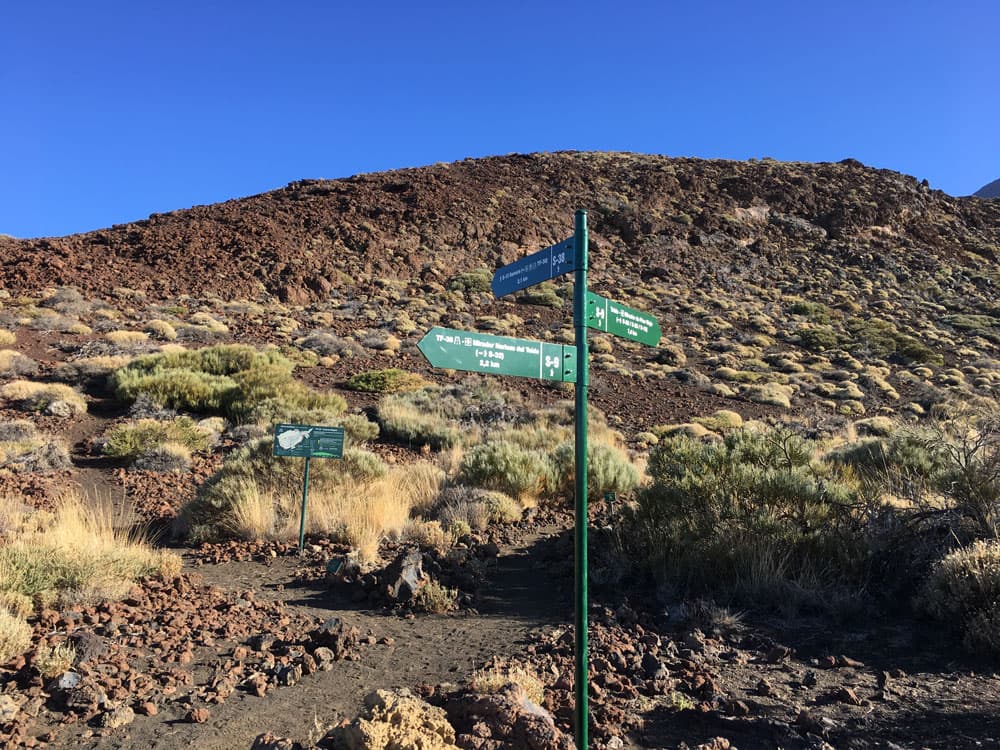
Continue to the right with the hiking trail S 9. From now on you have your destination, the Pico Viejo in front of you. The path now rises noticeably. In small hairpin bends it goes uphill on the sandy ground. After 700 meters you reach a small plateau with stone walls and another hiking crossroads. Turn left again onto the S 32 hiking trail towards Samara. Once again turn right on the S 9 in the direction of Pico Viejo. 
Hiking route through the volcano stones to Pico Viejo
Now you climb straight up the path in a small Barranco between two lava ridges. When you reach the top, the path leads you around to the left. Once again the path leads up between other rock flanks for some time. Then you have crossed all the „foothills“. Now you see a long path in large arches in front of you. After some time this will take you directly to the foot of Pico Viejo.

Panorama view from the sloops of Pico Viejo
From here it goes now mostly straight uphill. After about half an hour you pass a small crater on your left side. Shortly afterwards the path forks. If you want to take a tour to the south wall of the crater (Pico Sur), it is advisable to leave the hiking trail S 9 at this point and walk steeply uphill. The path passes a large crater behind the Lomo de Chío. As it continues up to the summit, the path is said to be a little confusing and sometimes difficult to find. This is probably also the reason why the official hiking trail S 9 takes the other direction around the Pico Viejo.

hike over lava fields
You follow the S 9 path straight ahead and for a while you go along a crossroad that takes you up and down the other side of Pico Viejo to the Narices del Teide. It goes uphill through dark volcanic rock. On the opposite side, at the edge of a large volcanic cone, you can already see your way back. The paths meet above the volcanic cone. From here you continue uphill with the hiking trail S 9 in Kehren. To your right you can now see the volcanic cone Narices del Teide.
Panorama view from Pico Viejo to the west
Narices del Teide – crossroads with the hiking trail S 28
At the top of the Narices del Teide volcanic cone you come very close to the big crater. The hiking trail leads you on a few meters directly past the crater edge of the approx. 100 meter large „nostril“. Then it continues uphill along the slope. During the whole time you have fantastic views of the caldera and the Cañadas mountains on your right. Behind you you can see the whole area around Samara and Chinyero. With good visibility you can see the Teno Mountains and the neighbouring island La Gomera in the distance. 
View during ascent to the Teno Mountains
Continue up the slope and after a short while you will come to a fork in the road. Here the hiking trail S 28 from Boca Tauce comes up and unites with the S 9 (see also variants). To Boca Tauce it is 4 kilometres from here. The starting point Mirador Narcises del Teide is 5.5 km. With the S 9 it goes now further and steeper uphill in the direction of Mirador Pico Viejo.
Article summary and large selection of GPS hiking tracks
Sign up for my newsletter now and get exclusive access to my collected GPS tracks as well as all the brief information about my articles.
Sign up now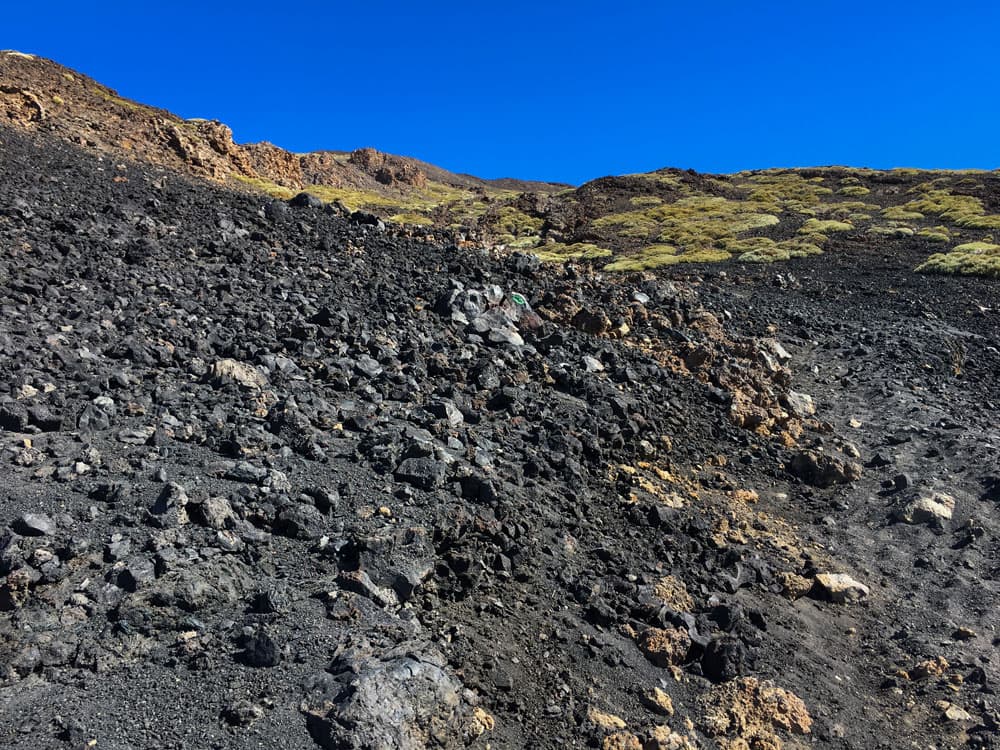
a large part of the way leads over lava slag
Section of hiking trail S 28 – crater rim Pico Viejo
The hiking trail S 9 now leads you uphill in steep bends towards the crater wall. The crater wall is already visible above you. After you have climbed steeply through a small high valley, the path runs along the slope to the right. Partly it goes over rocks. Then it climbs up again over oily sand. After some time the Pico del Teide appears in front of you.
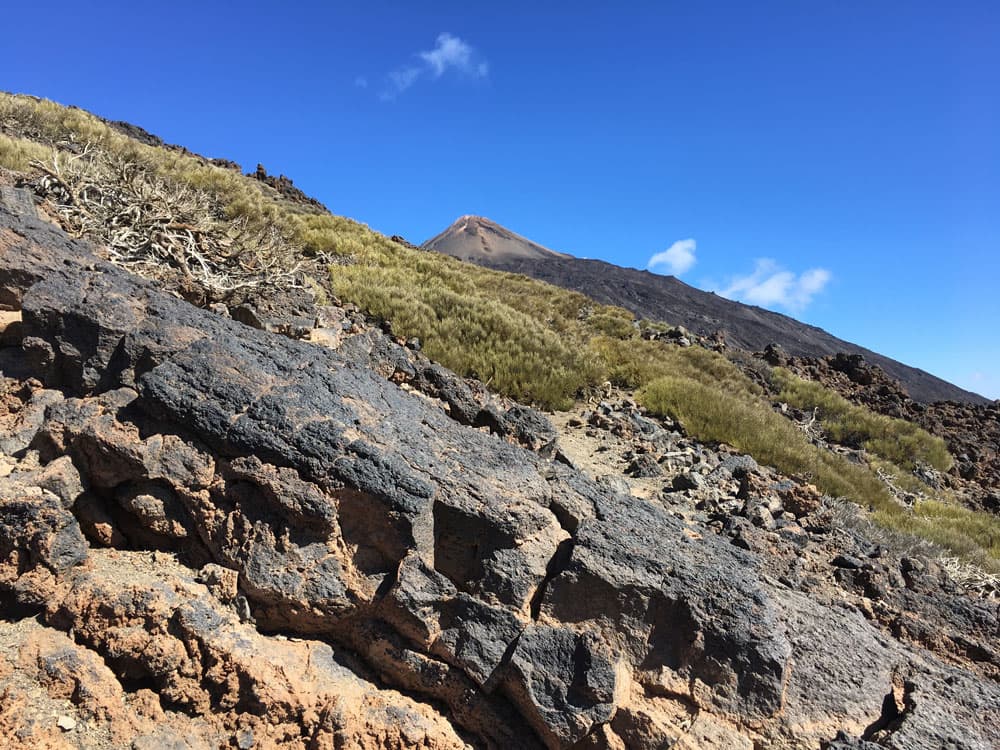
short time before you reach the rim, you will see Teide top
You continue and have a better and better view of the Teide and the whole region. Above you you can also see the Mirador Pico Viejo. And then you made it. On the left a path leads you up to the crater rim. From the edge of the huge crater you can see the whole crater with the impressive diameter of 500 meters. A great viewpoint of the entire Teide massif and the surrounding mountains.
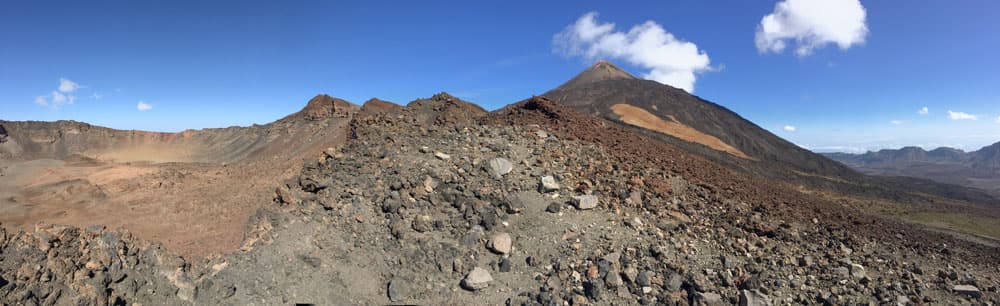
Panorama Pico Viejo and Pico del Teide
Crater rim Pico Viejo – crossroads at the Narices des Teide and possible variants
If you’ve seen enough, you might want to wander around the crater on a path behind the crater rim. You can then descend on the southwestern side over the Pico Sur and further down again on the hiking trail S 9. I have not yet walked this section myself, but have read and heard that it is said to be a bit confusing at several passages.
You can also follow the hiking trail S 9 straight on and climb up to Mirador Pico Viejo. There it continues on the Teide. After having climbed the crater rim, I myself went back on the hiking path S 9 up to the Narices del Teide. At the fork below the large volcanic cone, the S 9 leads back to the right (same path as described). 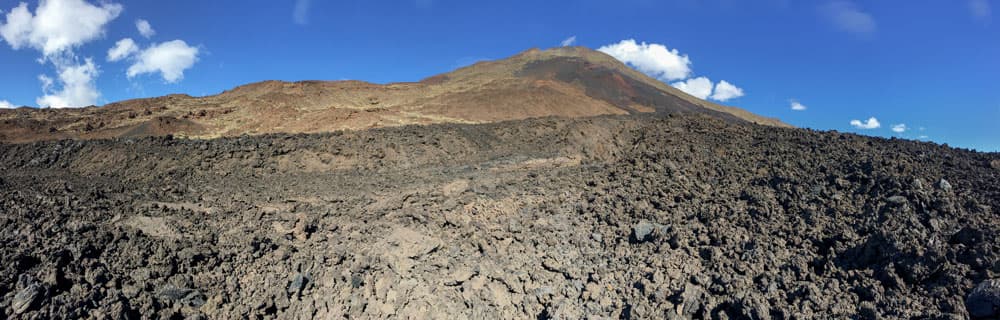
the wide lava stream from Pico Viejo
Crossroads Narices del Teide – lava flow
The further way straight ahead is not marked or marked. From time to time you will find stone men. If you prefer the safe option, you should return to the right on trail 9. Otherwise, the slope side of the volcano in the lava sand is steep. Actually, you will slide down the mountain more than you will hike. Afterwards it goes for a short time over a somewhat flatter running crossway. Then the game starts all over again.
On the slope side you hike or better slide down the volcano on sandy ground. Then the path leads you right past a group of rocks and then over a small plateau. Then it goes straight and from time to time in bends further down. Before you you can already see the Mirador Narices del Teide in the distance. The path is still clearly visible. It leads you to the edge of the huge lava flow that once flowed from the Narcises del Teide.
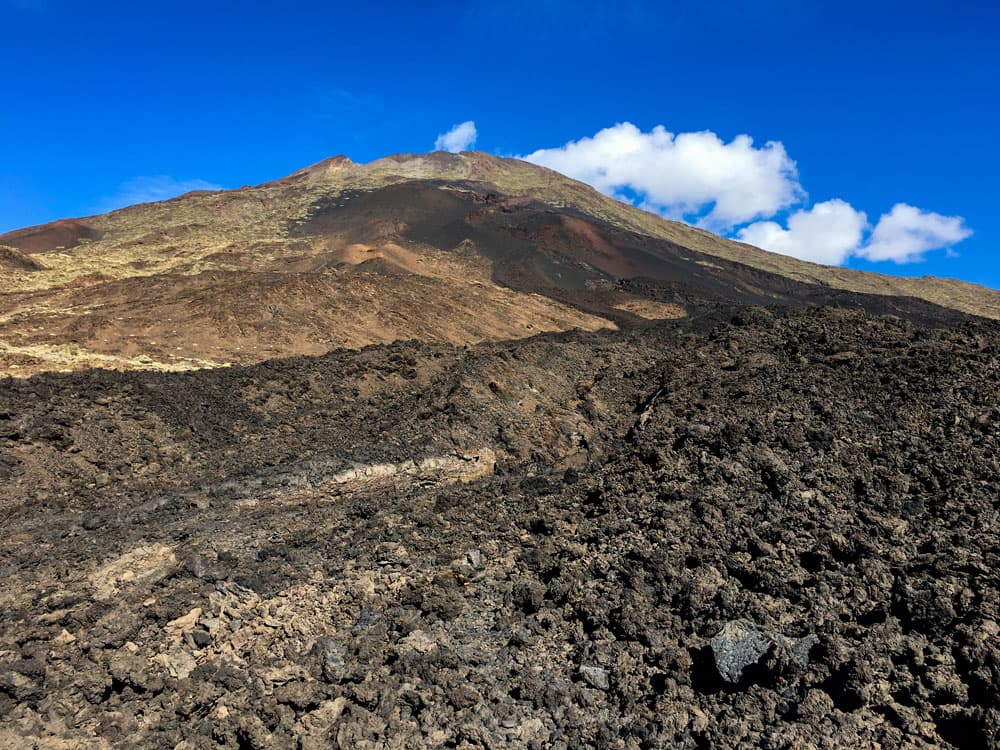
Top of Pico Viejo with lava stream
Lava flow section – Mirador Narices del Teide
At the edge of the black lava flow you are already quite close to the starting point. But from here the way is more than confusing. Therefore I also think that it is hardly possible to find the way in the opposite direction. The first difficulty is to cross the lava flow. Even if described so in some hiking guides, I did not find a clear marking. Possibly there are also different possibilities.
In any case, I have walked two different paths over the wide lava flow so far. Immediately at the point where the path meets the lava flow, there is a possibility of crossing marked with stone figures. And even if the lava flow on the other side mixes a little with the terrain, there is no clear path. However, there are many footprints, stone figures and the Mirador directly in front of you makes it impossible to get lost.

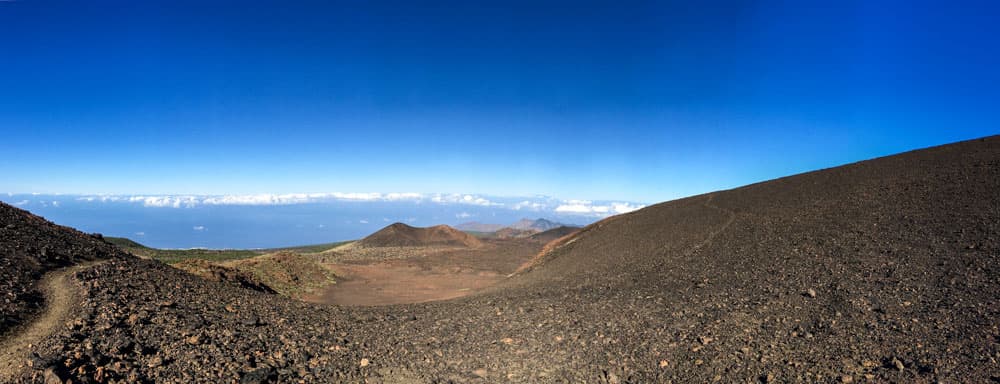
the crater of Pico Viejo
Hike to Pico Viejo from Parador
Route section Parador to hiking junction S-23/S-9
You start your hike at the Parador or directly at the Roques de García. From there, follow the S-3 trail along the Roques de García (short circular route). After 1.4 kilometres you will come to a small crossroads. The small hike around the Roques de García continues on the left. However, you follow the S 23 around to the right in the direction of Pico Viejo. From here there is not much more to describe, because the path is easy to see and marked. The path continues uphill towards Pico Viejo.

Starting point of the hike at the Roques de García
As you climb, you also go around some lava fields from Teide and can enjoy beautiful views back to the cañadas and the caldera. It is a tough climb of 950 metres in total. After 3.8 kilometres of ascent, you will reach a T-junction. To the left, you can go around below the crater to the circular walk described here to the Mirador Narices del Teide (S-9). To the right, you can also take the S-9 in 2.1 kilometres towards Teide to the Mirador Pico Viejo. From there you can also hike on Teide.

View to Mount Teide
Route section hiking junction S-23/S-9 to crater rim
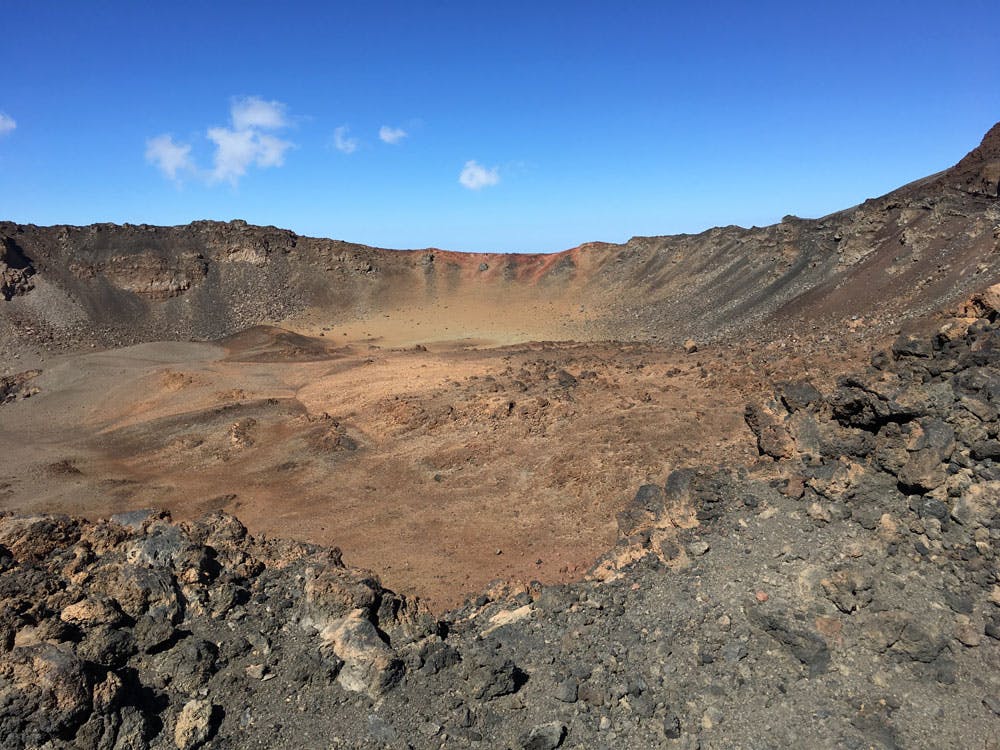
However, if you want to see the impressive crater of Pico Viejo, you have to leave the normal hiking trail here. A small path, which is a little rough and very steep, leads from here up to the crater rim. But the somewhat arduous path is worth it. At the top of the crater rim you have a view over the entire huge crater of Pico Viejo. You can now see the mighty Teide close up and the entire national park below you. And if you like, you can walk further along a small path along the crater rim.

View into the impressive crater of Pico Viejo
When you have seen enough, you can return to the Parador along the same path. But even if you choose a different way back, I’ve shown you a few options in this article.

View from the ascent path back to the Cañadas and the Caldera
And finally:
I hope you enjoyed the excursion to the second highest volcano of the Canary Islands. With the different variants described here, you will surely find a nice way for yourself. I wish you interesting hiking experiences,
Dagmar from SiebenInseln