
Table of contents
Guajara 2 – Ascent to the third highest mountain on the island from the Parador Nacional
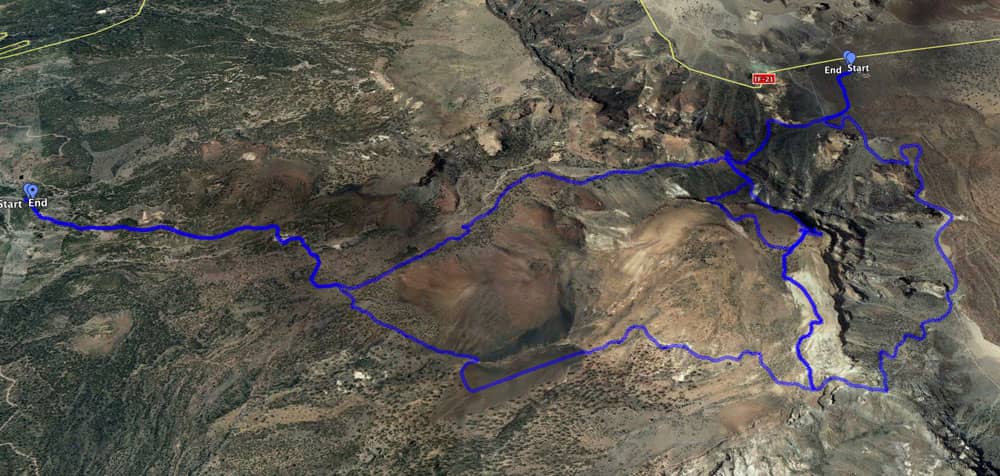
Map
You might wonder about the name Guajara 2, but with Guajara 2 I only want to separate this Guajara Tour from the Guajara Tour, which has already been described here from Villaflor. This tour Guajara 2 is considerably shorter in comparison to the ascent over Villaflor and the long way back over the Ucanca valley.

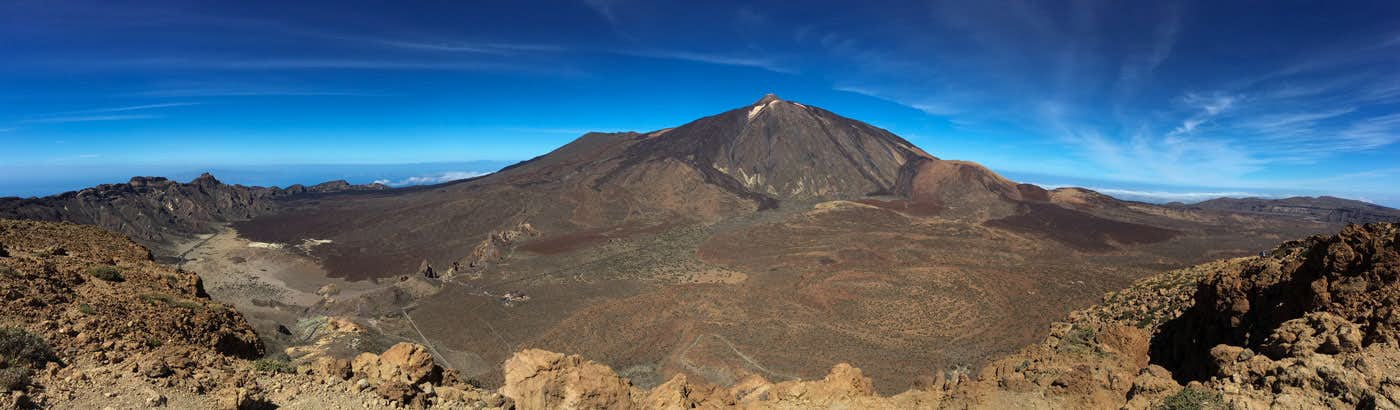
Guajara
You also start higher in the Teide National Park at the Parador Nacional de la Cañadas at 2150 altitude meters and have less altitude meters to climb to the summit of Guajara (2718 altitude meters).
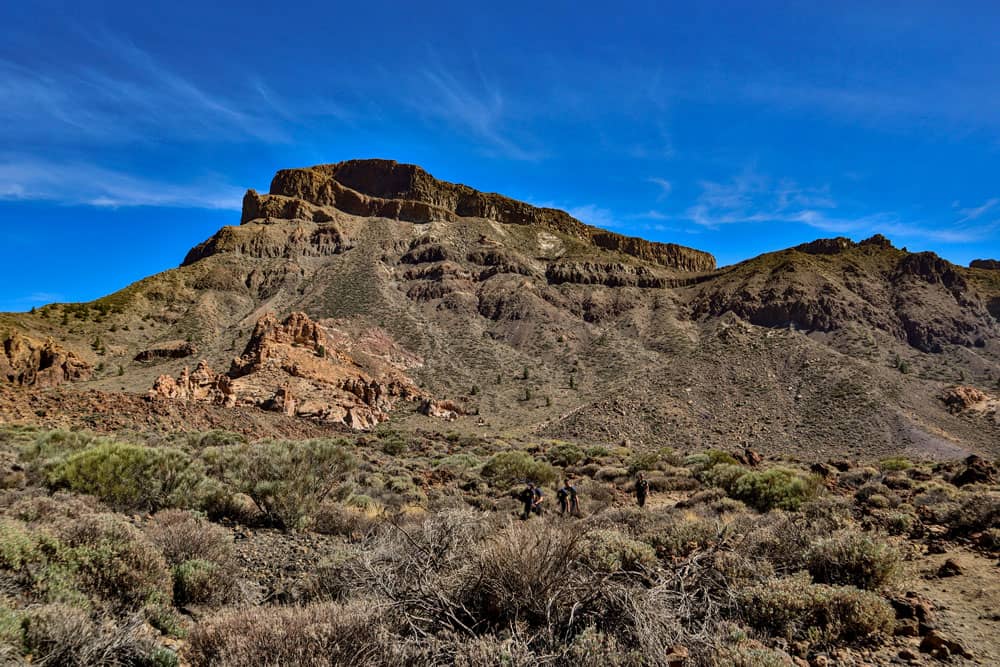
under the rock face - Guajara 2
I have already done this tour several times and also from the Parador there are several possibilities to reach the third highest elevation of the island. One way is quite long, but the ascent is moderate. Another way is identical from the saddle above the Ucanca valley with the way back from the summit towards Villaflor. And then there is the third, shortest and steepest path just before the impressive rock face.
hiking path on the backside of the rock face to the ridge - Guajara 2
Since I already described the way from the summit to the Ucanca saddle here, I chose the short steep ascent for the Guajara 2 tour. But the way back runs around the whole front mountain and resembles a moderate walk compared to the ascent. With the Guajara Tour and the Guajara 2 Tour you can compare all possibilities of the ascent to the Guajara and choose the best combination for you.
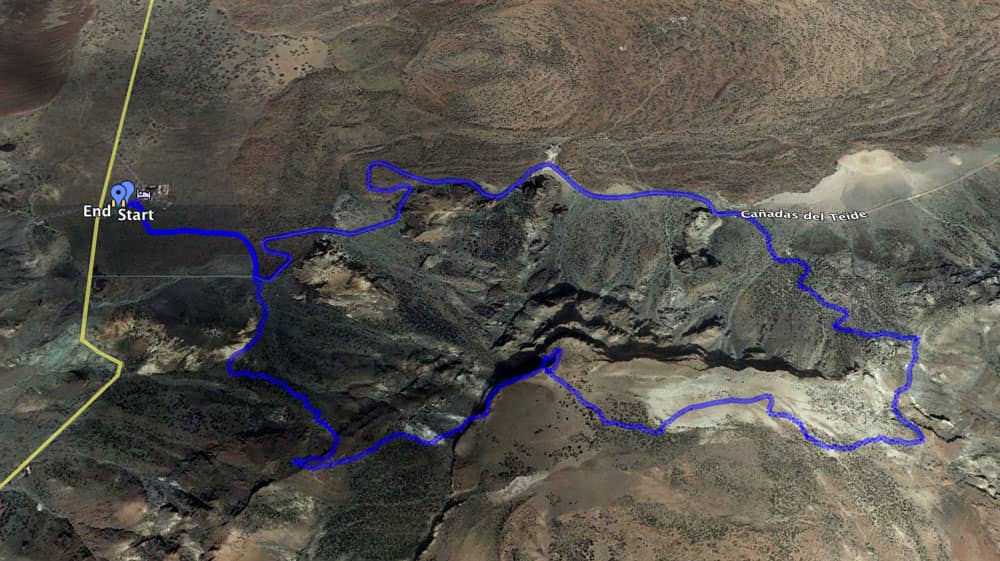
Track circular Guajara 2 from the Parador Nacional
General information on the Guajara 2 Circular Hike
Starting point and approach
Starting point is the parking lot in front of the Parador Nacional de las Cañadas. Coordinates: 28.223801, -16.627745. If everything is occupied there, you can also park on the opposite side on the small parking lot at the Mirador de la Ruleta (2151 meters altitude).
Access route at the Parador Nacional - Guajara 2
Arrival by car
You can drive on the access roads from all sides of the island to the Teide National Park. The Parador Nacional de la Cañadas and the Mirador de la Ruleta as well as the Roques de García are signposted. The parking spaces are located at the TF-21. Coordinates: 28.224095, -16.626830.
Arrival by bus
The Titsa bus lines number 342 and 348 stop at the Parador. You can find the exact timetables on the Titsa homepage.
Time
Article summary and large selection of GPS hiking tracks
Sign up for my newsletter now and get exclusive access to my collected GPS tracks as well as all the brief information about my articles.
Sign up nowI don’t like to give general time information for hiking tours, because the times are very individual. We needed for the last tour with a bigger group and an extensive summit rest a little less than 5 hours time.

elevation profile circular tour Guajara 2
Difference in altitude and distance
The difference in altitude is about 600 and 720 meters gross. This is far less than the ascent from the other side, where you have to reckon with approx. 1,180 metres of altitude difference. The distance is a little less than 11 kilometres.
Requirement
The ascent described here is quite steep, demanding and connected with a bit of scrambling. Sure-footedness and a head for heights are absolute prerequisites. The descent, on which you can also climb, is a comfortable hike on good hiking trails. And the ascent and descent on this path is possible for everyone with a little physical condition. The ascent described here can also be varied. If you don’t want to climb up on this partly very narrow and partly slippery path in front of the massif, you can choose the ascent over the Ucanca saddle and the back of the mountain.
Refreshment
There is a restaurant only at the starting point, the Parador Nacional de la Cañadas. Therefore, take enough water and food with you.
all 5 tracks leading to the summit of the Guajara
Variants
The tour Guajara 2 can be optimally combined with the already described ascent and descent possibilities to the Guajara. From the 5 ascent and descent options described in Guajara and Guajara 2, you can choose the best option for you and your needs.
Guajara
Guajara 2 – Circular trail over the summit of the third highest mountain of Tenerife
Section Parador Nacional to first mountain ridge
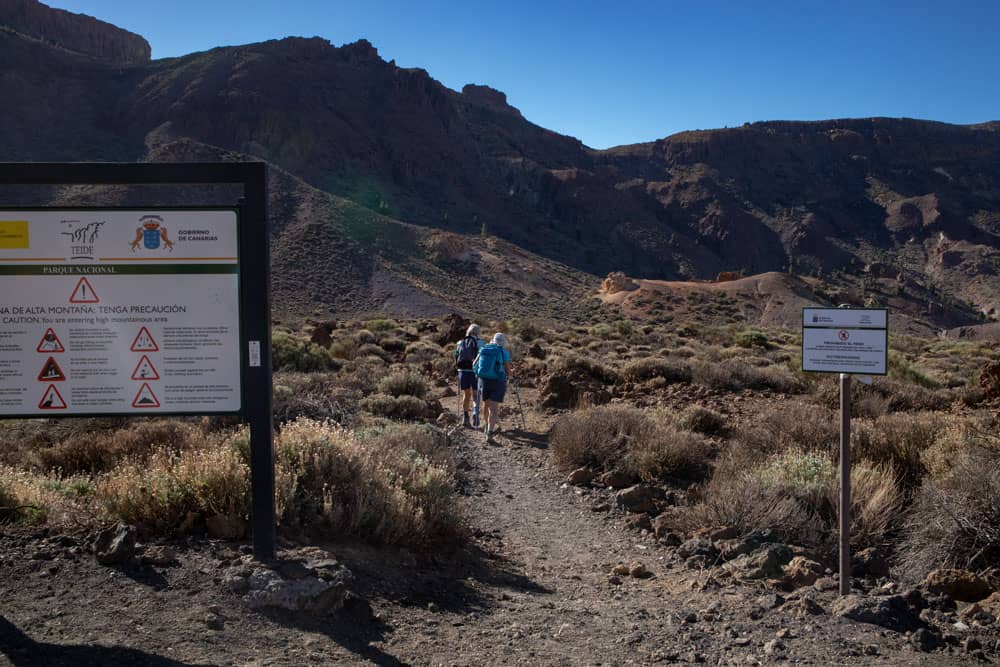
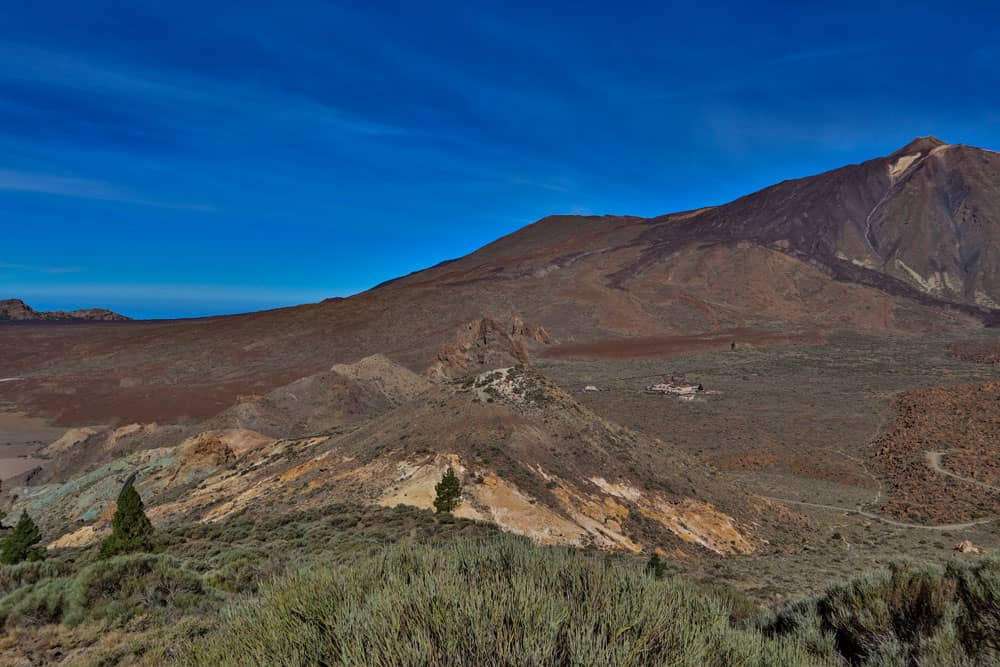
Today’s hike to the Guajara starts directly at the Parador Nacional de la Cañadas. This area is also signposted as Montaña Blanca. First you follow the small path that starts just behind the car park. This is the hiking route no. 4, which runs slightly downhill towards the Guajara in an easterly direction. You are at an altitude of 2150 metres and already have the impressive massif with the steeply rising rock face of the Guajara right in front of your eyes. The massive summit massif up there in lofty height looks quite impressive.
Hikers on their way up - Guajara 2
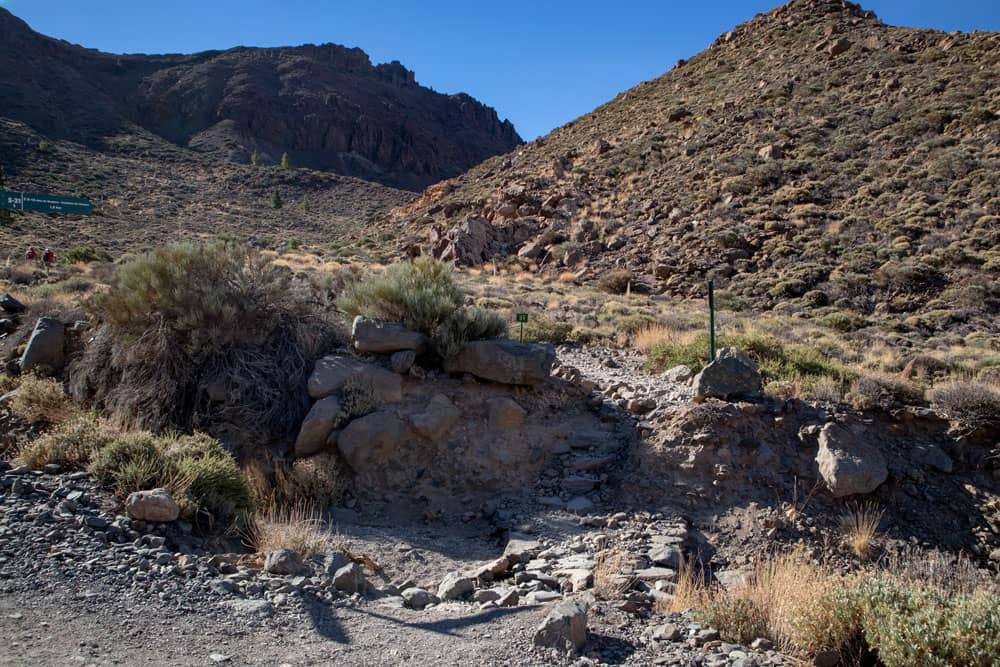
After a short quarter of an hour hike, you reach a wide driveway that is also called Cañadas del Teide. You cross this one and go straight ahead with the path 31 up to the Degollada de Ucanca. This path takes you up the mountain in serpentines from time to time and then straight again over stones and through bushes. In May and June the area is particularly beautiful to look at, as the large red tajinas (endemic plants to the Canary Islands) shine from all corners. You will quickly leave the Parador and the surrounding caldera far below you. You are on a first mountain ridge from where you can already enjoy wonderful views of Teide and the Teide National Park.
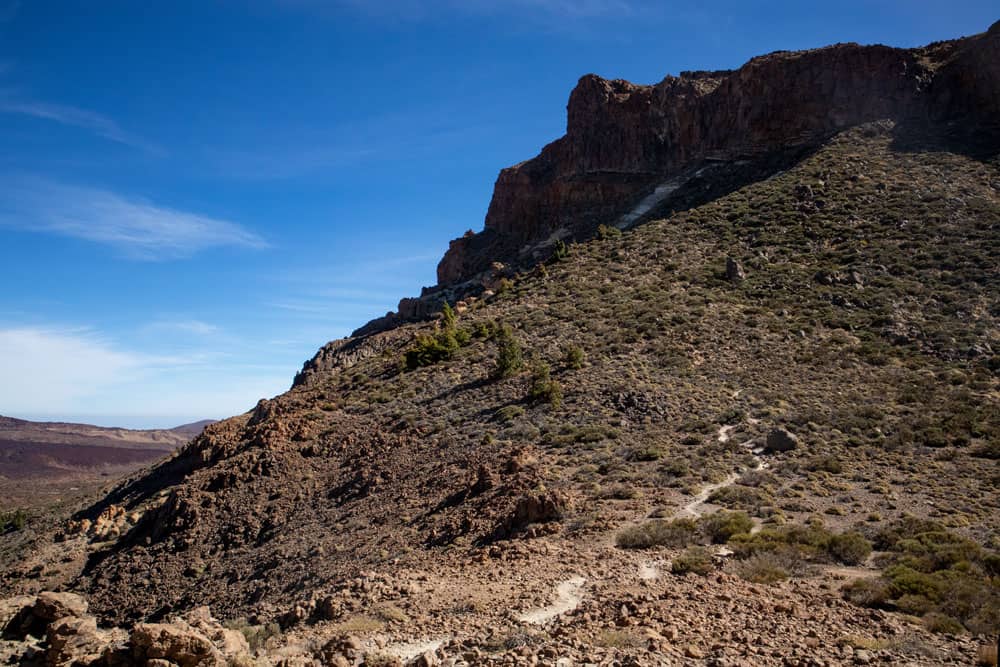
Ascent path - guajara 2
Route section first mountain ridge to fork (Alto Guajara)
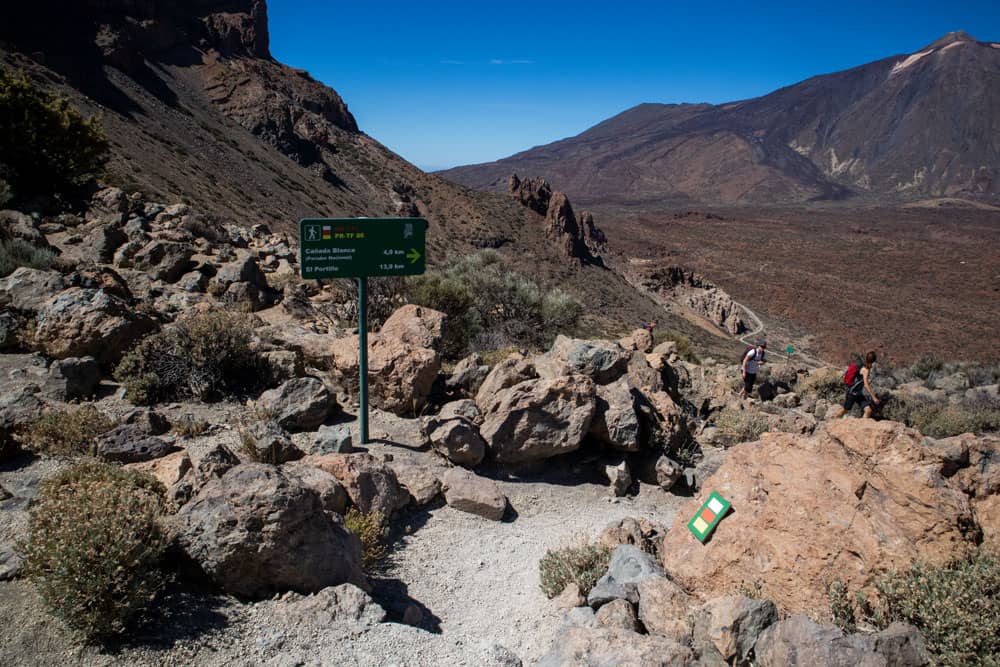
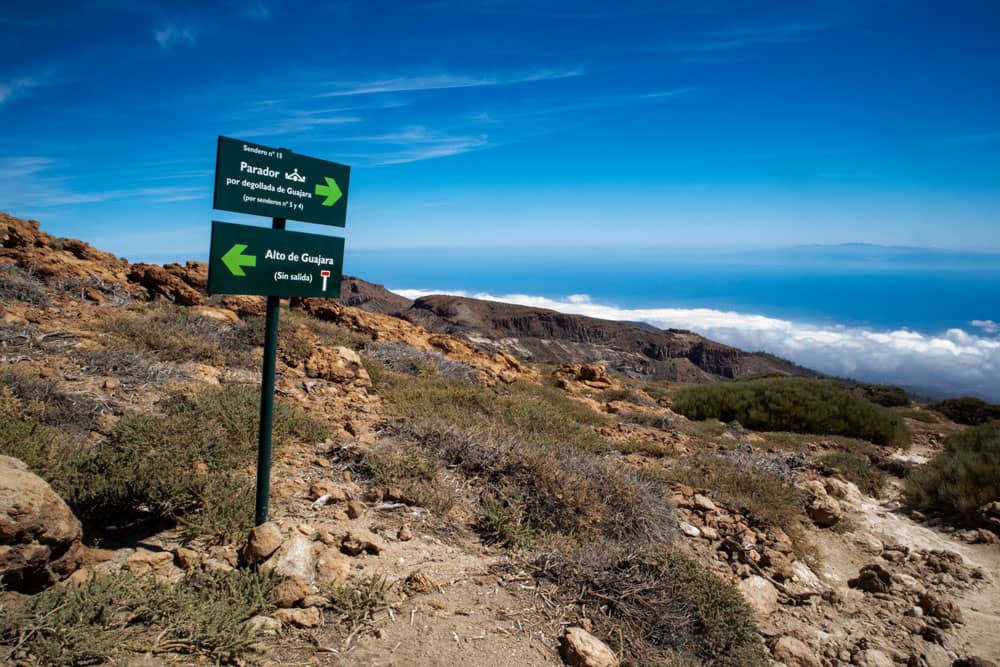
The next section of the route takes you in small serpentines up this first mountain ridge further steeply. The views of the wide caldera below you are fantastic. Then it goes a whole time around right along a mountain ridge. Then a small ascent follows. And then you come to another ridge. From here you have a first view of the other side of the mountains framing the caldera. And here you will also find a signposting. To the right you continue on the ridge towards Sombrero de Chasna. Straight ahead is the descent into Valle Ucanca, which is part of my Guajara description part 1. But you go around to the left towards Alto de Guajara.
Article summary and large selection of GPS hiking tracks
Sign up for my newsletter now and get exclusive access to my collected GPS tracks as well as all the brief information about my articles.
Sign up now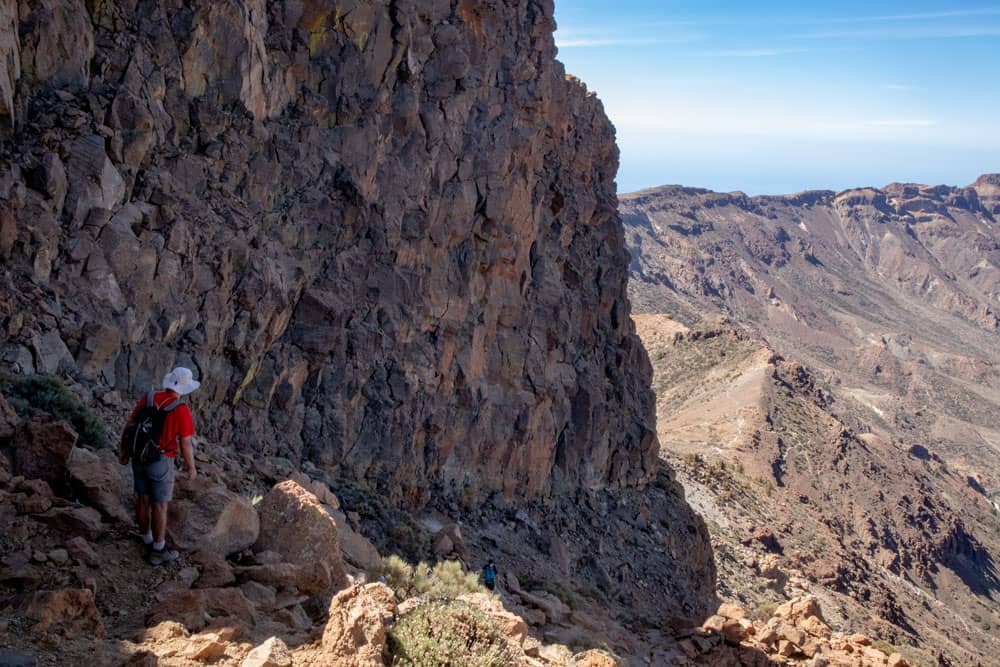
under the rock face - Guajara 2
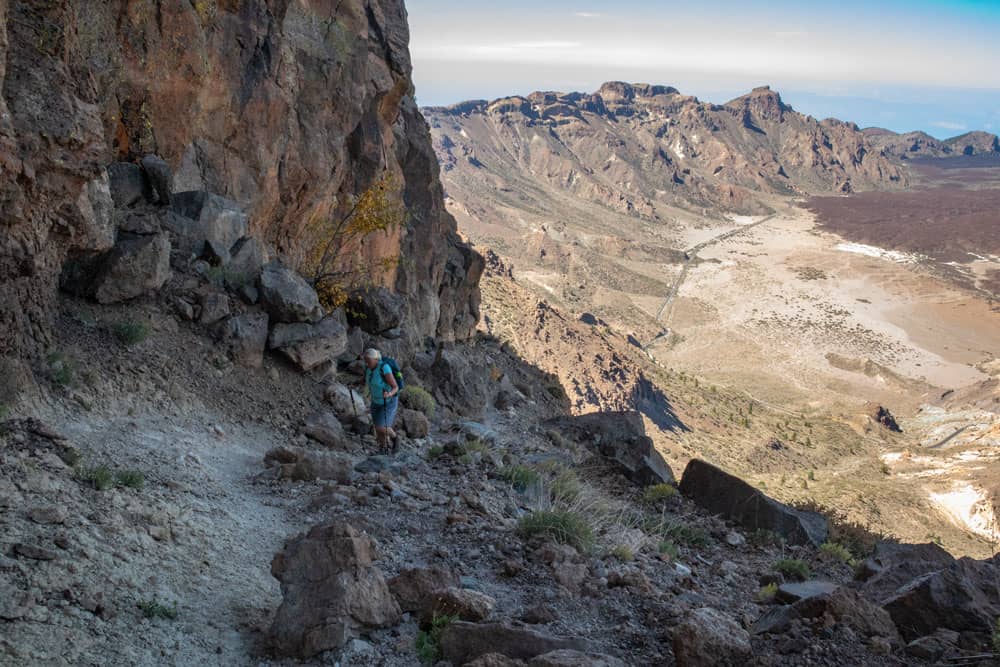
For some time you keep straight on the path, which is now partly covered with bushes. Then steep serpentines start again. After a short time you reach a small fork. To the right the signpost goes to the Guajara (Alto de Guajara). You can follow this path. I described it on my Guajara 1 tour as a return trip. Here I would like to introduce the somewhat arduous and steep ascent at the front side of the Guajara. You should really only choose this path if you are free of vertigo and sure-footed.
shortly before the summit
Section fork (Alto Guajara) to summit Guajara
After the small fork, where you keep left, the path becomes narrower and more impassable. Partially through bushes and over rocks it goes steeply uphill. A little “climbing” is already there. After some time you cross a wide white scree field. Here the way is quite arduous because of the loose stones and left beside you it goes steeply downhill. So be very careful. Slowly you reach the upper steeply rising rock massif of Guajara. The path leads you directly up to the rock face.
View to the Caldera - Guajara 2
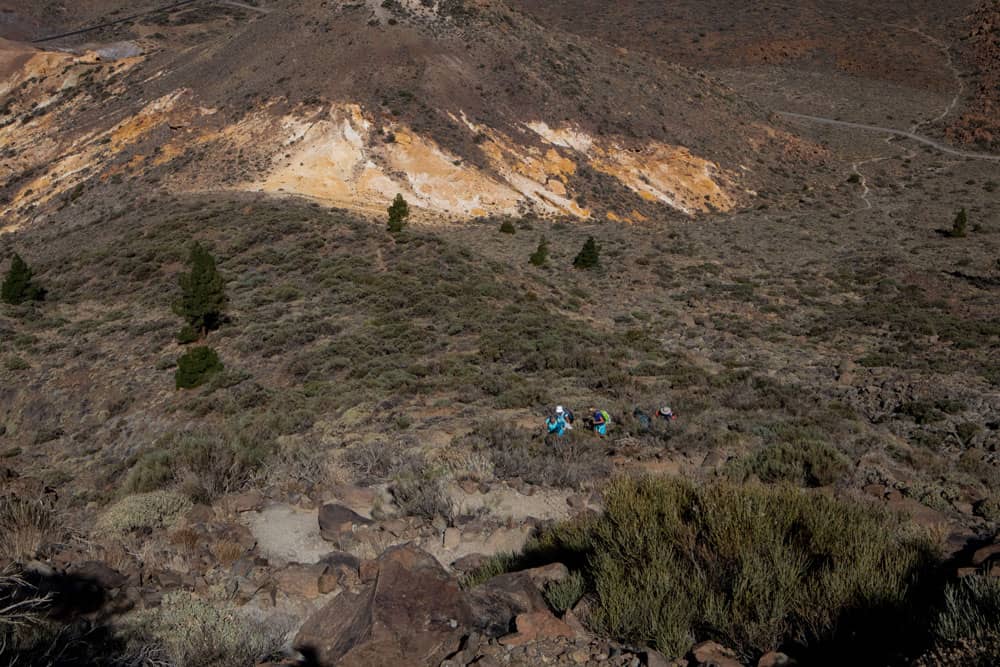
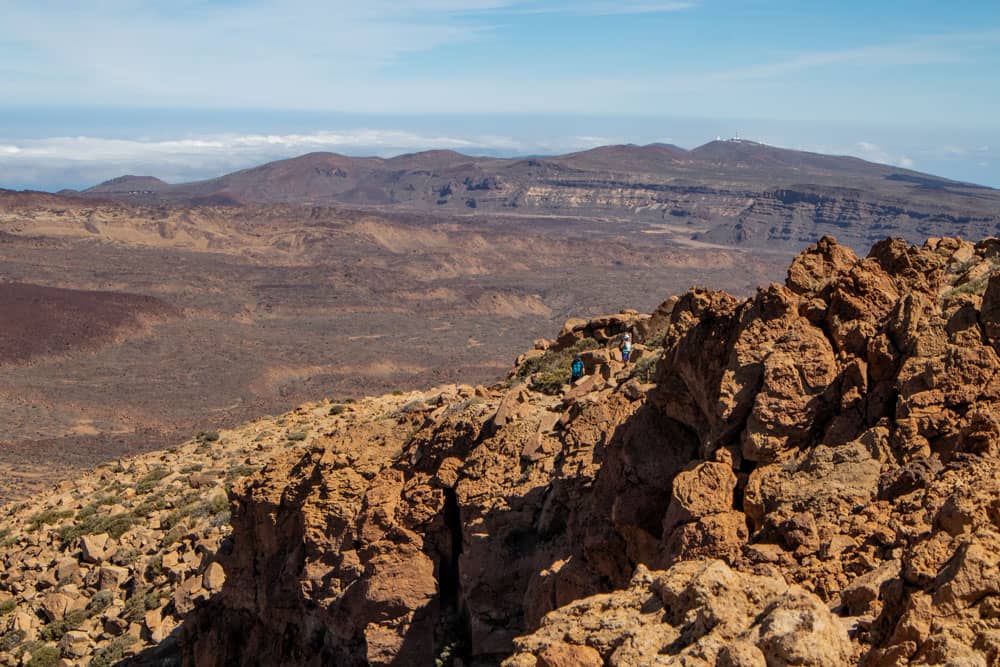
After some time you cross another scree field. From time to time you have to find your way between big rocks that block the way or climb over them. So it goes along the rock face for quite a while. When you have walked along the entire rock face of Guajara, you will reach a field with many large rocks. Once again you have to find the way between and over these rocks. In between you go over a small rock plateau and then steeply uphill. Then you have made it and are on the Guajara with its 2718 meters of altitude. About the old observatory and the fantastic view from up here I had already reported here.
View to the Parador Nacional and Mount Teide
Summit Guajara to Degollada de Guajara
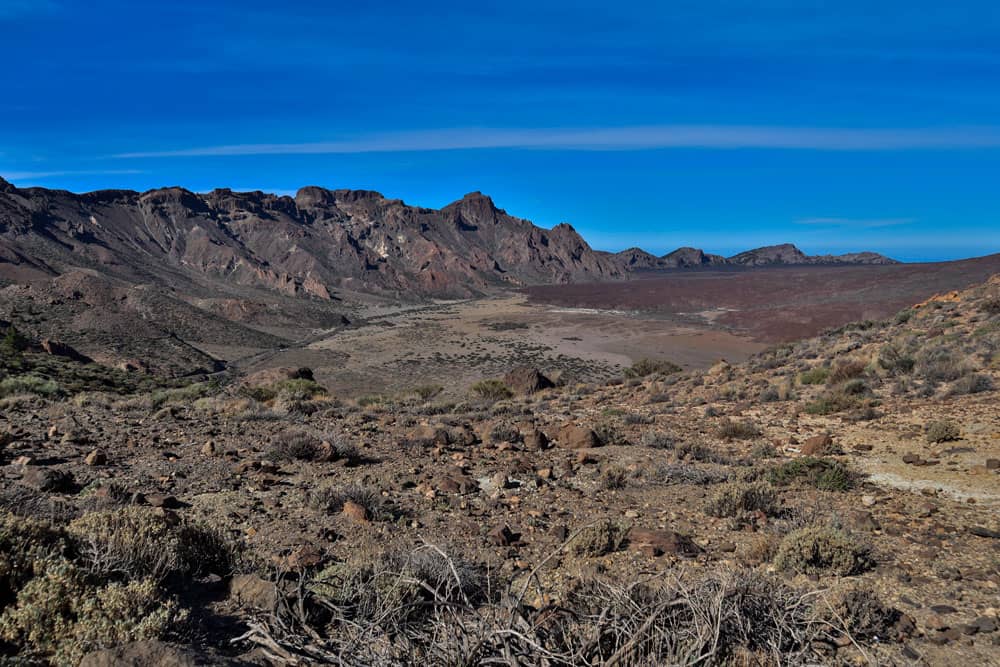
If you have made a sufficient rest at the summit and hopefully enjoyed the more than impressive view in clear weather, you will continue on the path that leads you past the stone walls. You follow the path downhill for a short time on the back of the Guajara. Then you come to a branch-off path. To the right, the descent via Degollada de Ucanca is possible with path no. 15 (described in the first Guajara article). Continue straight ahead downhill. The good hiking trail behind the Guajara peak takes you slowly downhill. It is longer than the steep climb. On the other hand you can enjoy wonderful views of the neighbouring island Gran Canaria and direction Villaflor as well as over the back of the mountains surrounding the caldera.
descent path to the Parador with view to the Teide - Guajara 2
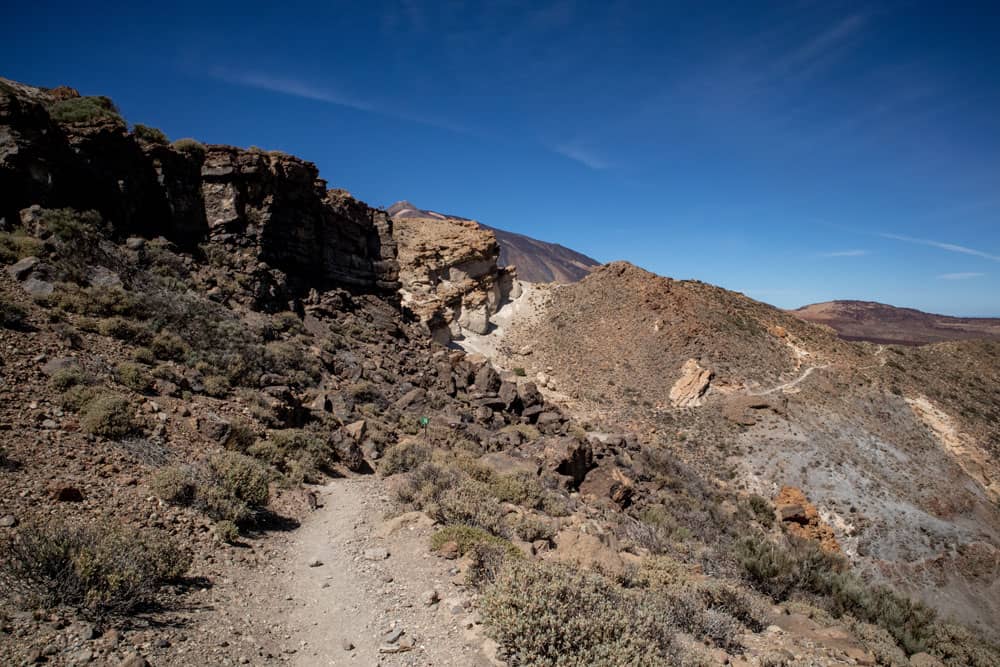
After a while, you’ll come to a crossing main road. To the right you take hiking trail no. 15 to Vilaflor (see Guajara description 1). Keep left towards Degollada de Guajara. Until then you go comfortably downhill on a good hiking trail and have the Guajara to your left. Then you reach the Degollada de Guajara and can once again enjoy a fantastic view in all directions. On the right, a path leads over the mountain ridge. You continue straight ahead downhill.
Hiking path on the backside of the mountain - Guajara 2
Section Degollada de Guajara to the Parador Nacional
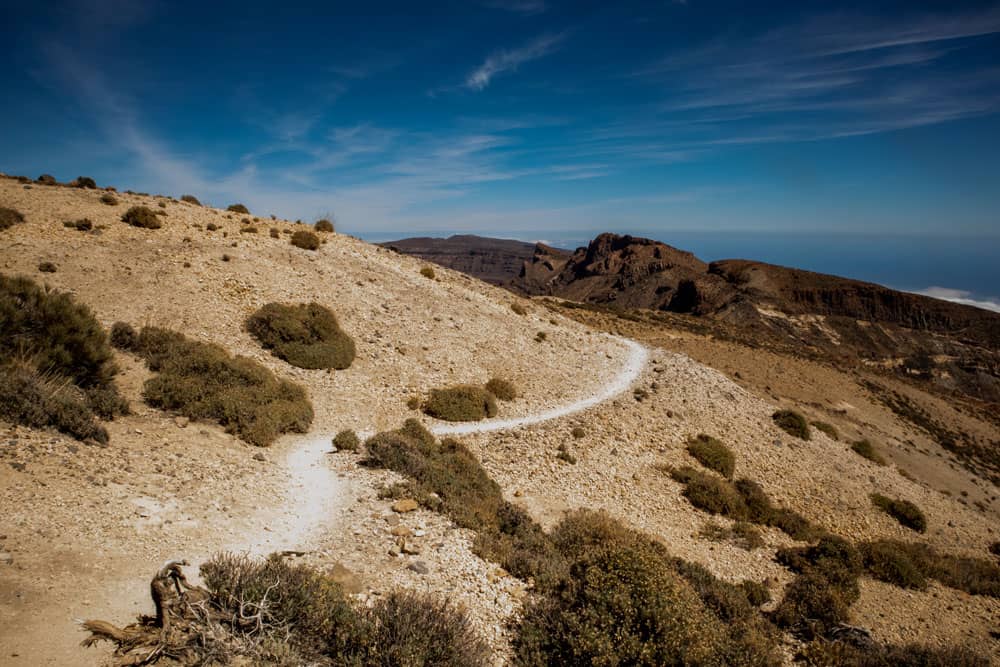
From Degollada de Guajara we descend through the slope. Already below you can see the wide road you crossed during the ascent. When you have finished the descent, you can turn left into the wide road and go back in the direction of Parador Nacional. A 3.7 km hike awaits you. You can, however, take the wide path that runs below the Guajara.
View to Gran Canaria from the hight - Guajara 2
The path takes you up and down around the Guajara. You have beautiful views of the Parador and the massif of the Guajara now far above you again. This route, which also passes a former film set, is part of the circular walk through the Caldera. When you have reached the point where you crossed the road on the way there, the path on the right leads you back to the Parador Nacional de la Cañadas.
descent path the Ucanca ridge - Guajara 2
And finally
I hope you enjoyed this circular walk to the summit of Guajara (Guajara 2). Now you know a total of 5 hiking trails that all lead to the summit of Guajara and can choose the best combination for you. I wish you a lot of fun while hiking!
Dagmar von Siebeninseln
Thank you for reading!
If you've found my hiking guides on SiebenInseln helpful for your Canary Islands adventures, please consider leaving a small tip. Your support is greatly appreciated and helps cover the costs of maintaining this blog.
Thank you for your support!
SSL secured
Comments
There are no comments for this post yet.
Post the first comment