Long-Distance Trail Hike GR-131 Camino de la Virgen
On the small Canary Island of El Hierro, there is the long-distance trail hike GR-131 Camino de la Virgen. It runs from the coast in the northeast of the island across the entire Cumbre to the southwest of El Hierro. You can start either in Tamaduste (Variant a) or in Puerto de la Estaca (Variant b). Both variants are roughly the same length and signposted as GR-131 Camino de la Virgen. The trail is named after the patron saint of the island, the Virgen de los Reyes. Every 4 years, on the first Saturday in July, the statue is carried approximately 29 kilometers along the Camino de la Virgen from the chapel Santuario Nuestra Señora de los Reyes to the capital of the island, Valverde.
Map
El Hierro – Meseta de Nisdafe – GR-131 – Camino de la Virgen
Originally, the GR-131 Camino de la Virgen ends down at the coast at the Faro de Orchilla. However, if you go down there, you have to return on the same path. We walked the Camino de la Virgen for almost 36 kilometers from Puerto de la Estaca to the chapel in one day. We stopped there as it was already getting dark, and I had been down at the Faro de Orchilla at earlier times. However, the 4-kilometer continuation from the chapel down to the Faro de Orchilla is very well signposted, so you can easily extend the route described here by me.
Hiking on the GR-131 Camino de la Virgen
Long-Distance Trail GR-131 Camino de la Virgen as part of a circular hike around El Hierro
In March 2024, we integrated the Camino de la Virgen long-distance trail into a circular tour around the island. Here, I describe the first part from Puerto de la Estaca on the Camino de la Virgin to the chapel Santuario Nuestra Señora de los Reyes. On the second day, we hiked from there via Sabinosa to La Frontera. And on the third day, we returned through the steep cliffs via the Camino de San Salvador to the plateau. From there, we descended over San Andrés on the coastal side back to Puerto de la Estaca. You will soon be able to read about these two hikes on Siebeninseln.
Part 1: GR-131 Camino de la Virgen (red)
Part 2: Chapel to La Frontera via Sabinosa (green)
Part 3: La Frontera - Puerto de la Estaca
But first, here’s the 1st part of the circular hike El Hierro – GR-131 Camino de la Virgen
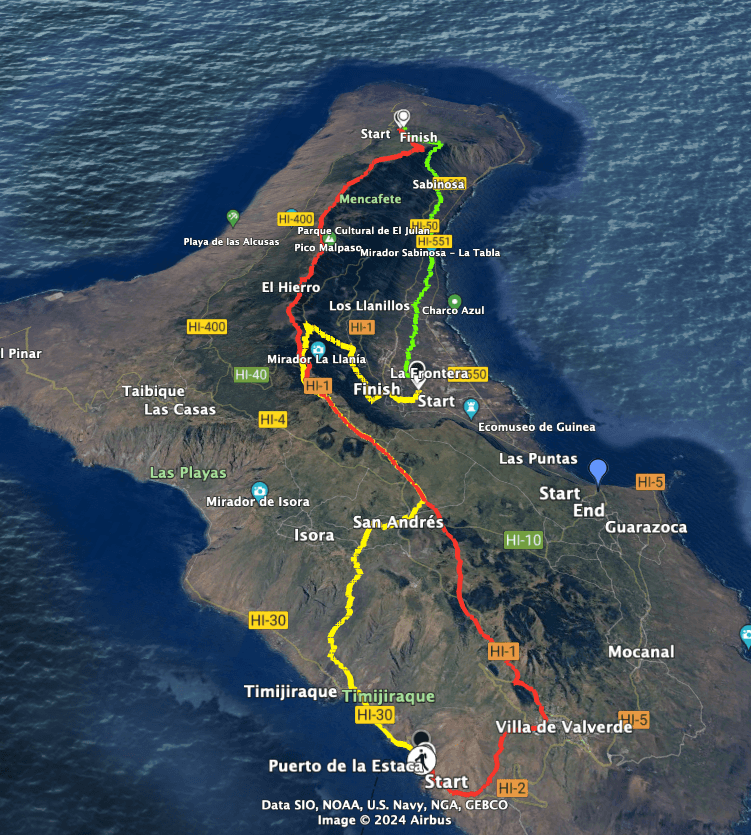
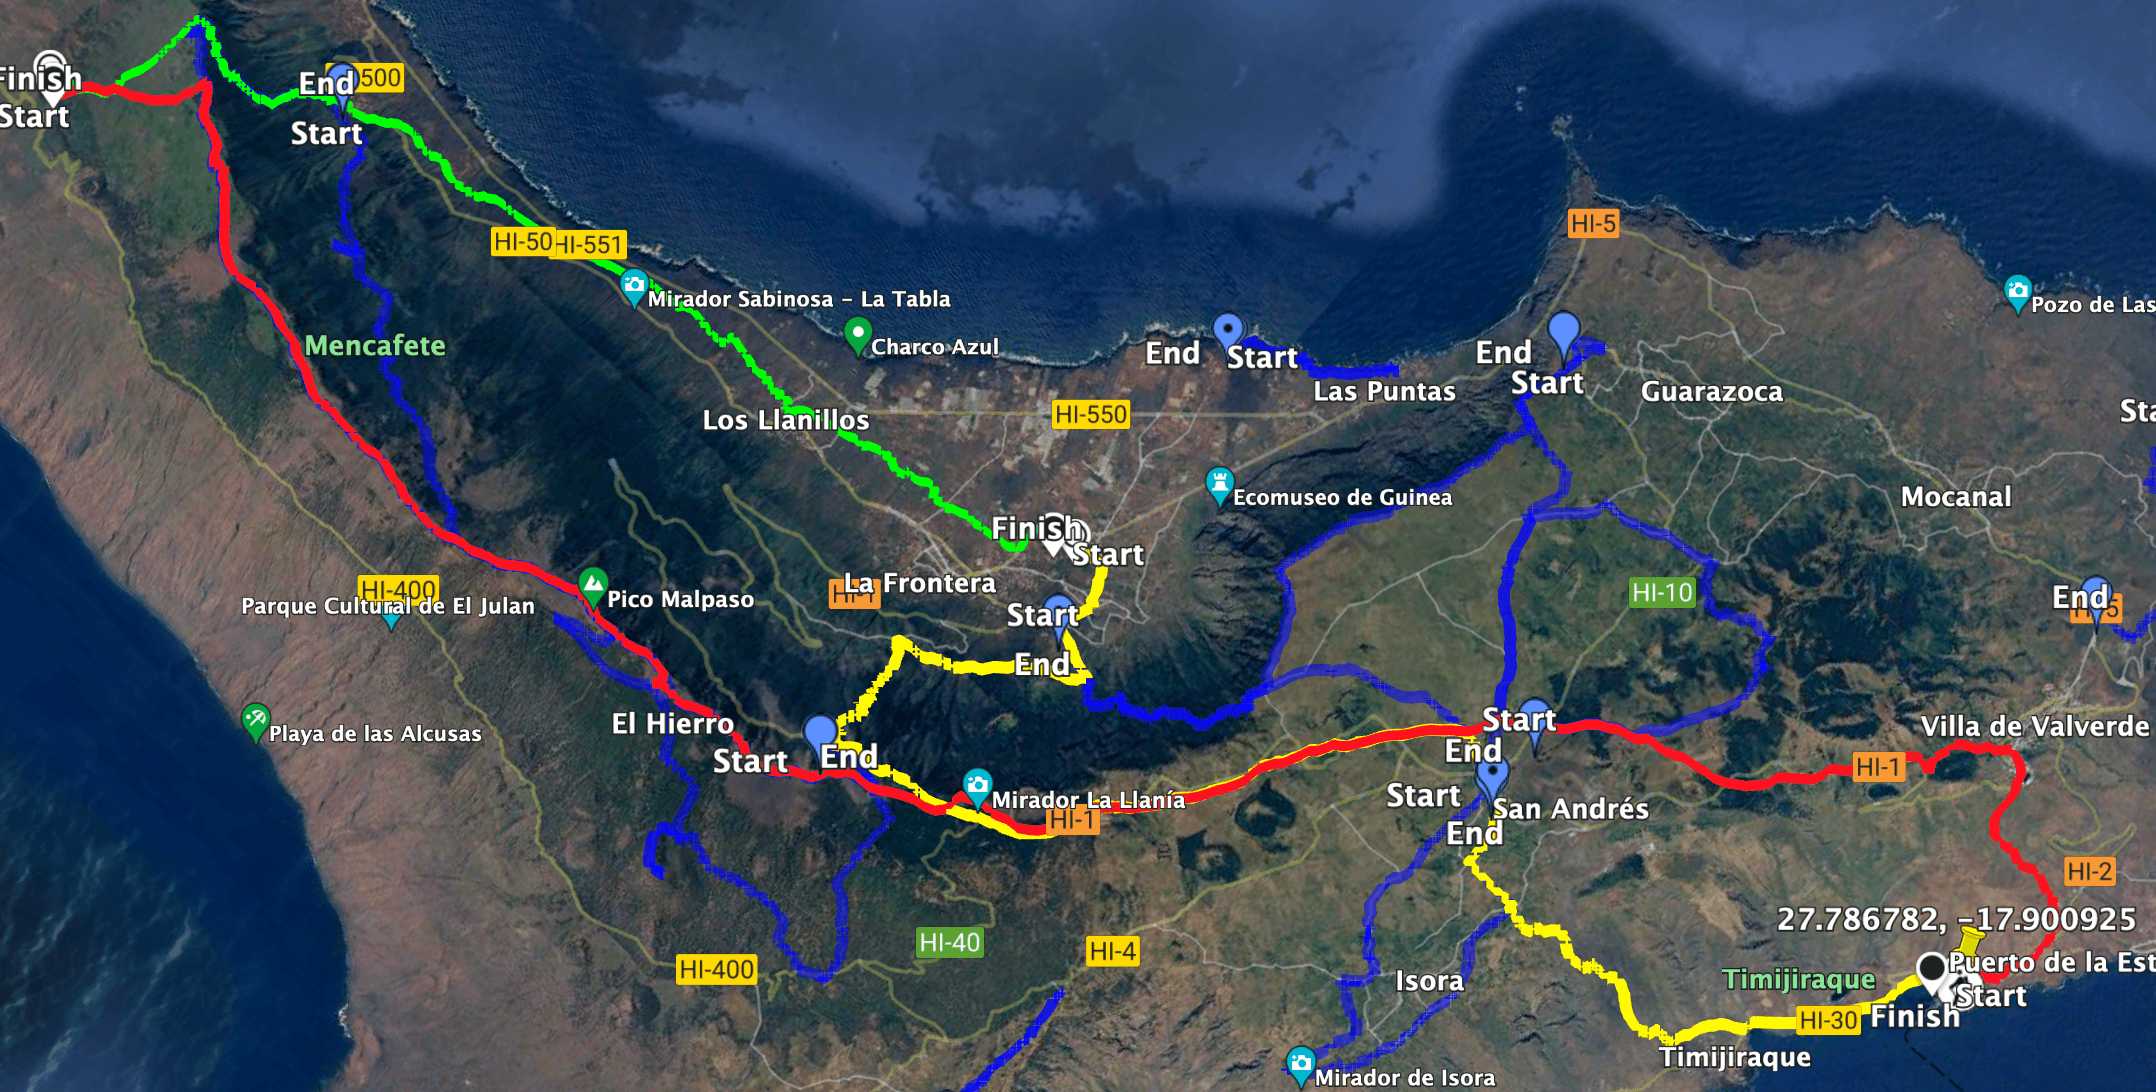
Track of the hike GR-131 El Hierro Camino de la Virgin from Puerto de Estaca to Santuario Nuestra Señora de los Reyes
General information about hike GR-131 Camino de la Virgen
Starting point and arrival
You start your hike at the port of El Hierro in Puerto de la Estaca.
Arrival by car
You can reach Puerto de la Estaca by ferry from Los Christianos (Tenerife) or via the island roads HI-2 and HI-30.
I prefer not to give time estimates as times can vary greatly depending on individual factors. For the GR-131 Camino de la Virgen from Puerto de la Estaca to the chapel de Nuestra Señora de los Reyes, we needed a little over 12 hours with heavy backpacks and breaks.
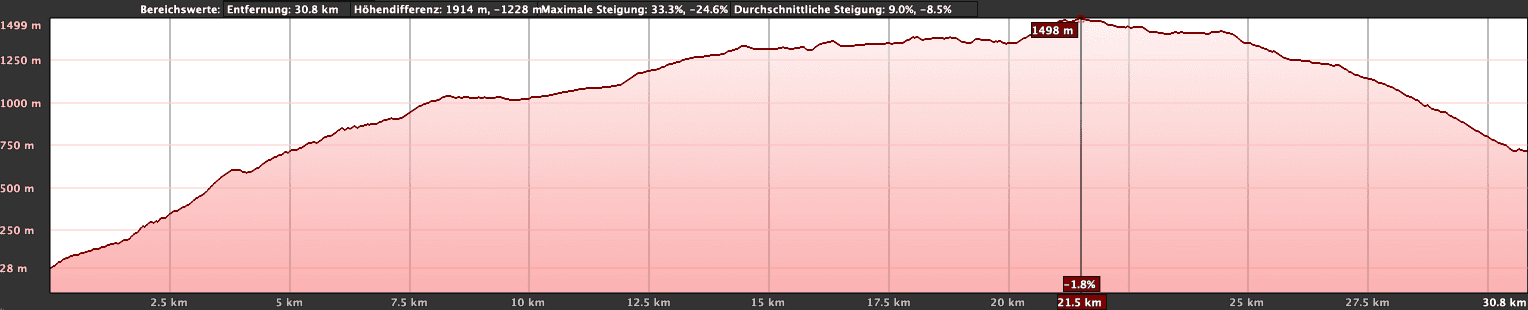
Elevation profile of the hike GR-131 El Hierro Camino de la Virgen from Puerto de Estaca to Santuario Nuestra Señora de los Reyes
Elevation difference and distance
Article summary and large selection of GPS hiking tracks
Sign up for my newsletter now and get exclusive access to my collected GPS tracks as well as all the brief information about my articles.
The elevation difference is just under 1700 meters, and the distance was just under 36 kilometers. If you continue to Faro de Orchilla, an additional 4 kilometers are added.
Requirements
The hike follows the well-known long-distance trail GR-131, and the path is consistently well-maintained and safe. However, a very good level of fitness is essential for this long distance. Even if you should divide this section into two or three parts, you will need a good level of fitness as there are quite a few meters of altitude to overcome.
In addition to sun protection and sufficient water, you should also plan your necessary equipment very carefully. I would only take the essentials. If you have not organized your return journey by taxi or pickup from friends, you will also need to think about bringing a sleeping bag, a mat, and a flashlight. On the night we slept outside at the end of the trail, it got quite cold. Therefore, depending on the season and weather conditions, you will also need appropriate clothing. In any case, if you plan to do the hike alone and not organized, you must plan very well in advance. In addition to organizing the items to take with you, the weather is also crucial. Rainfall and storms on the Cumbre can make your journey very difficult. Therefore, please observe the weather closely before the hike.
Refreshments
There are limited opportunities for refreshments at the beginning of the hiking trail in Puerto de la Estaca and on the way in Valverde. If you take a small detour, you also have the opportunity to walk into San Andrés on the GR-131 Camino de la Virgen. However, after that, on the longest and toughest section of the Camino de la Virgen over the Cumbre, there are no more refreshment options. But there are some water sources along the hiking trail where you could refill water, at least in March 2024. However, I cannot say whether these are always available. Therefore, you should definitely bring enough water and provisions.
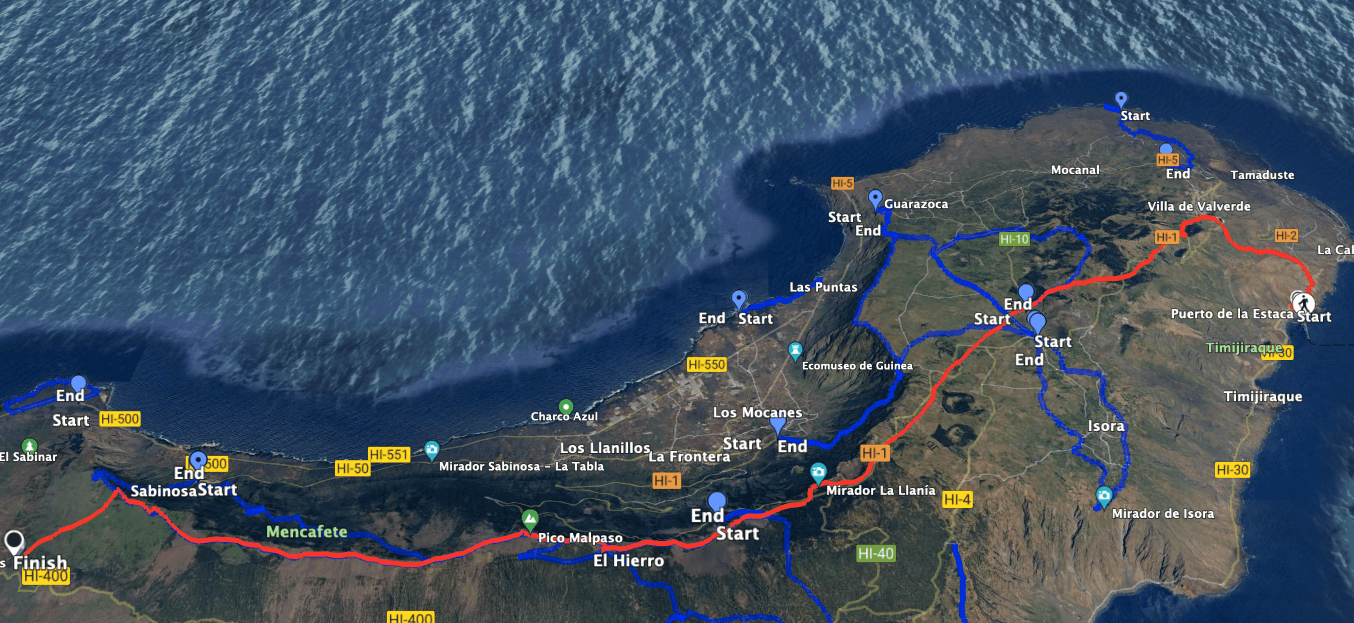
red: GR-131 Camino de la Virgen
blue: other hikes along the route that you can find on SiebenInseln
Variants
As an alternative, you can start in Tamaduste instead of Puerto de la Estaca. You can extend the route by 4 kilometers if you continue down to Faro de Orchilla.
If you want to divide this long hike into several sections, you will find on SiebenInseln some hikes that touch or even run parallel to the GR-131 Camino de la Virgen:
Hiker on the GR-131 Camino de la Virgen hiking trail in Puerto de la Estaca
Hike GR-131 Camino de la Virgen
Section Puerto de la Estaca to Valverde
You start your hike at Puerto de la Estaca. Well-signposted, the hiking trail GR-131 Camino de la Virgen begins at Carretera Puerto Estaca. You first climb steps and then follow the Calle García Escámez. The path, going up the hillside, steeply brings you to the main road HI-2 in a short time. Once at the top, you walk along the road uphill to the right for a while. Eventually, you reach a parking lot with a viewpoint on the right side – Monumento de la Sabina de El Hierro. At this point, the hiking trail begins on the left side, where you leave the road.
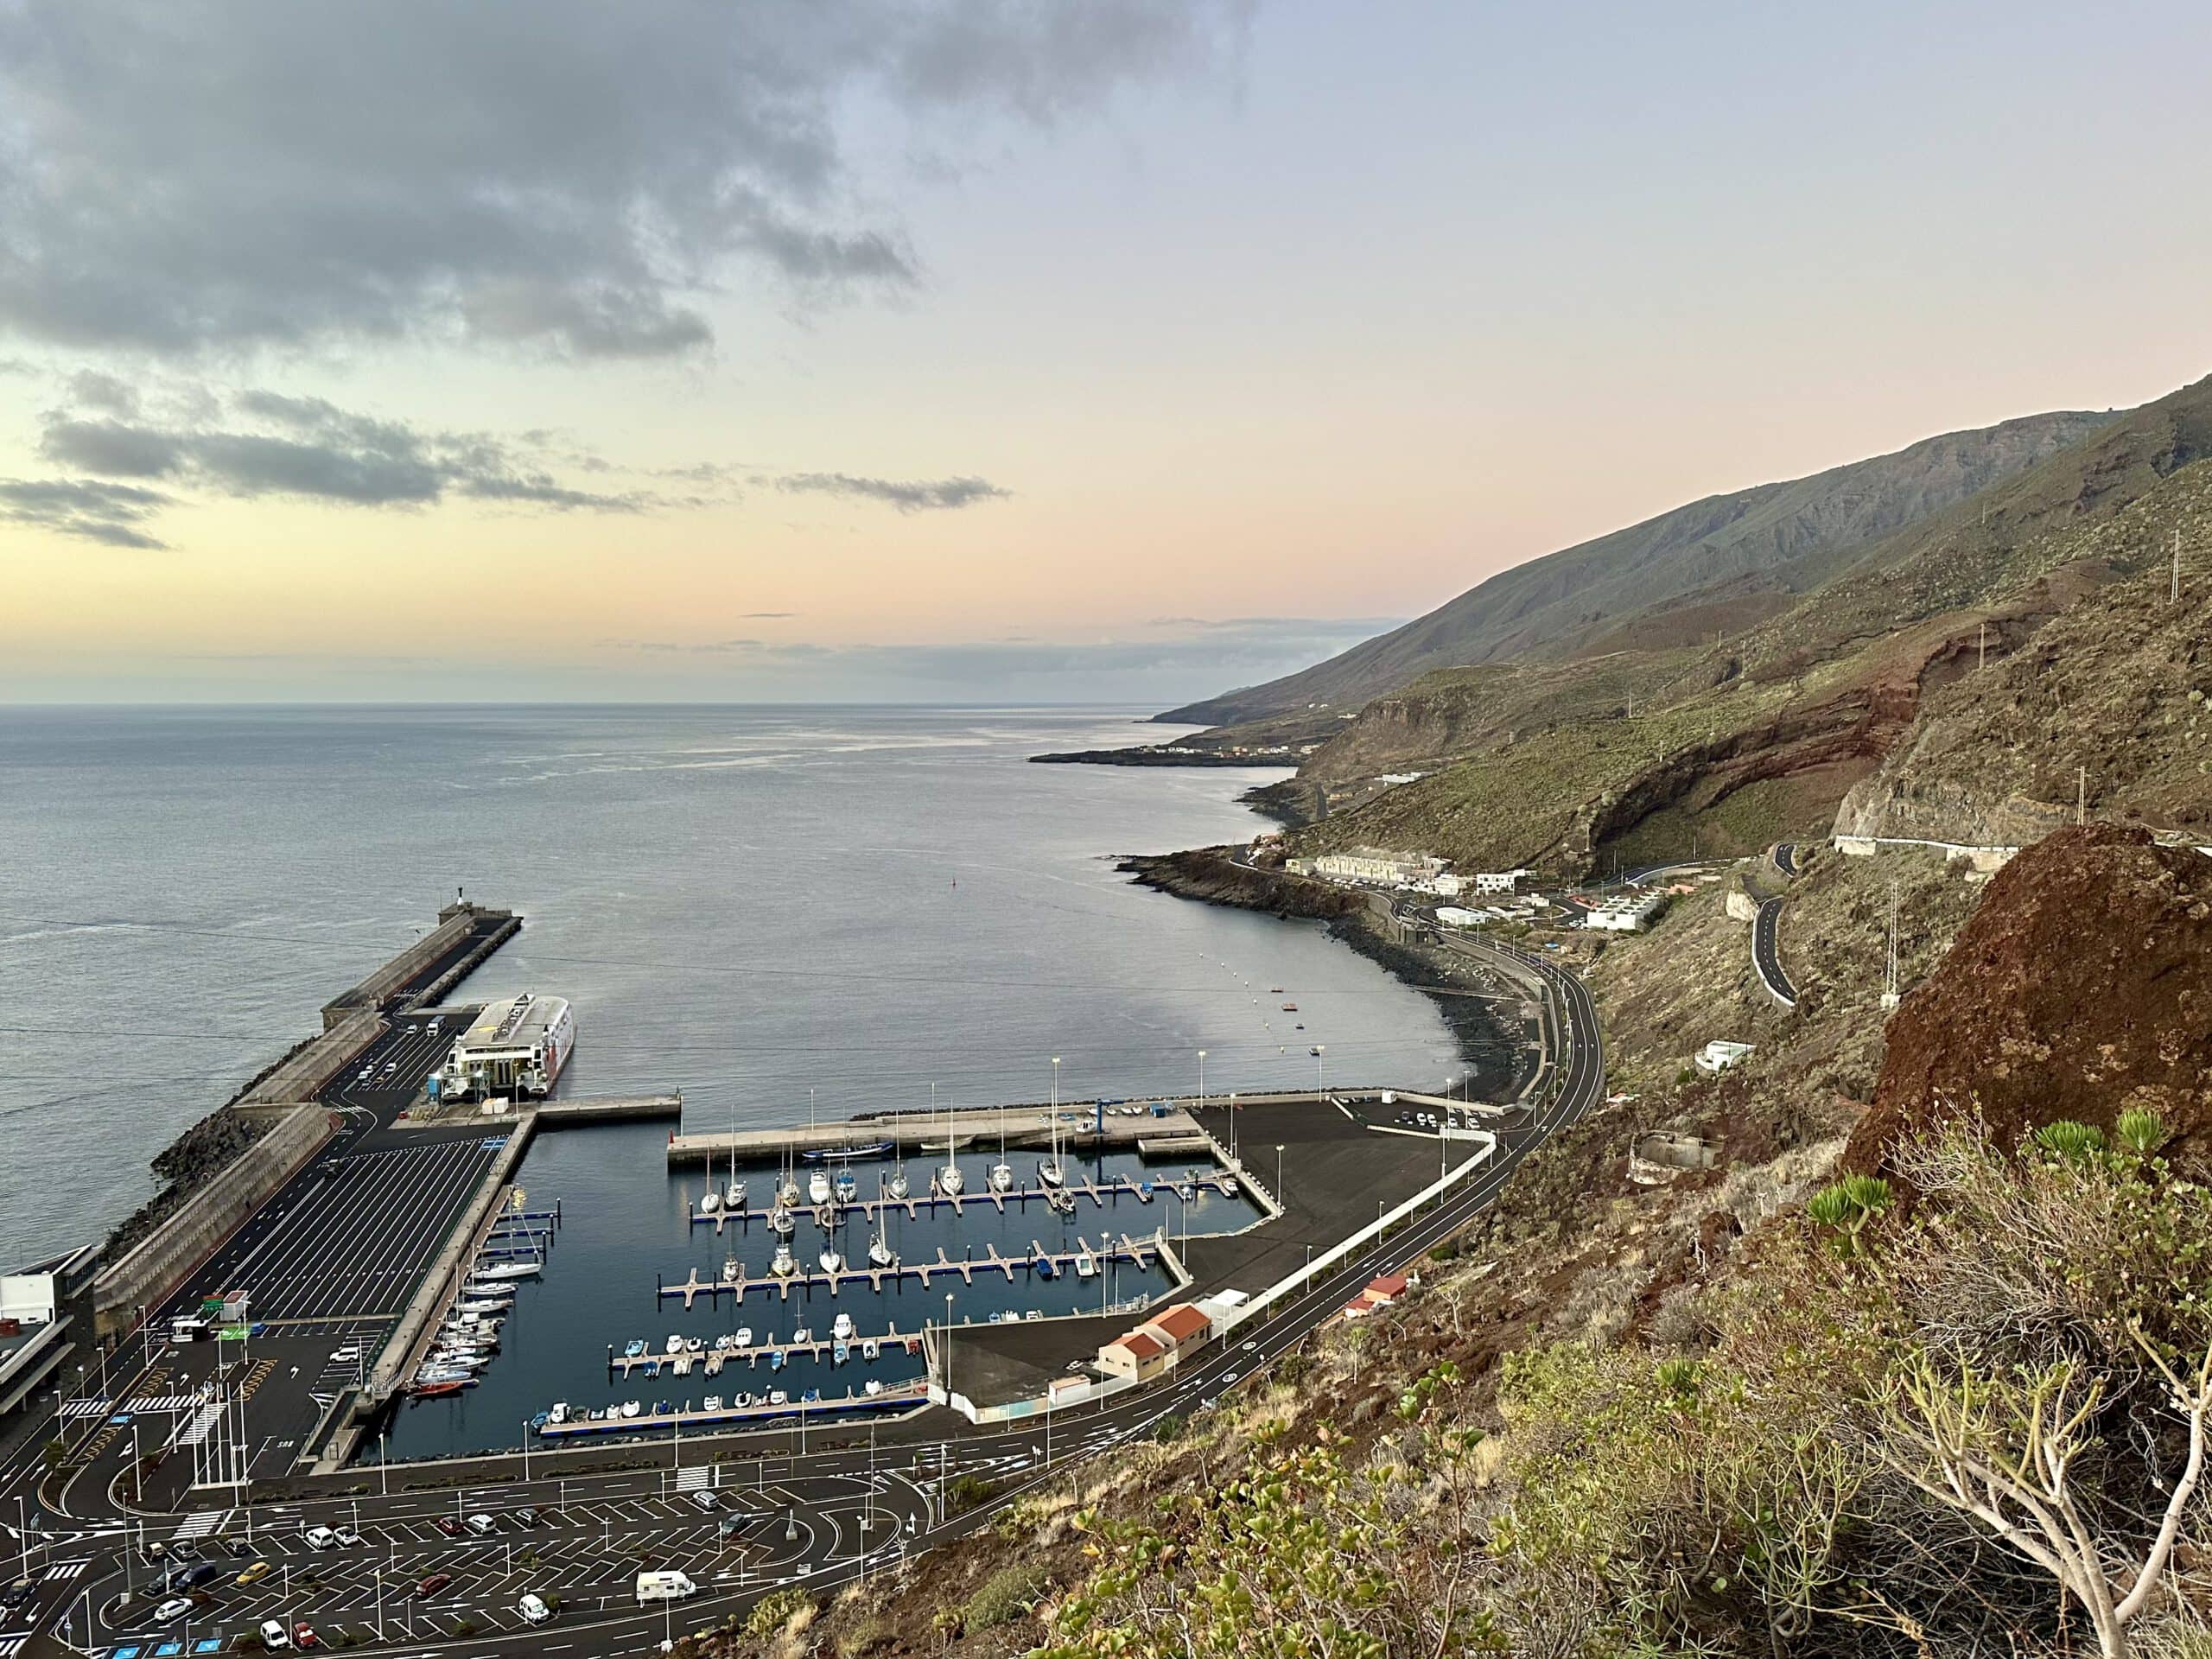
View from the ascent path back to the harbour of Puerto de la Estaca
From here, the hiking trail leads you along the right side of a large mountain. Parts of the trail are paved. It’s uphill. And when you finally reach Valverde after 6 kilometers and about 600 meters of elevation gain, you’ve made a good start. We arrived in Valverde after about 2 hours. There, you cross the HI-1 and follow Calle Azofa signposted on the right towards the city center. I won’t describe the entire route through Valverde, as it is very well marked with green-white hiking signs and the GR-131 signposted. At a major intersection, turn left onto a small street. From here, you continue steeply uphill for a while through small streets.
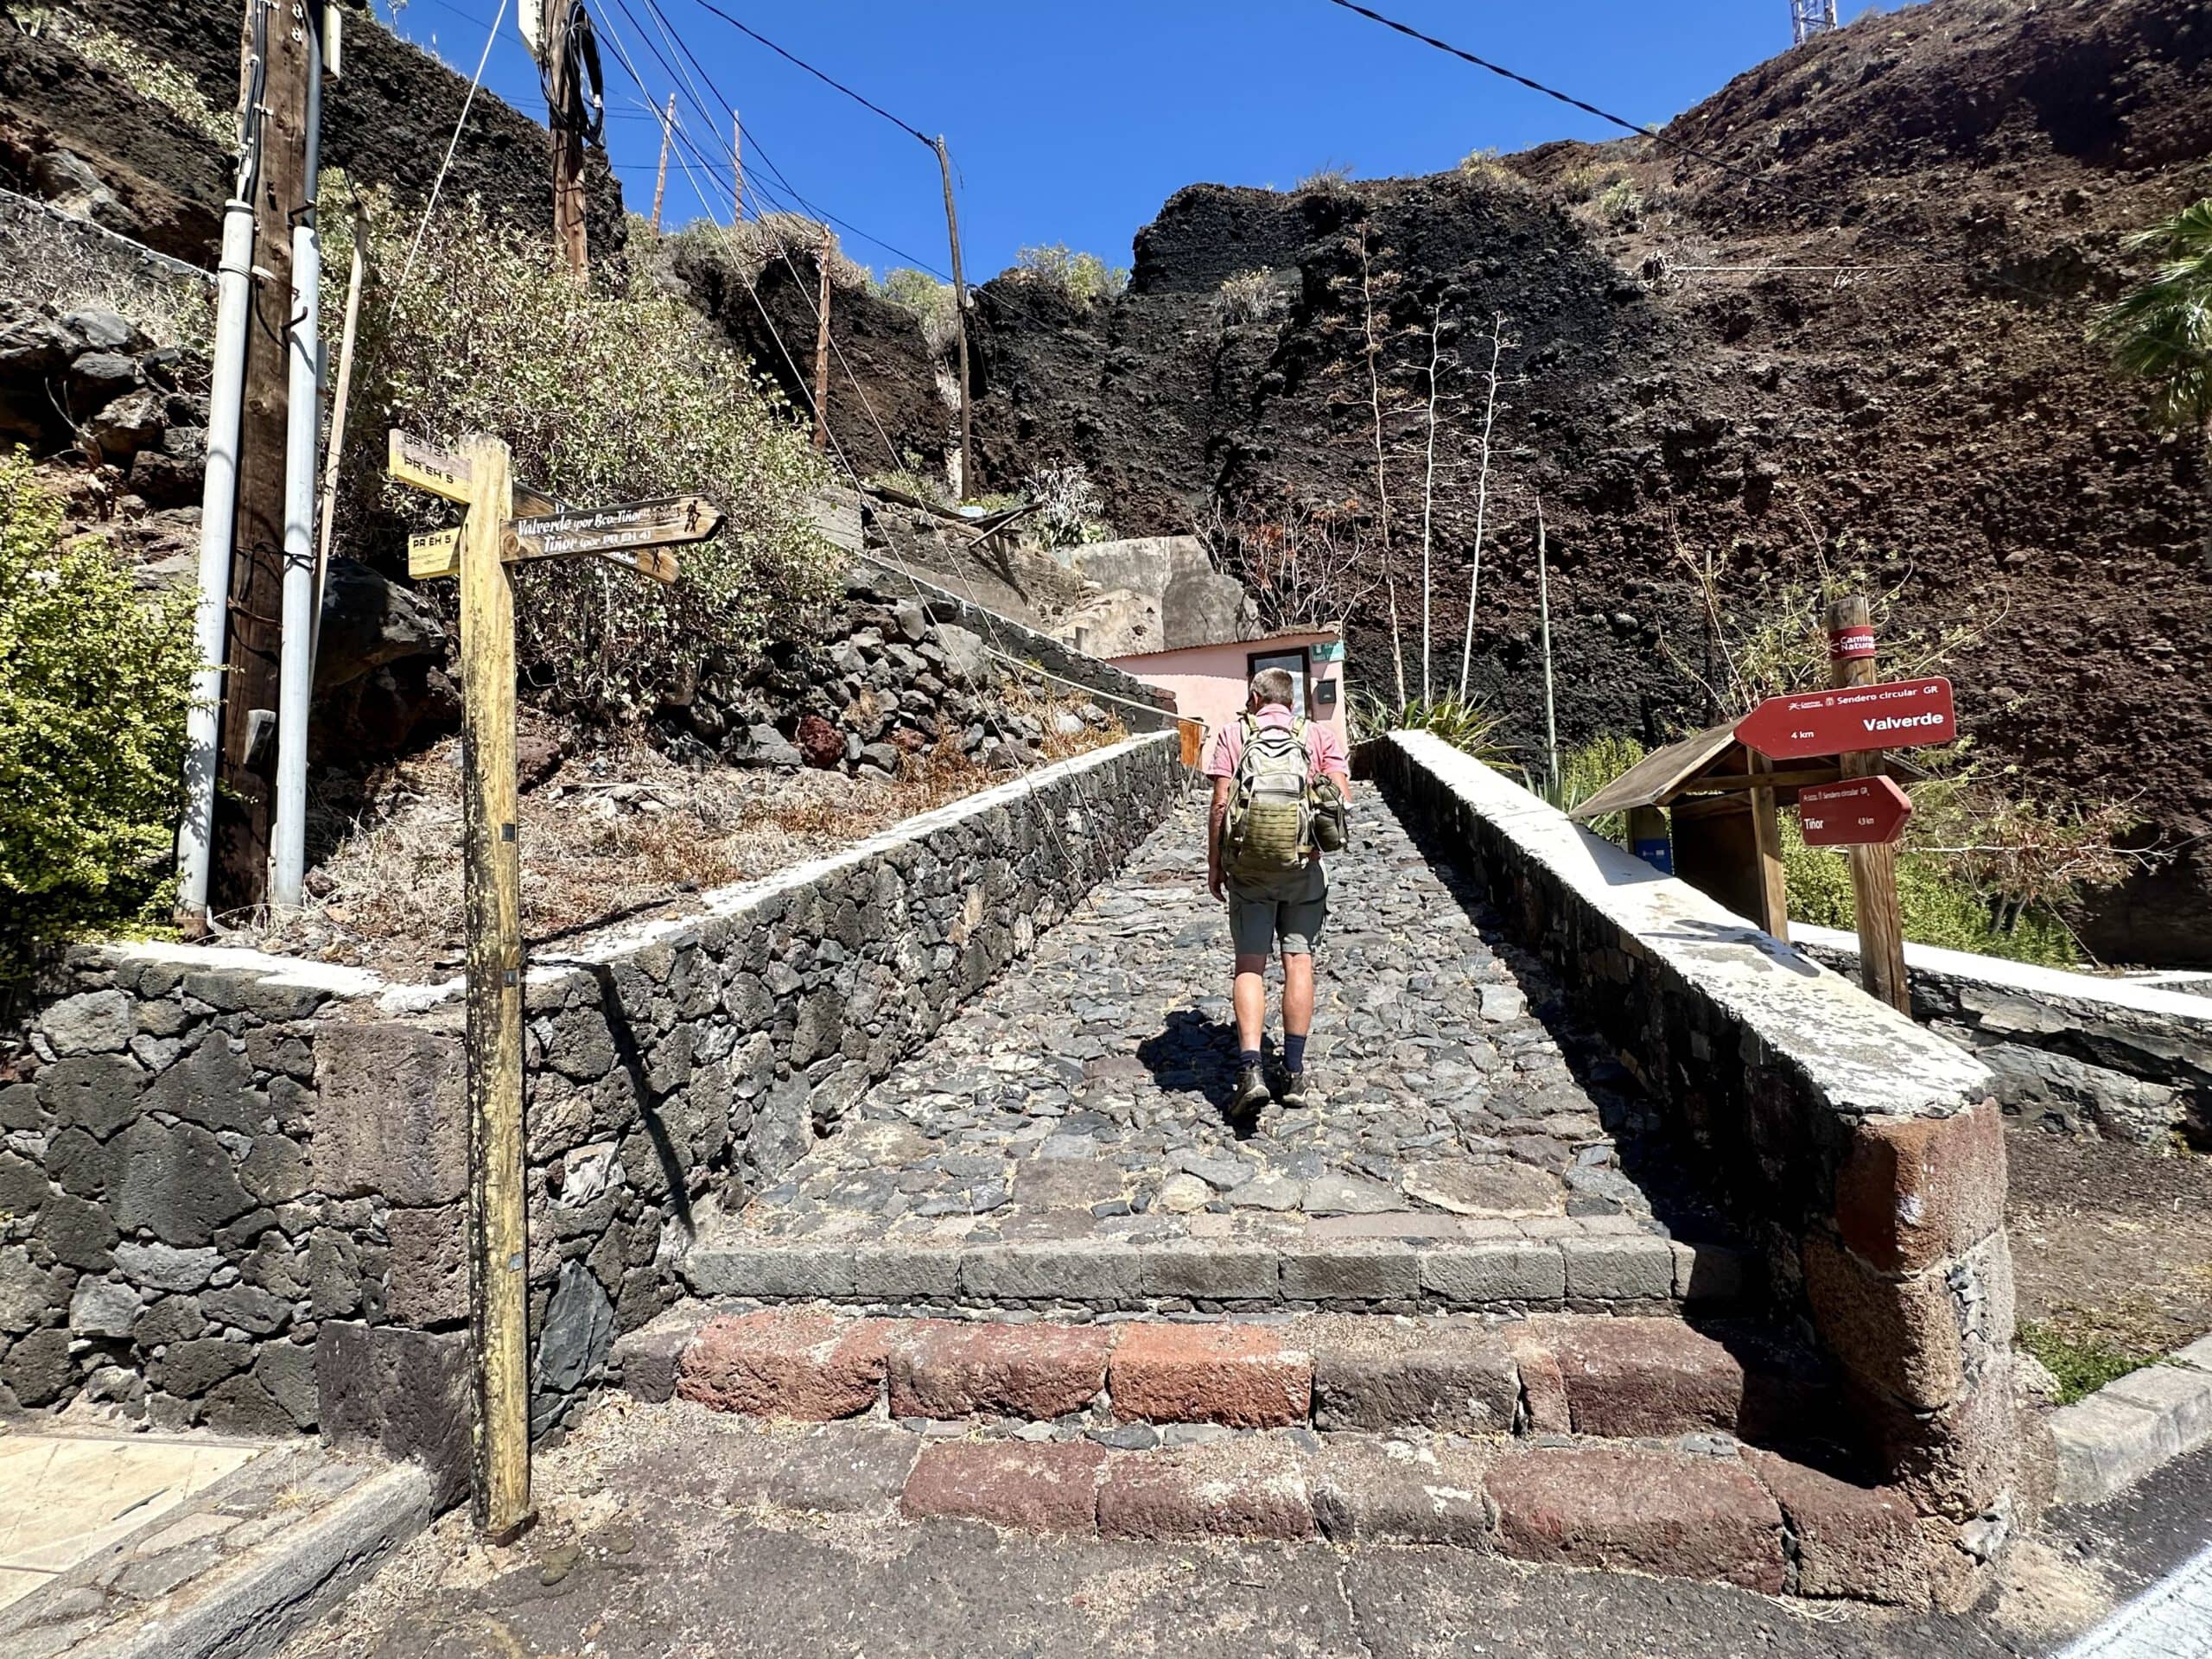
Hiking crossroads on the ascent path from Puerto de la Estaca to Valverde
Section Valverde to Nisdafe Plateau
Eventually, you reach the street Casañas Frias, which takes you uphill out of the city on the right side of a small ravine. The road turns into a hiking trail, which you continue to follow uphill. Eventually, this trail merges onto the road HI-101, which you follow to the right for a while parallel to the HI-1. When the HI-101 turns right, you continue straight ahead parallel to the HI-1. After a short while, the hiking trail sharply turns right uphill. It takes you uphill for a while and then continues left always parallel to the HI-1. Eventually, it brings you back down to the HI-1. You cross the road and continue on the left side of the road.
Hiking through the small village of Tiñor - GR-131 Camino de la Virgen
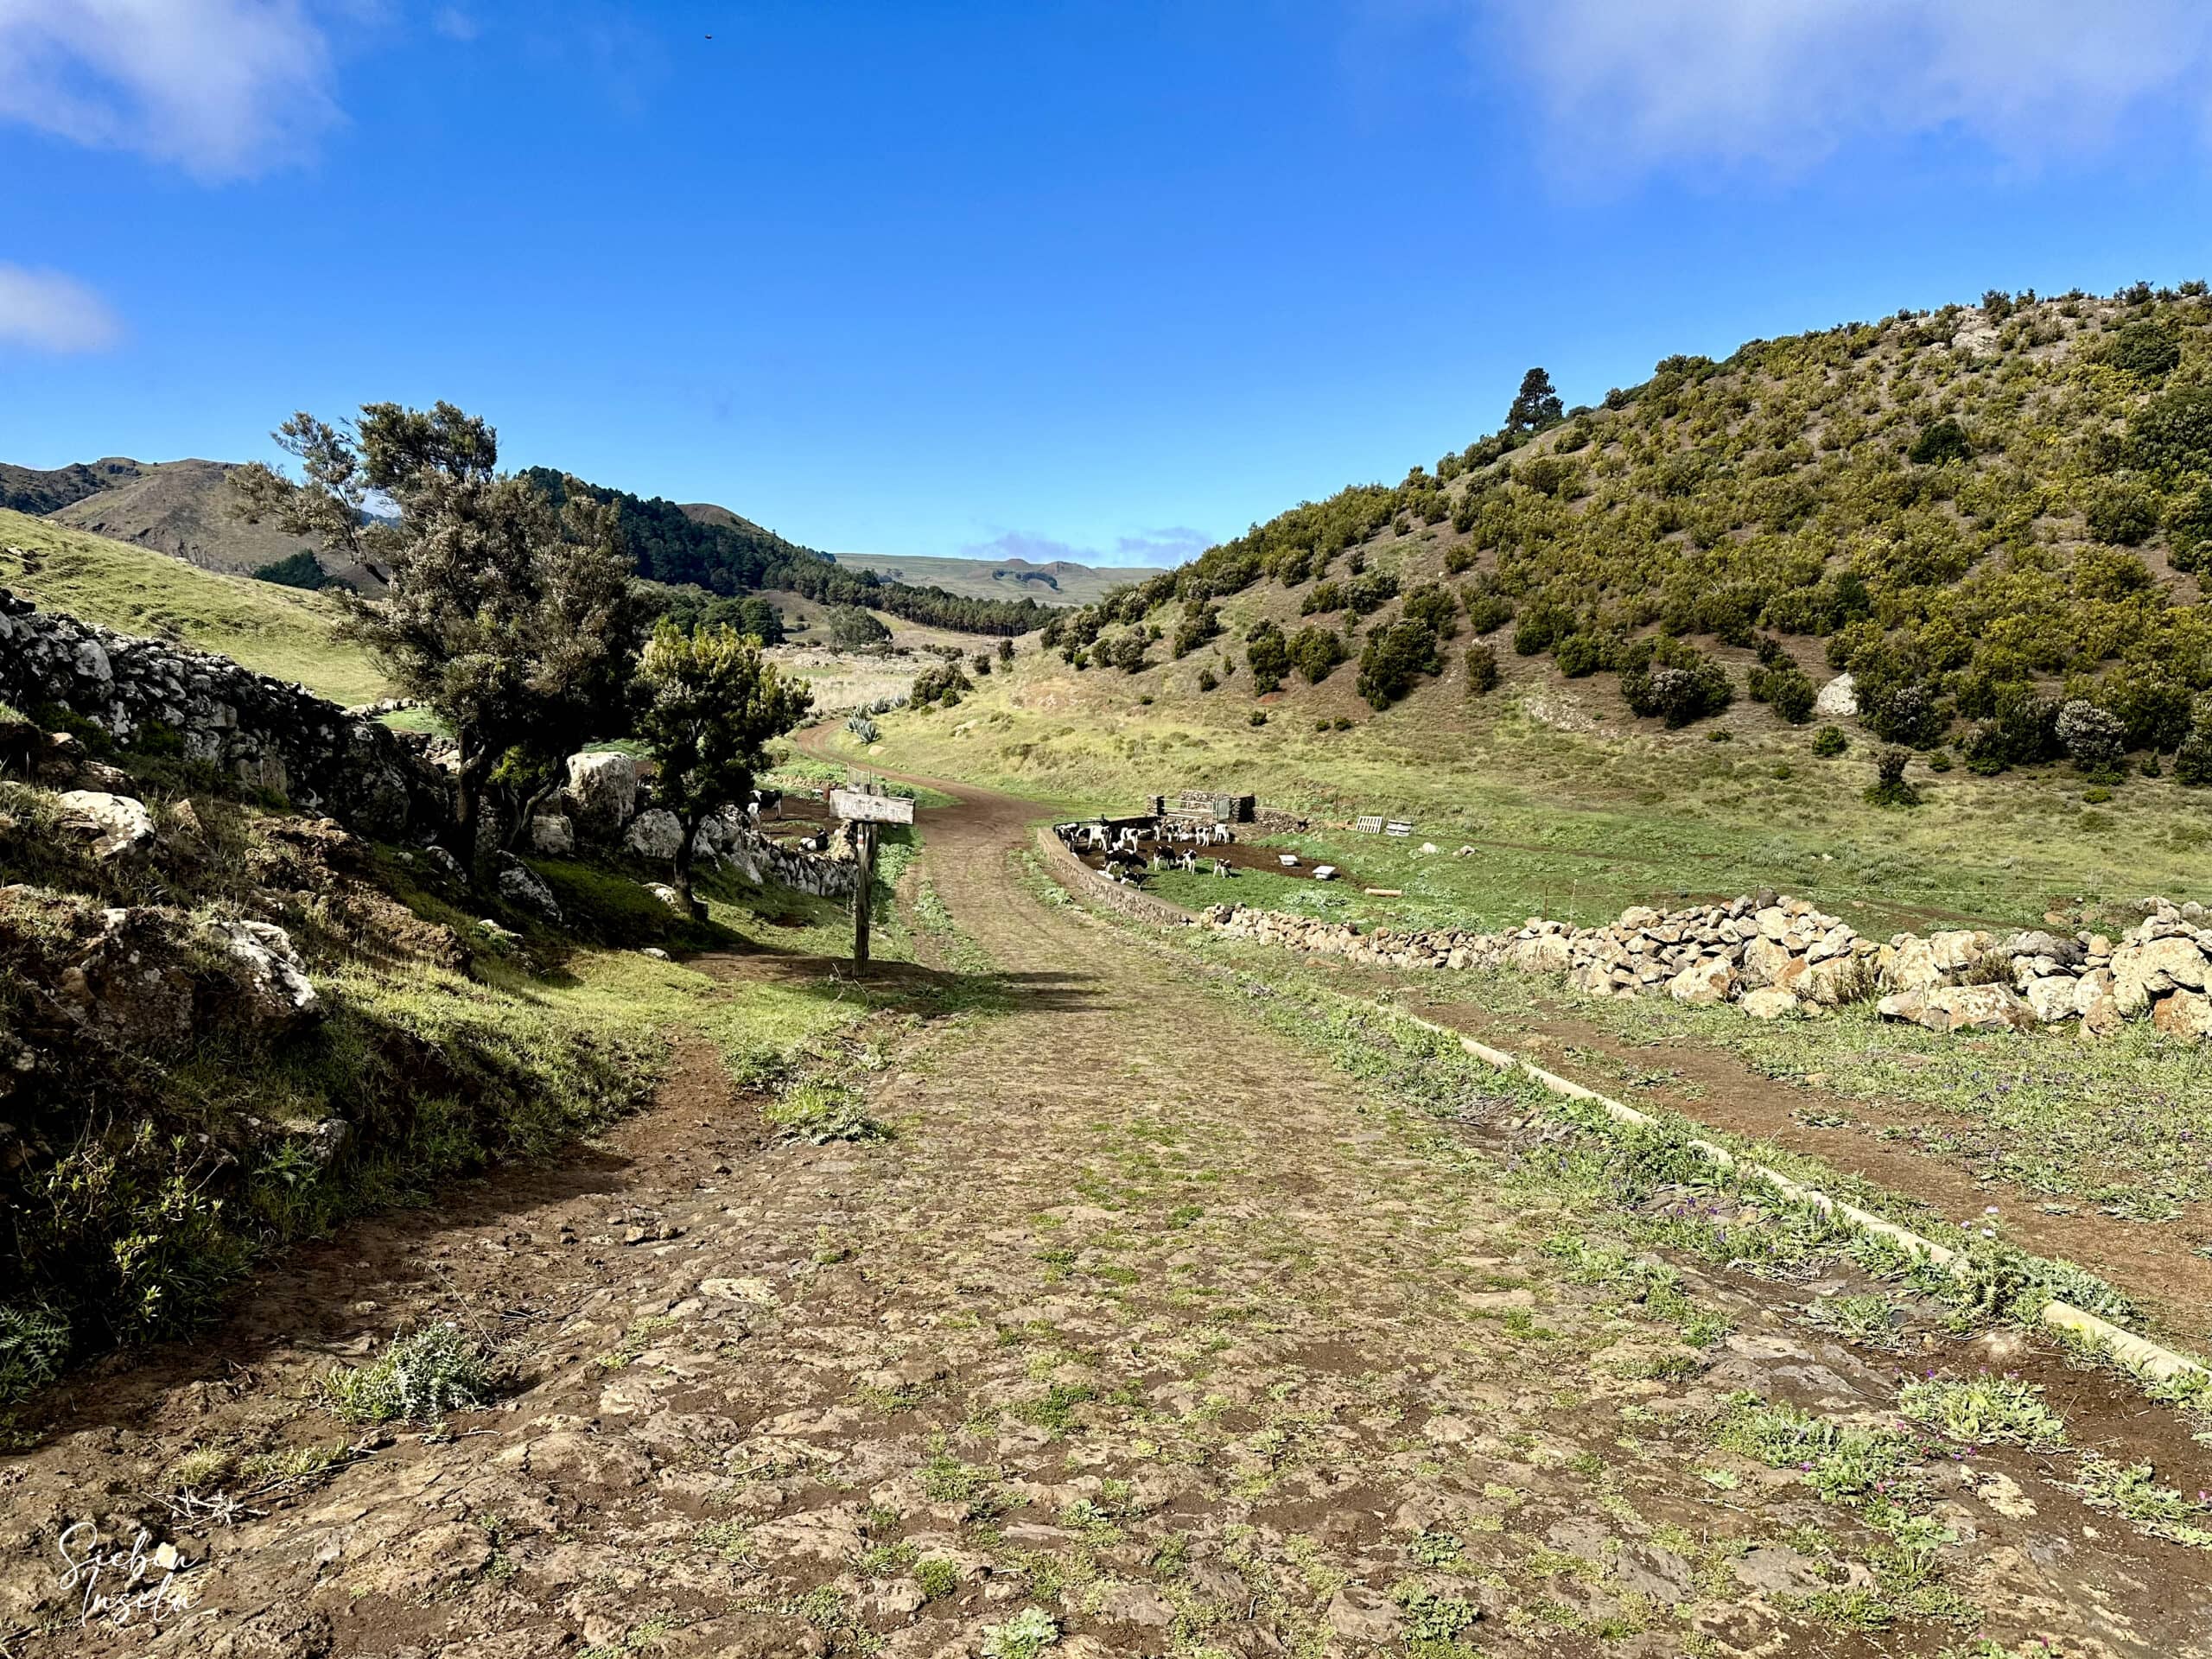
After some time, you reach the small village of Tiñor. You walk through the pretty little village, always going straight ahead. After Tiñor, the path continues through wooded areas for a while and becomes steeper for a short time. You cross the HI-1 again and finally leave the forest onto a vast plateau. This is the beginning of the Nisdafe Plateau. Here you will find green meadows reminiscent of Ireland, and even encounter goats, sheep, and cows.
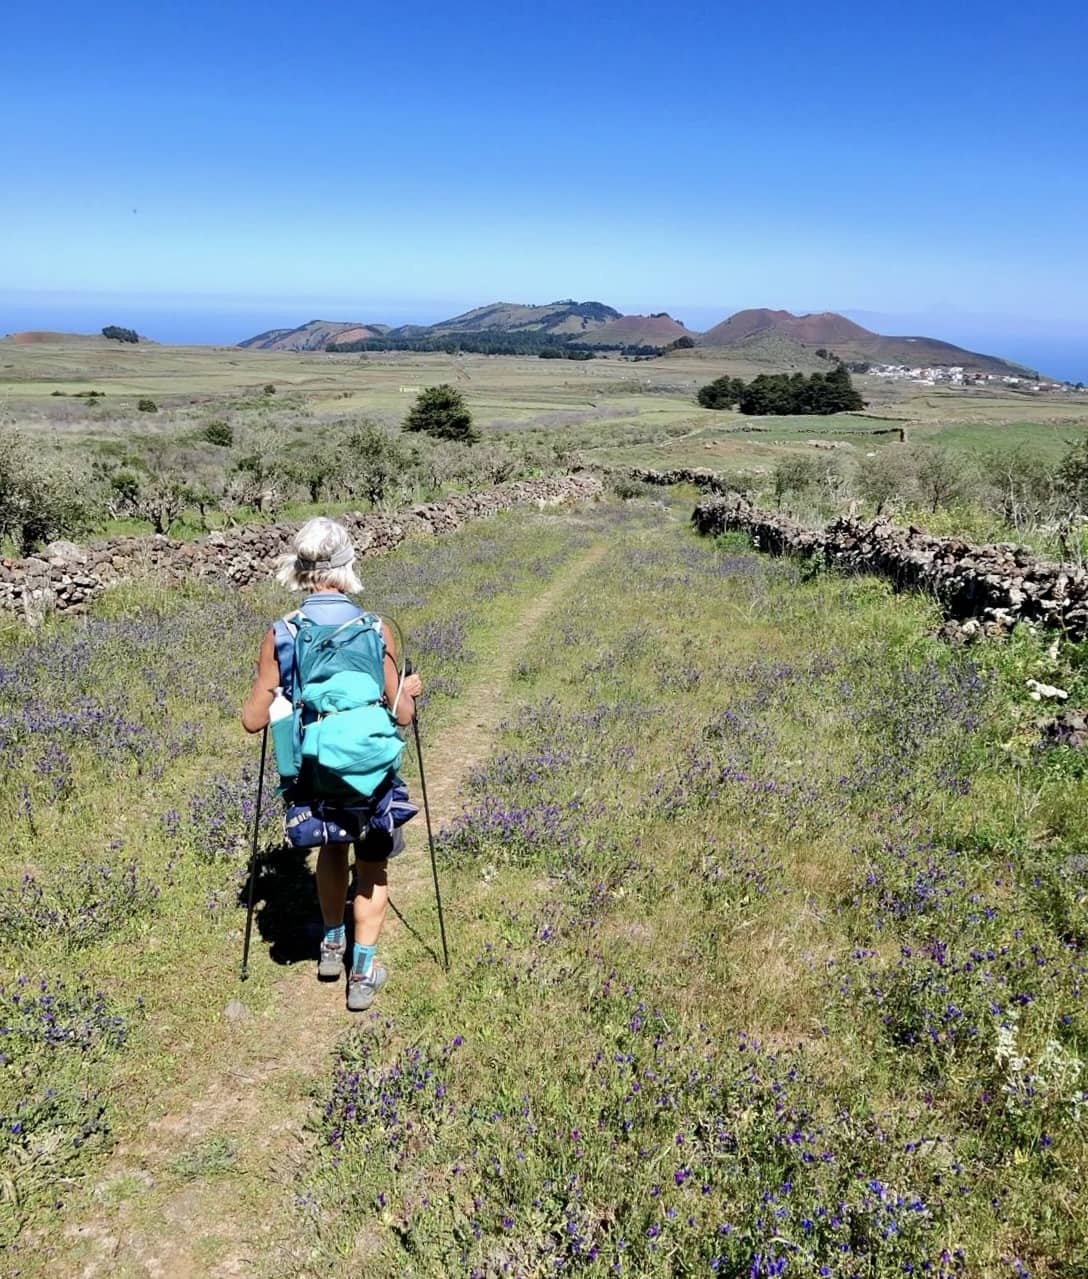
Camino de la Virgen hiking trail behind San Andrés amidst lush pastures and cows
Section Nisdafe Plateau to Mirador de la Fireba
Article summary and large selection of GPS hiking tracks
Sign up for my newsletter now and get exclusive access to my collected GPS tracks as well as all the brief information about my articles.
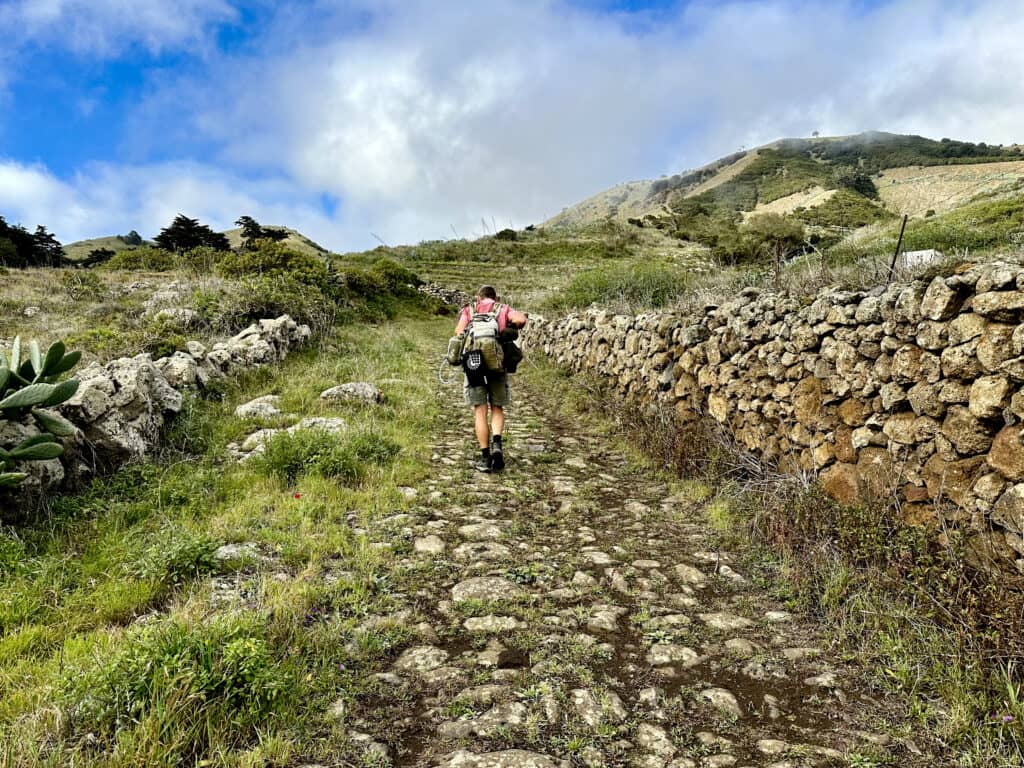
On this section, you can hike relaxedly up and down for a while. Then you enter wooded areas again. I have already described this section in the article Circular Hike on the Meseta de Nisdafe to the Arbol Garoé. You hike gently uphill through the forest on the Camino del Agua. Then you cross the HI-10 and on the other side of the road, you reach Merendo las Cuatro Esquinas. If you want to do some shopping or visit a bar, you can walk to San Andrés to the left in a short time. Otherwise, the hiking trail continues straight ahead for a very long time, mostly straight between high stone walls.
Hiker on the El Hierro GR-131 Camino de la Virgen long-distance hiking trail near San Andrés - hiking trail with stone walls
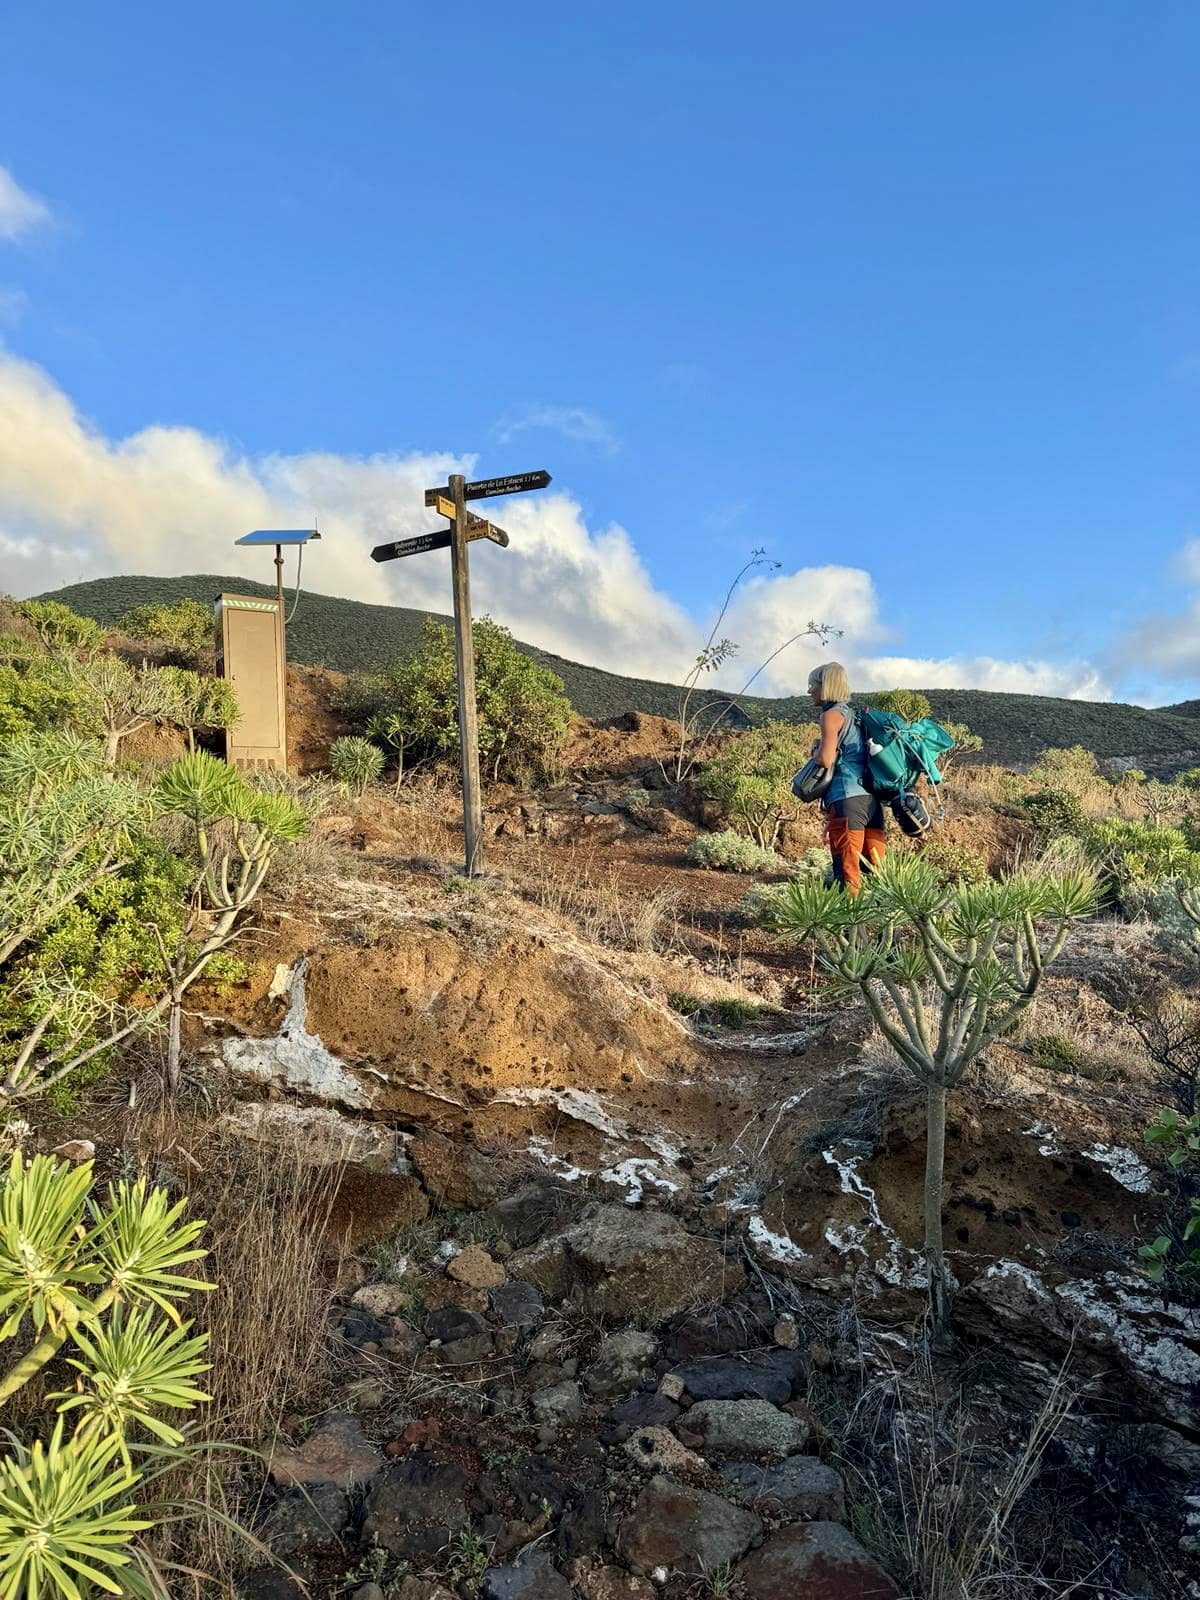
You hike across the Nisdafe Plateau and cross the HI-121 first and later three times the HI-1. Parallel to the HI-1, the hiking trail gradually ascends again on the left side. You slowly approach the Cumbre of El Hierro. Below the observatory on the Cumbre, the path flattens out a bit. There you enter wooded areas with large green areas. An ideal picnic spot. You walk through the beautiful area and then cross the HI-1 again. On the other side of the road, the trail takes you up to the Mirador de La Hoya de Fireba. From there, you have a magnificent view into the volcanic crater of Fireba from a small pavilion.
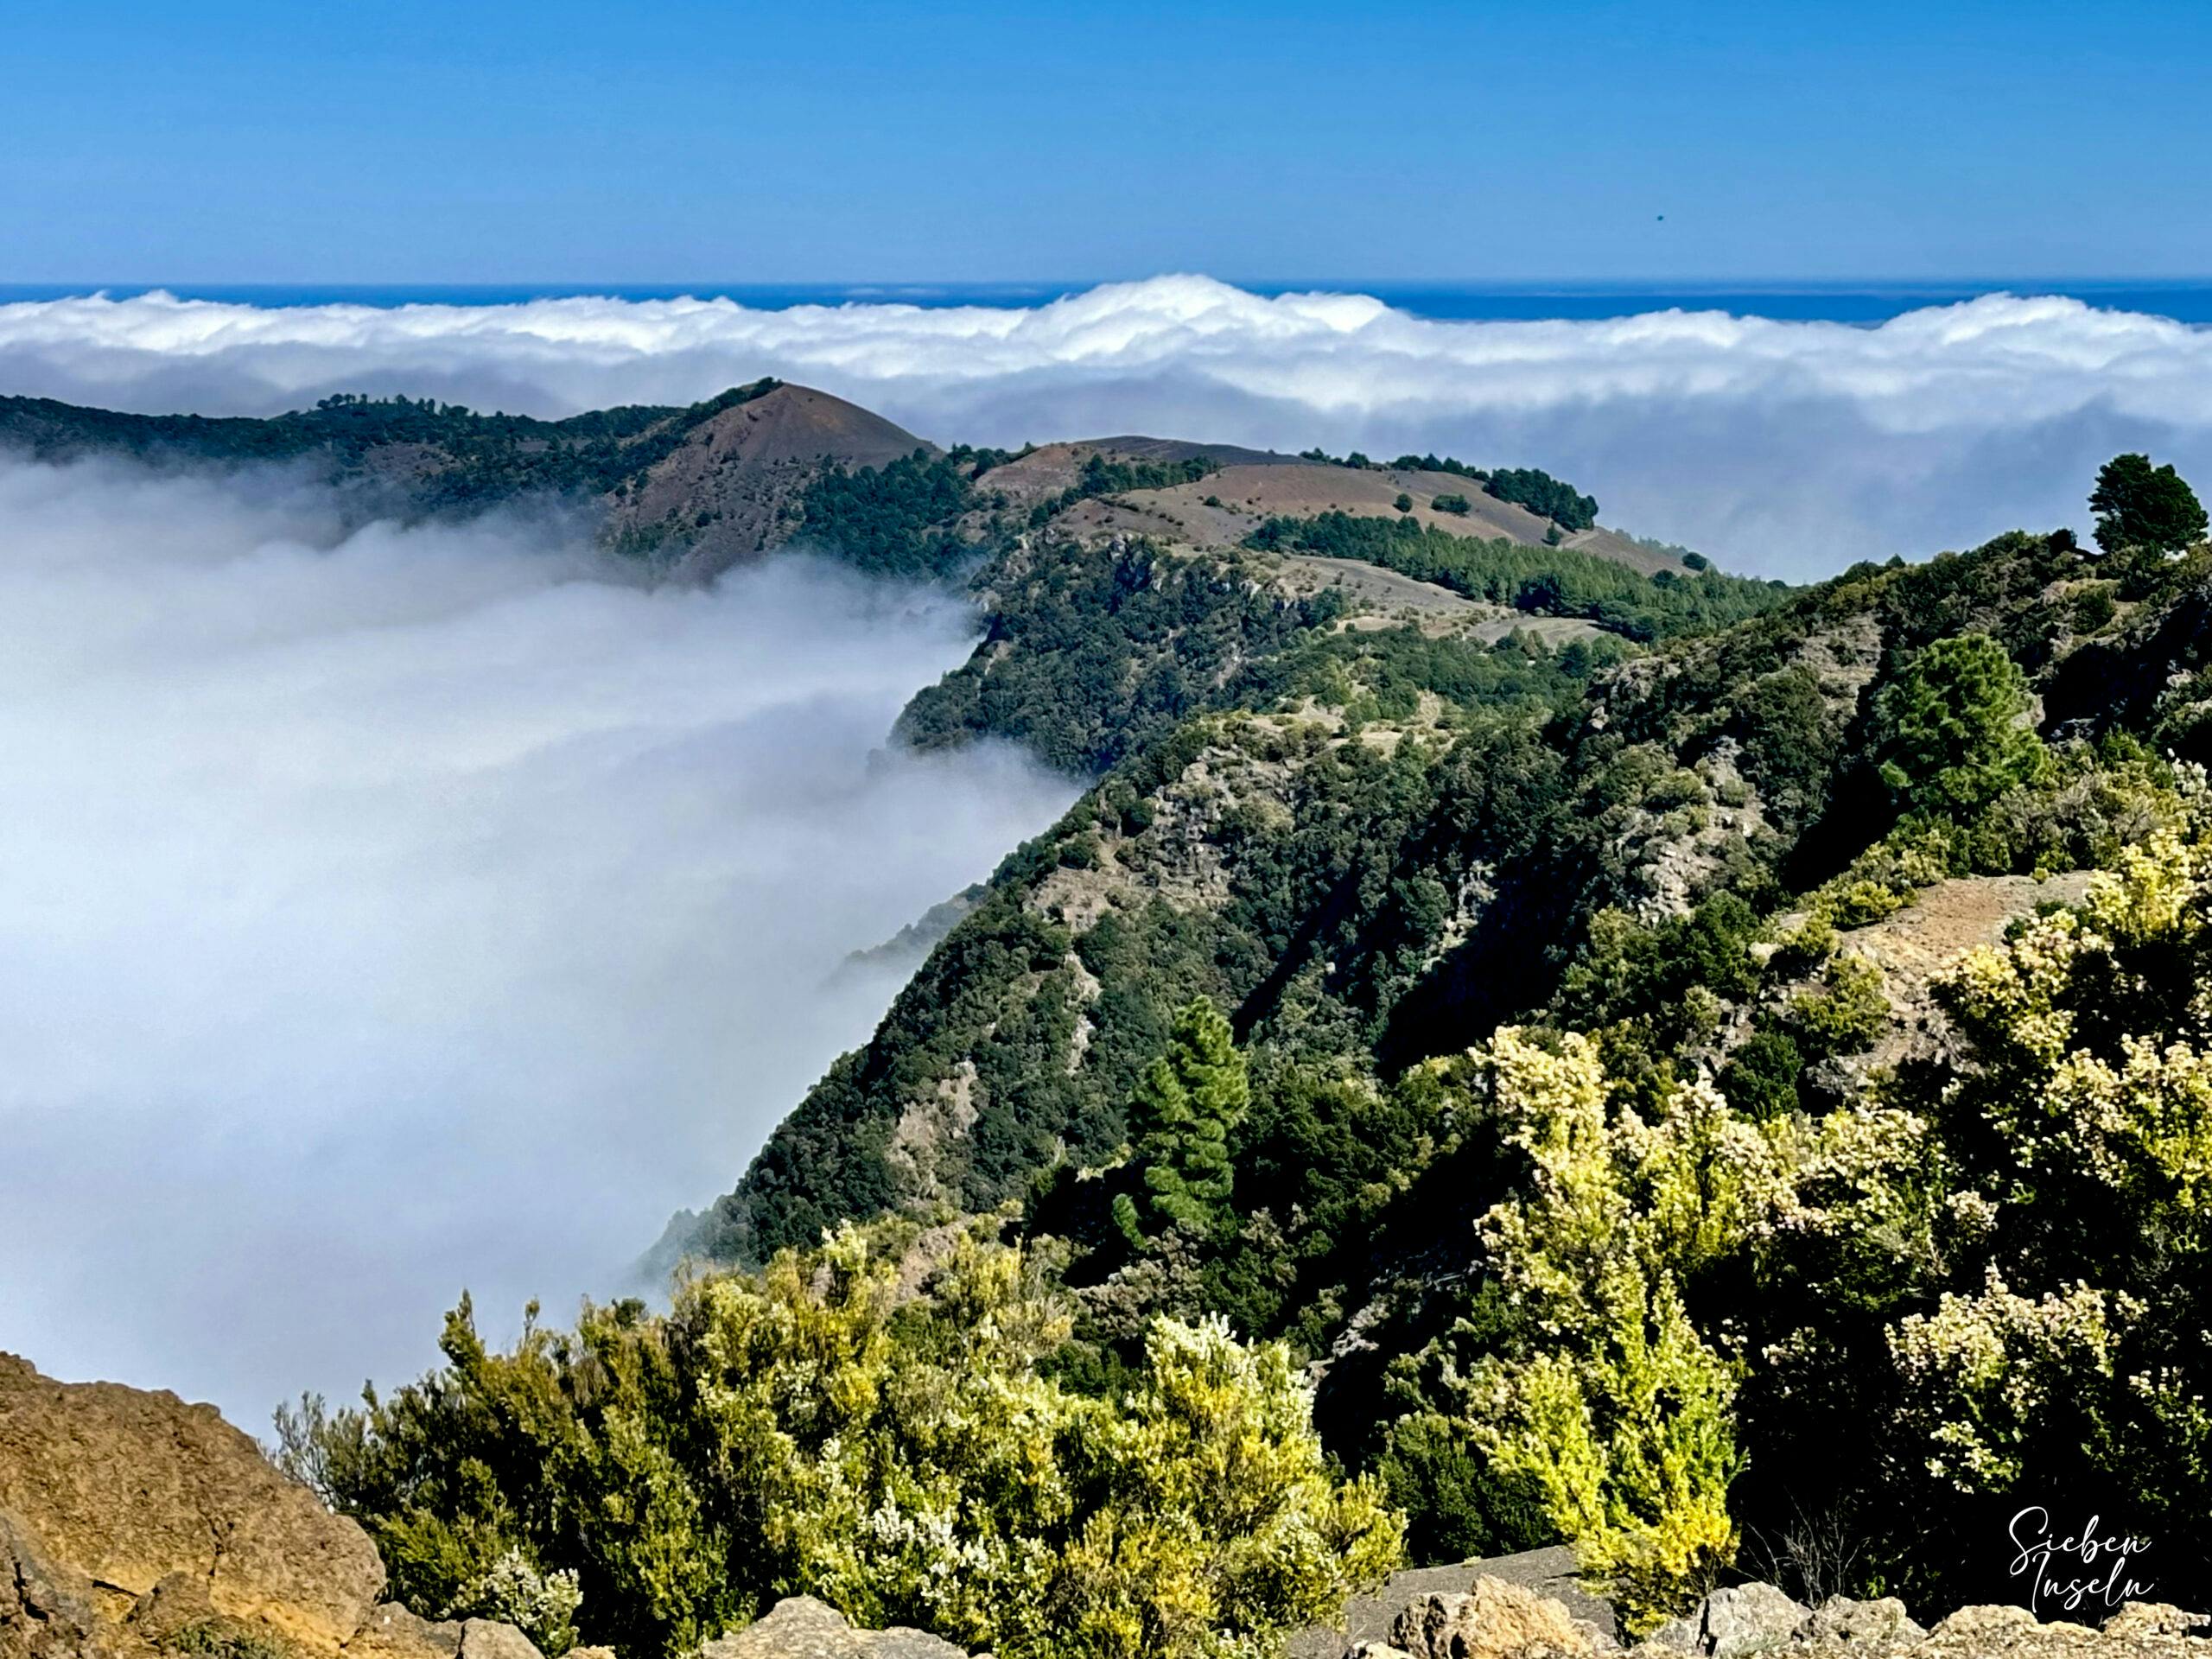
View from the Mirador de la Fireba of the hiking trail near the Cumbre - Camino de la Virgen
Section Mirador de la Fireba to Cruz de Los Reyes
From Mirador de la Fireba, the path briefly descends and then brings you uphill through wooded areas again at the Cumbre. You pass by the Witch’s Dance Square (El Bailadero de las Brujas). This section follows the Sendero La Llania hiking trail. Once at the top, you can take a short detour to Mirador La Llania and – if there are no clouds – look down into the wide plain around La Frontera. In the distance in front of you on the Cumbre, you can already see the antennas on Malpaso. Then the path brings you back down to the HI-1, which you cross and then continue to the right following the HI-45.
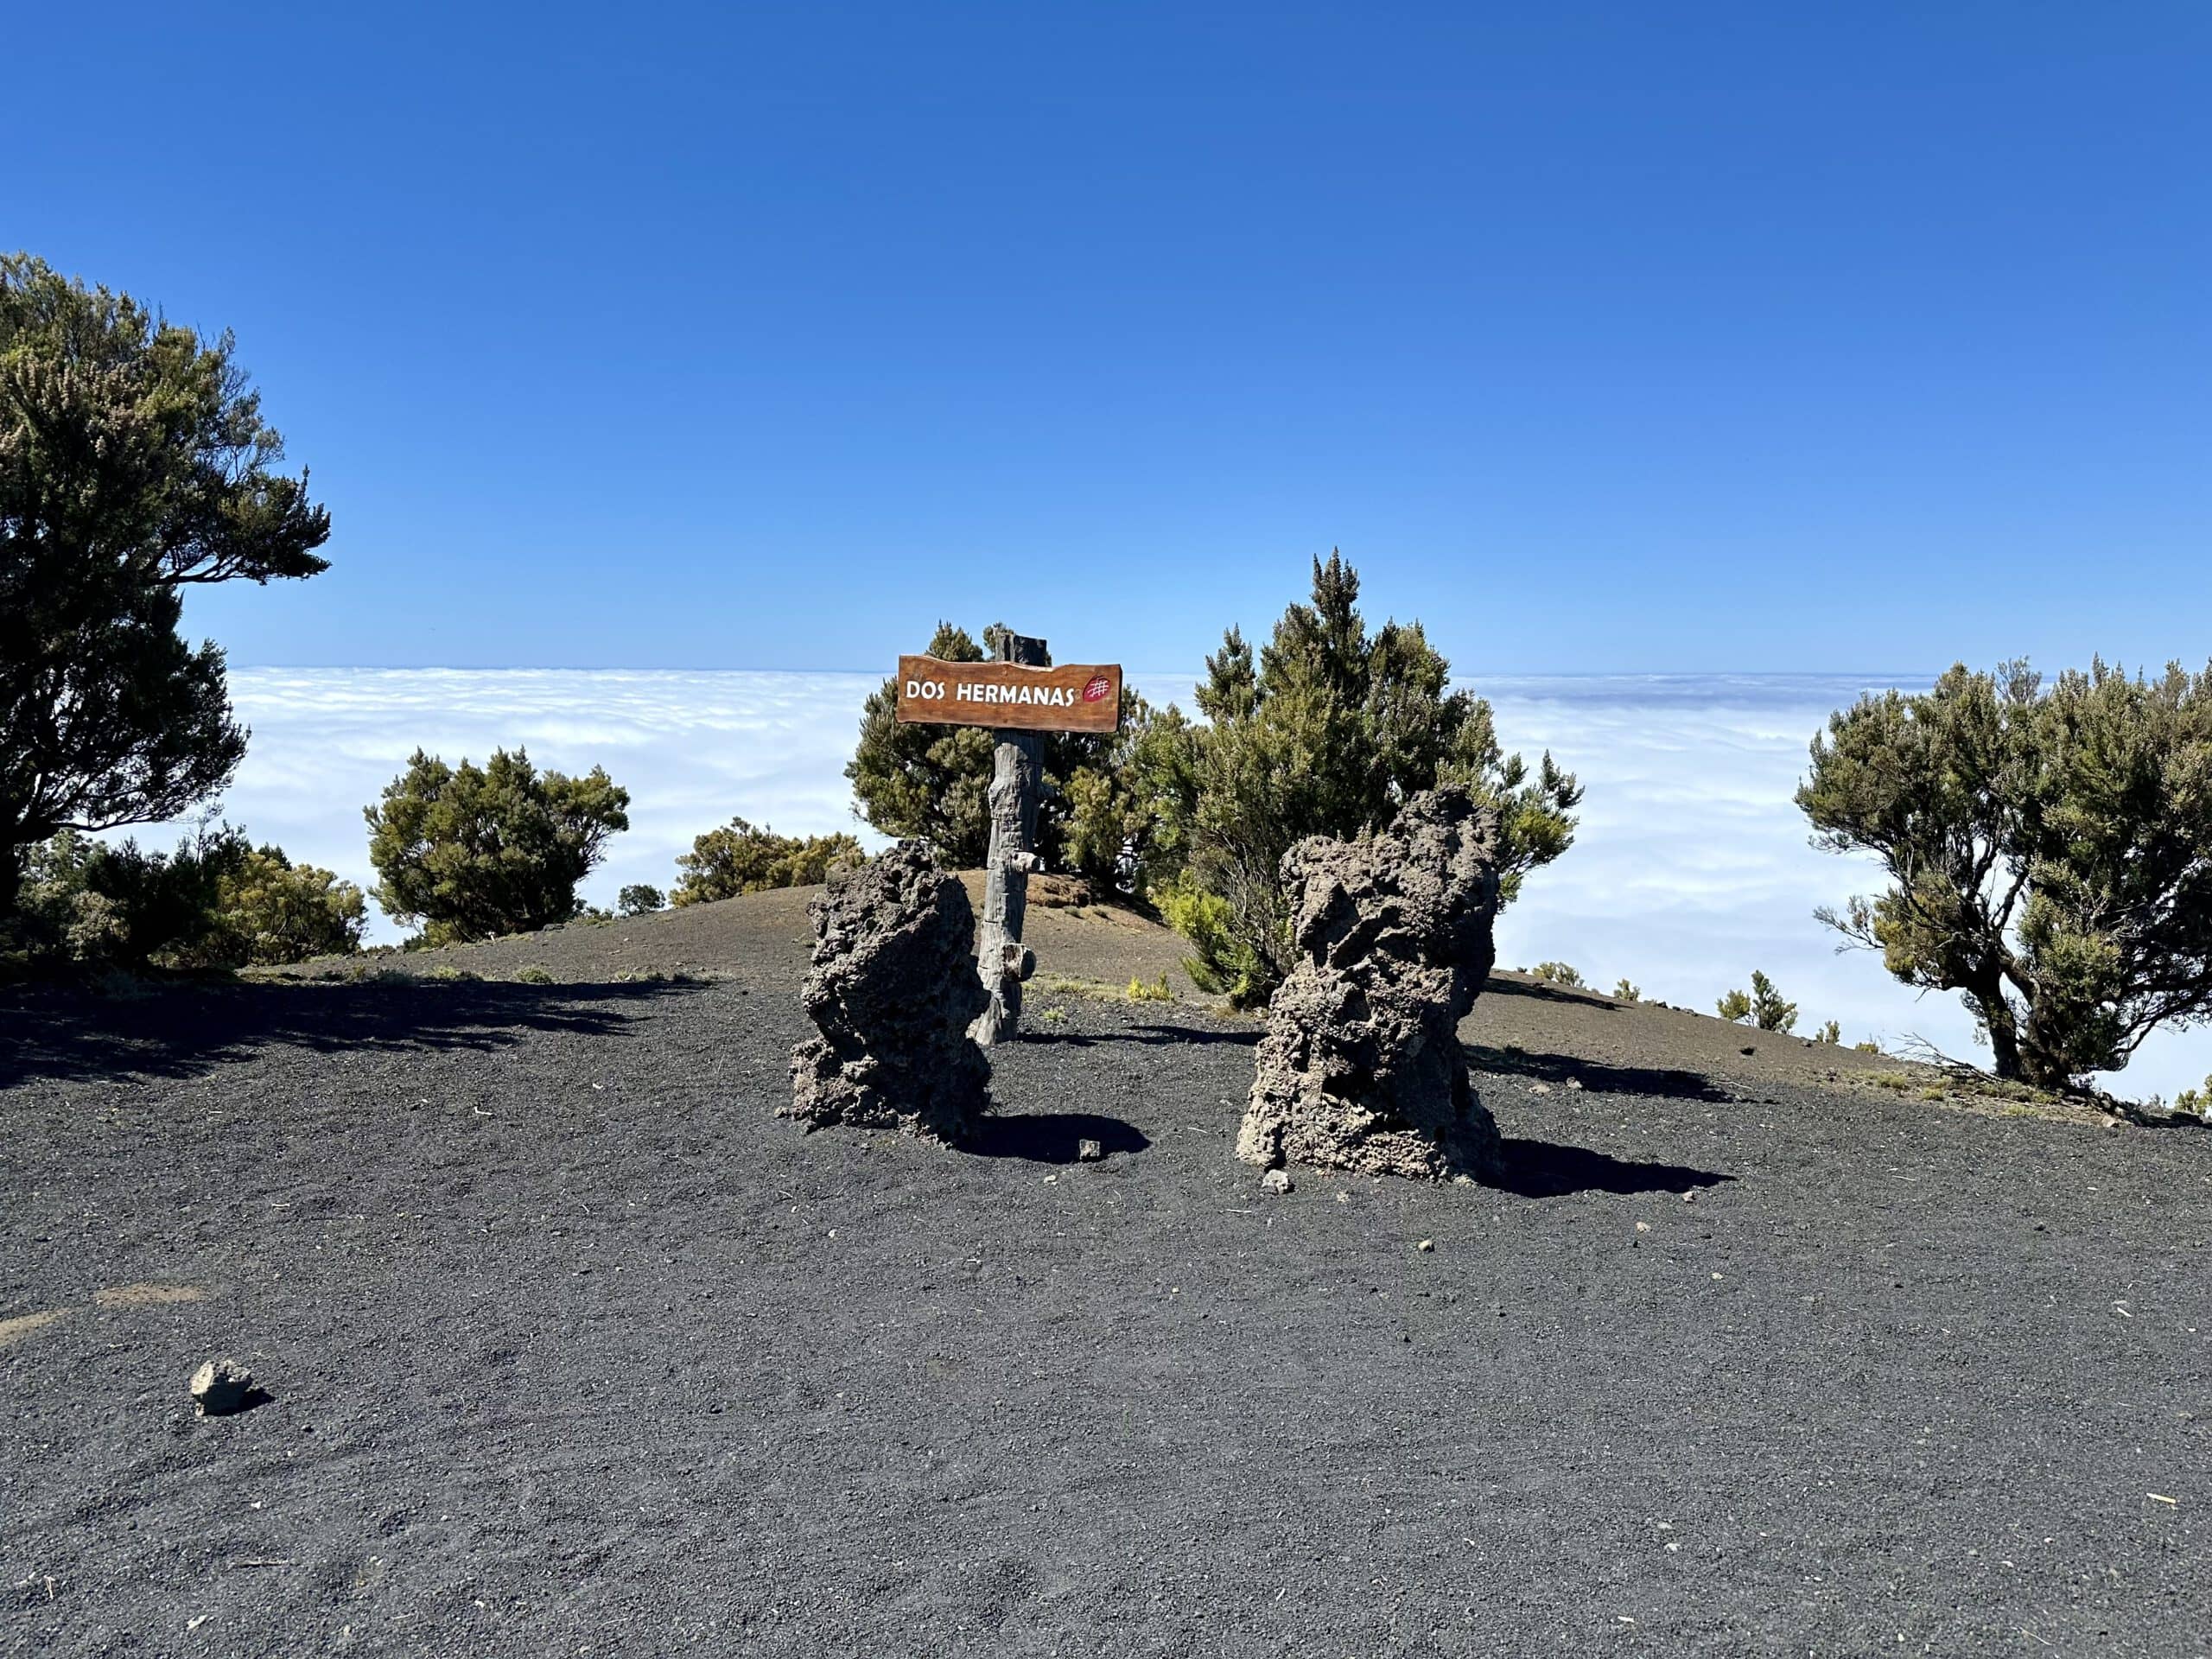
Dos Hermanas - Cumbre El Hierro
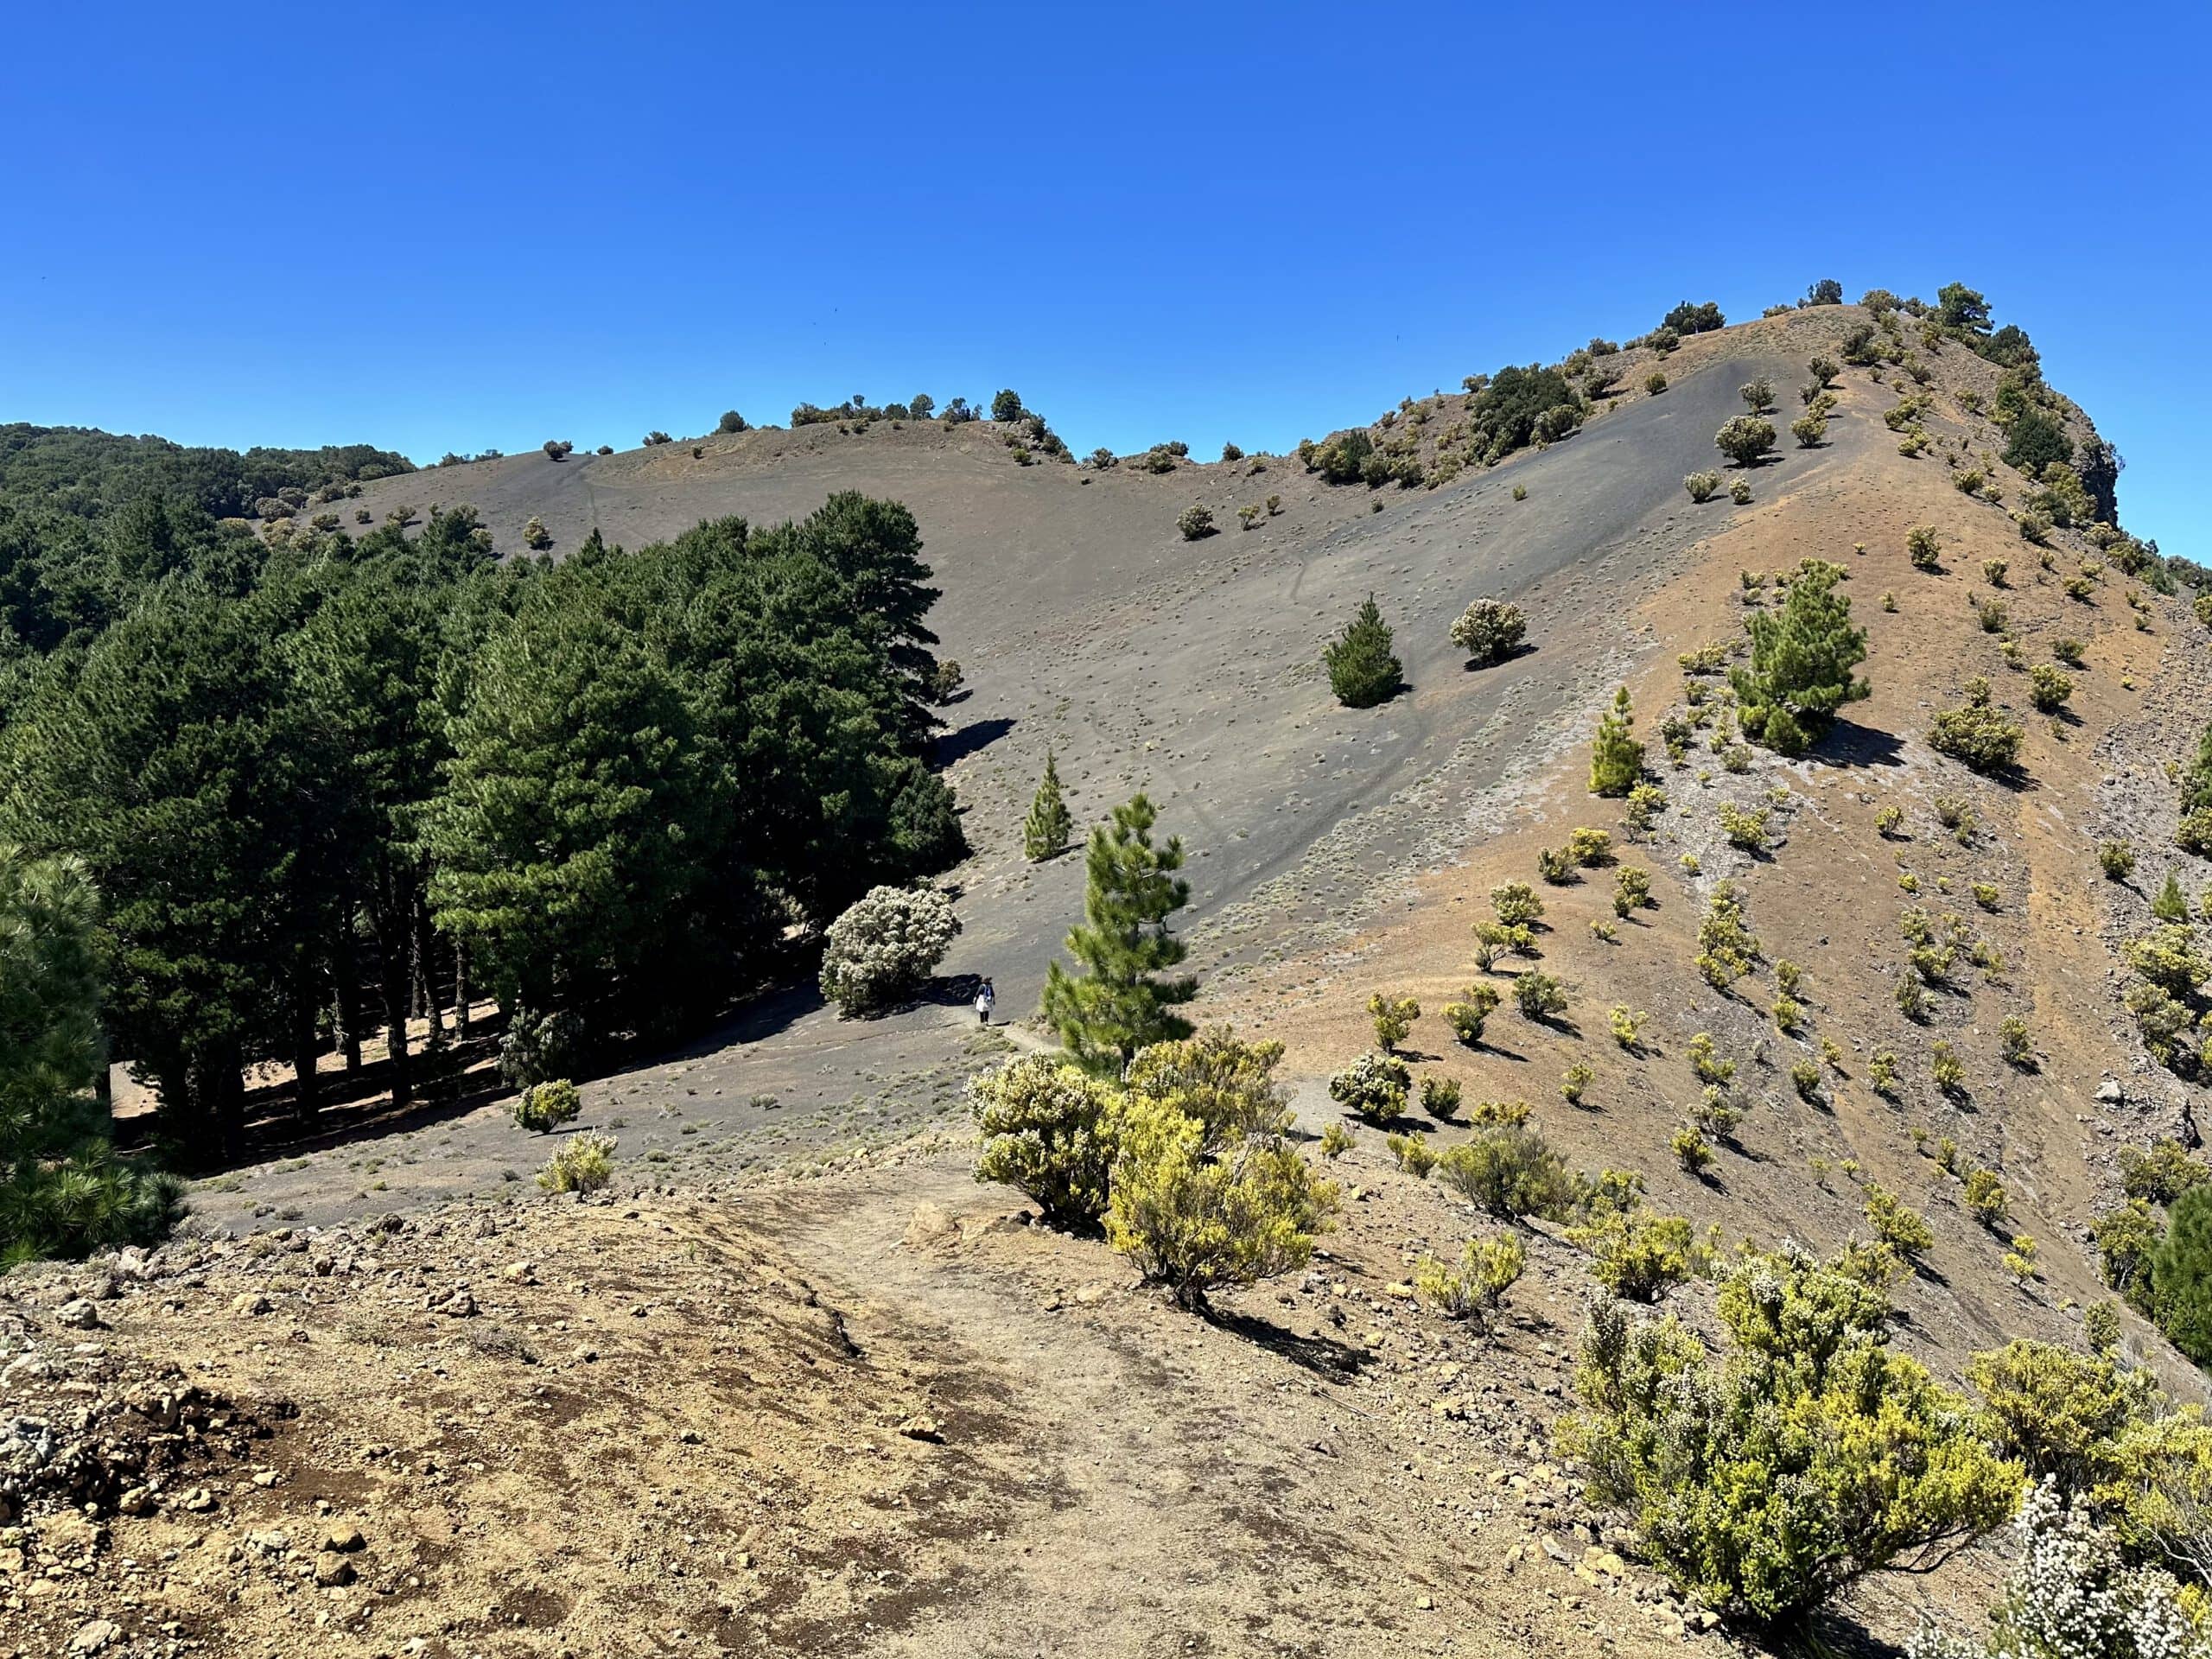
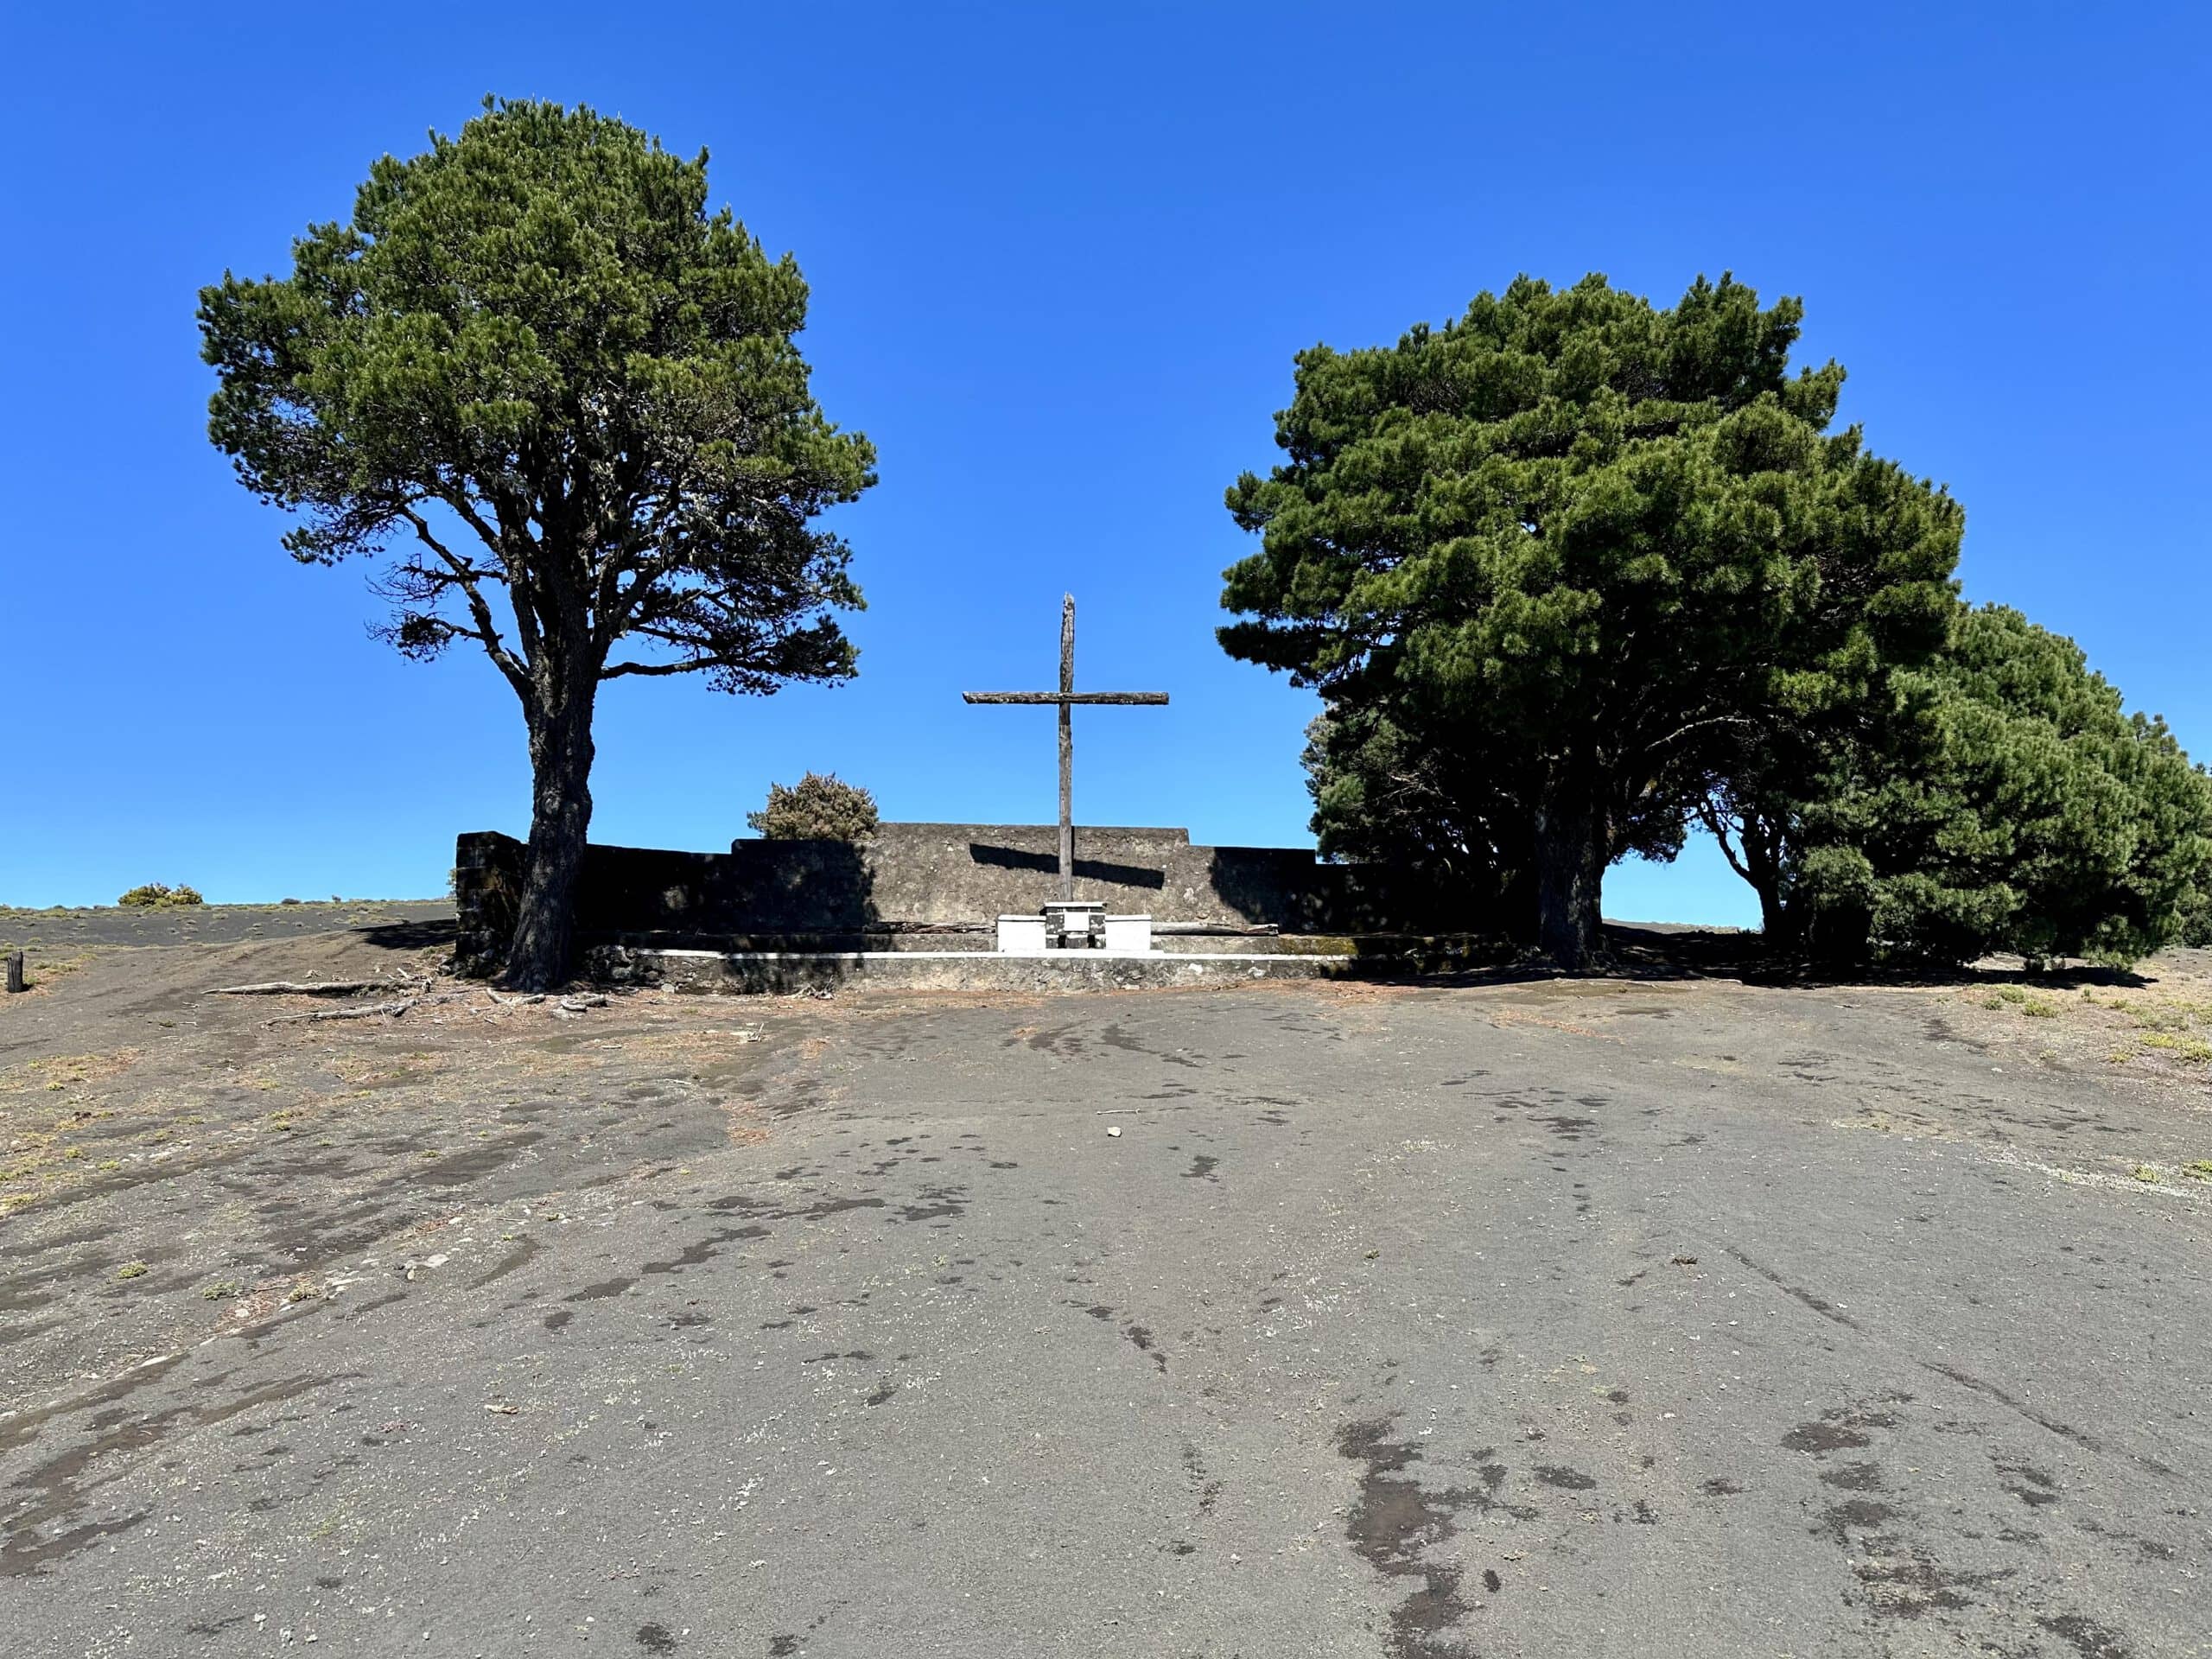
You walk along the road for quite some time. However, there is hardly any traffic, so you can enjoy the wide views over the Atlantic Ocean to the left. Eventually, the hiking trail turns right off the road and takes you up the dark slopes of the Cumbre. You hike for a long time parallel to the road, mostly straight ahead, but higher up. You pass by the Dos Hermanas viewpoint. There are benches, and you can take a break. I have described this section of the trail in reverse in the article Malpaso. At the notable point Cruz de Los Reyes with the large cross, you finally approach the road again.
Cruz de los Reyes - Camino de la Virgen
Section Cruz de Los Reyes via Malpaso to Cruz de los Humilladeros
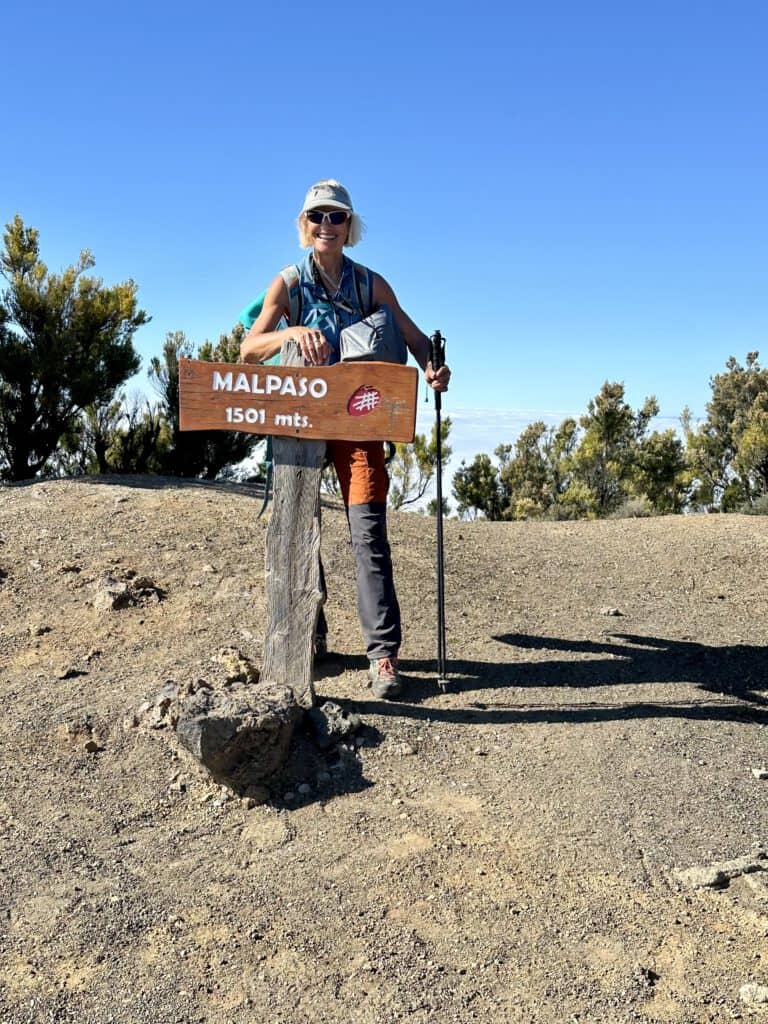
You hike parallel to the road for a short while. Then, the steep ascent to Malpaso turns off to the right. This somewhat lengthy ascent finally brings you to the summit, Malpaso, of La Gomera. Here you stand at 1501 meters above sea level and have already covered more than 1600 meters of elevation gain from the coast up and down. Therefore, you should definitely stop here, take a break, and enjoy the views in all directions.
Done - at the highest point of the GR-131 Camino de la Virgin on the Malpaso
Then comes the long descent. The hiking trail takes you slowly downhill on the slopes of the Cumbre. You only lose metres in altitude very slowly. At one point, a hiking trail branches off to the right from the Cumbre down to Sabinosa. However, keep straight on along the left-hand side of the cumbre. You will now pass a few places where you could draw water. We finally found a proper spot with water from a tap at Cruz de los Humilladeros (as of March 2024).
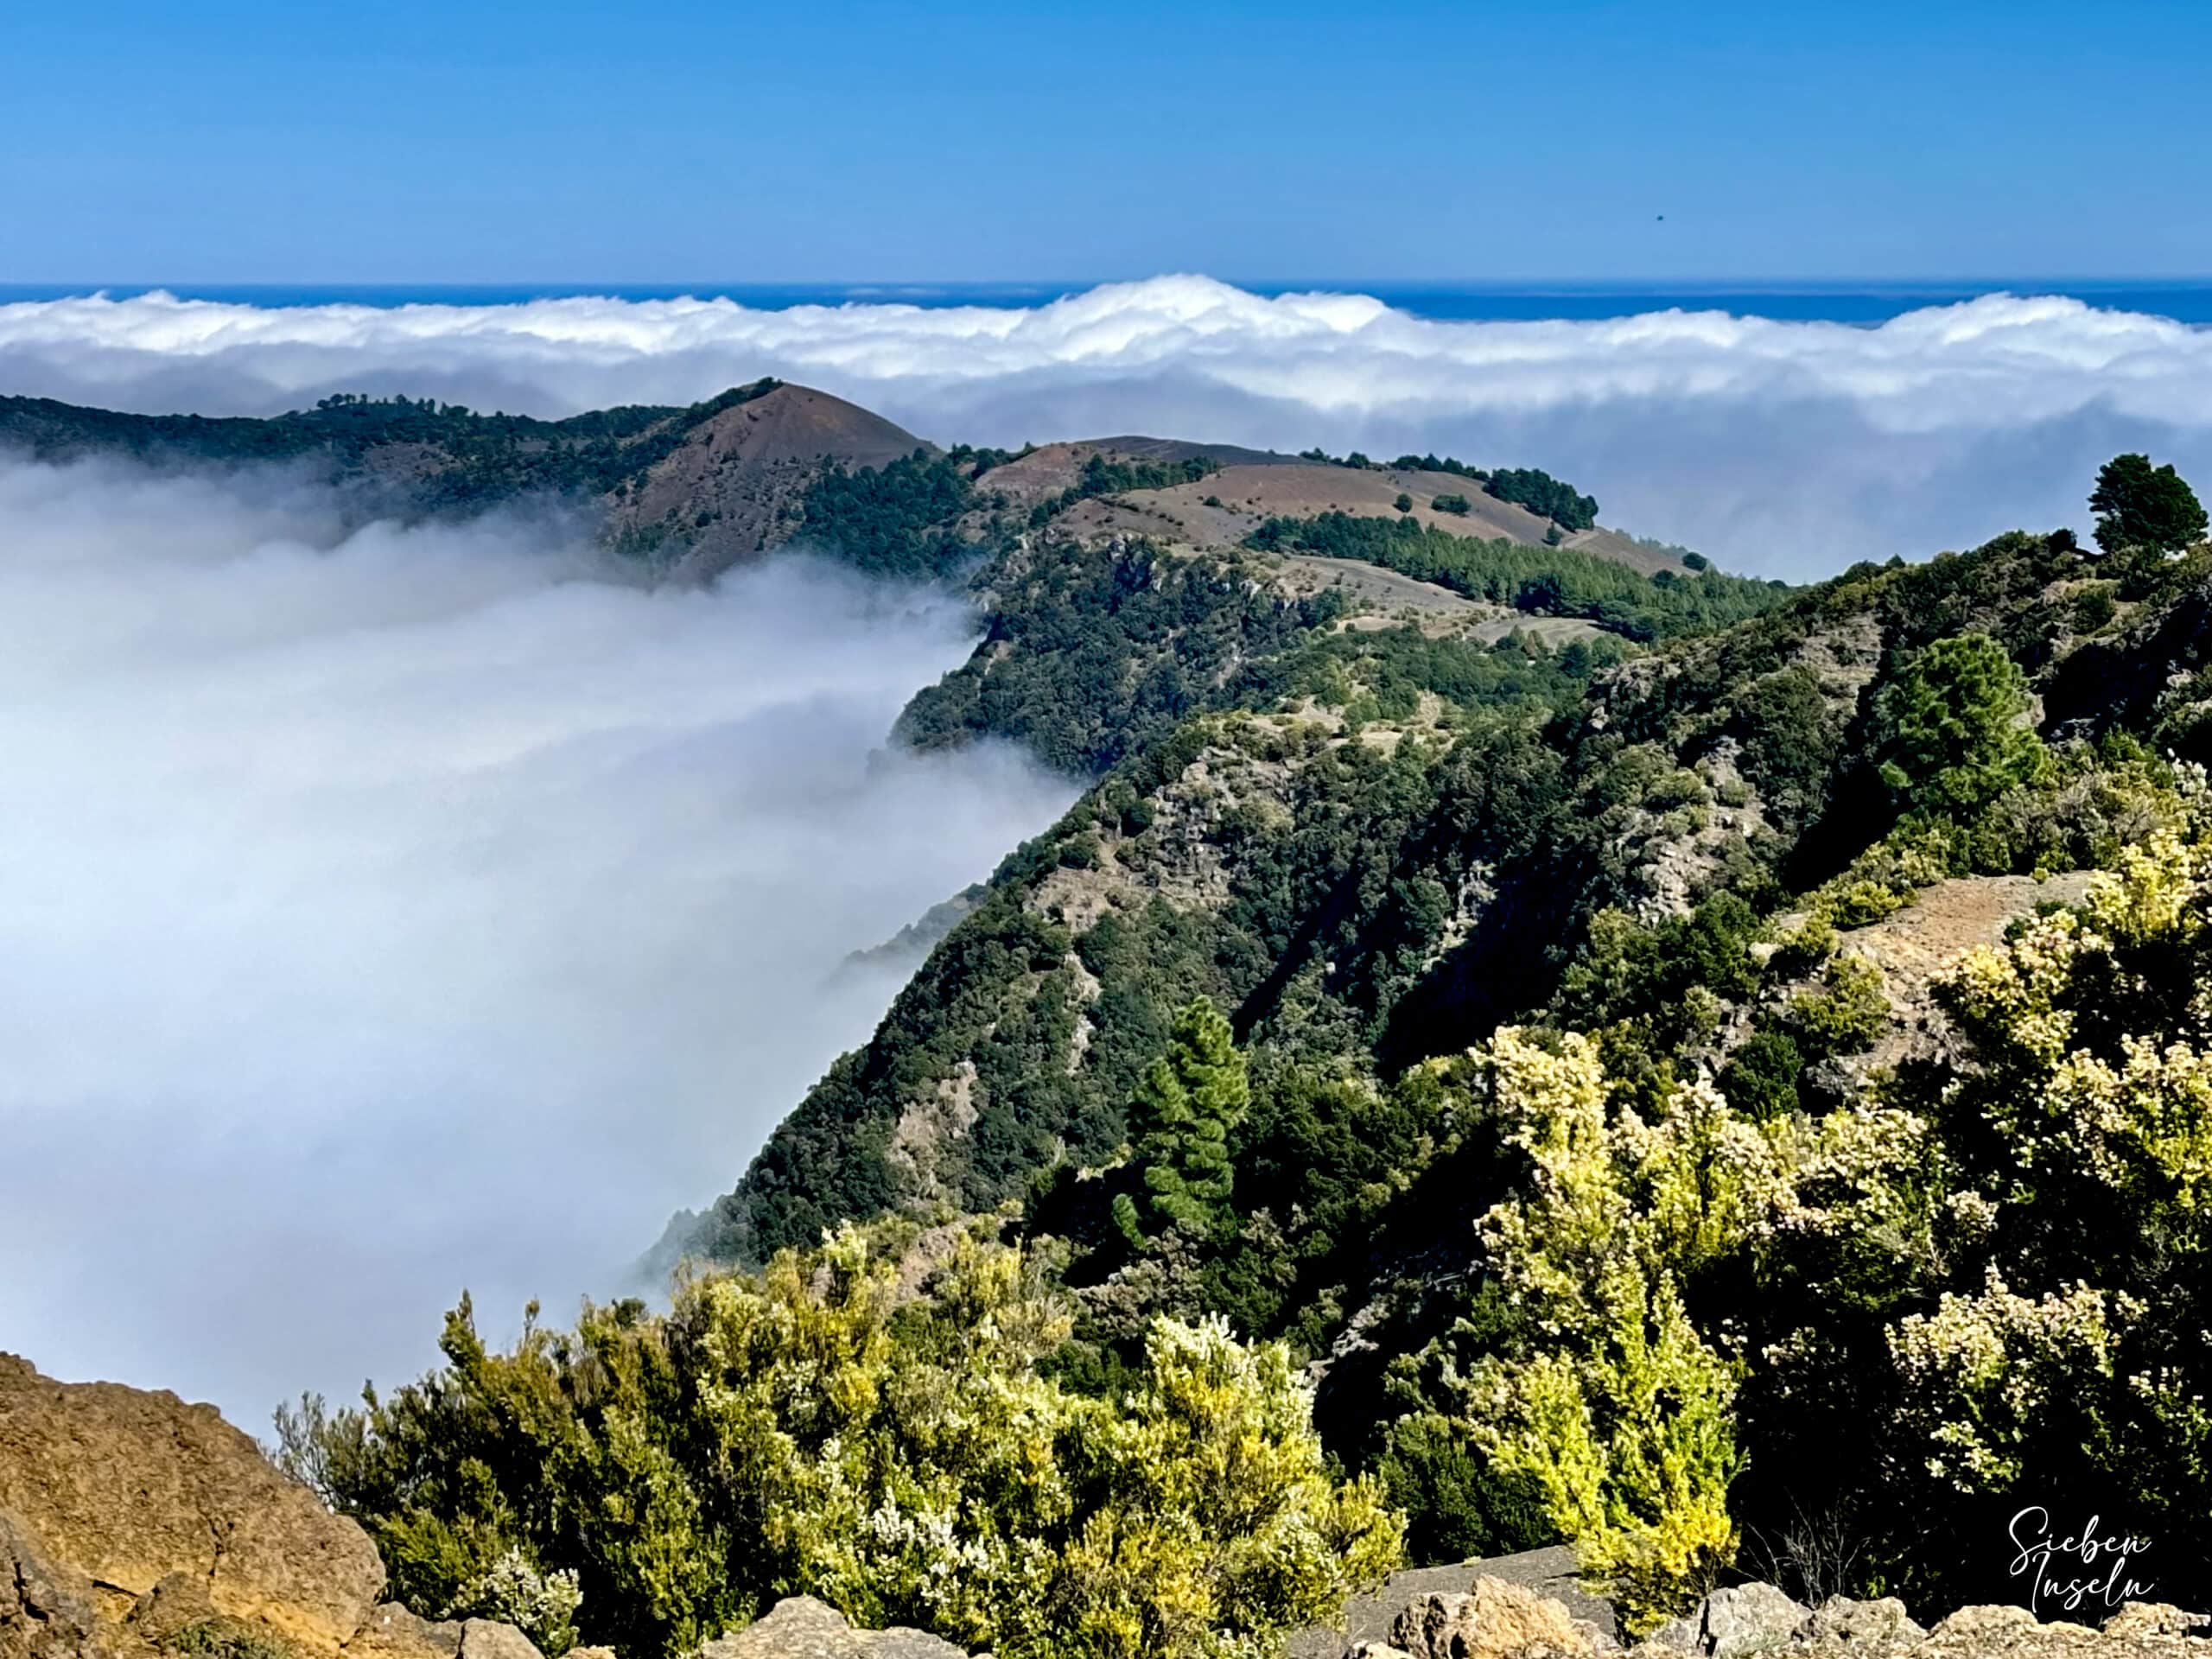
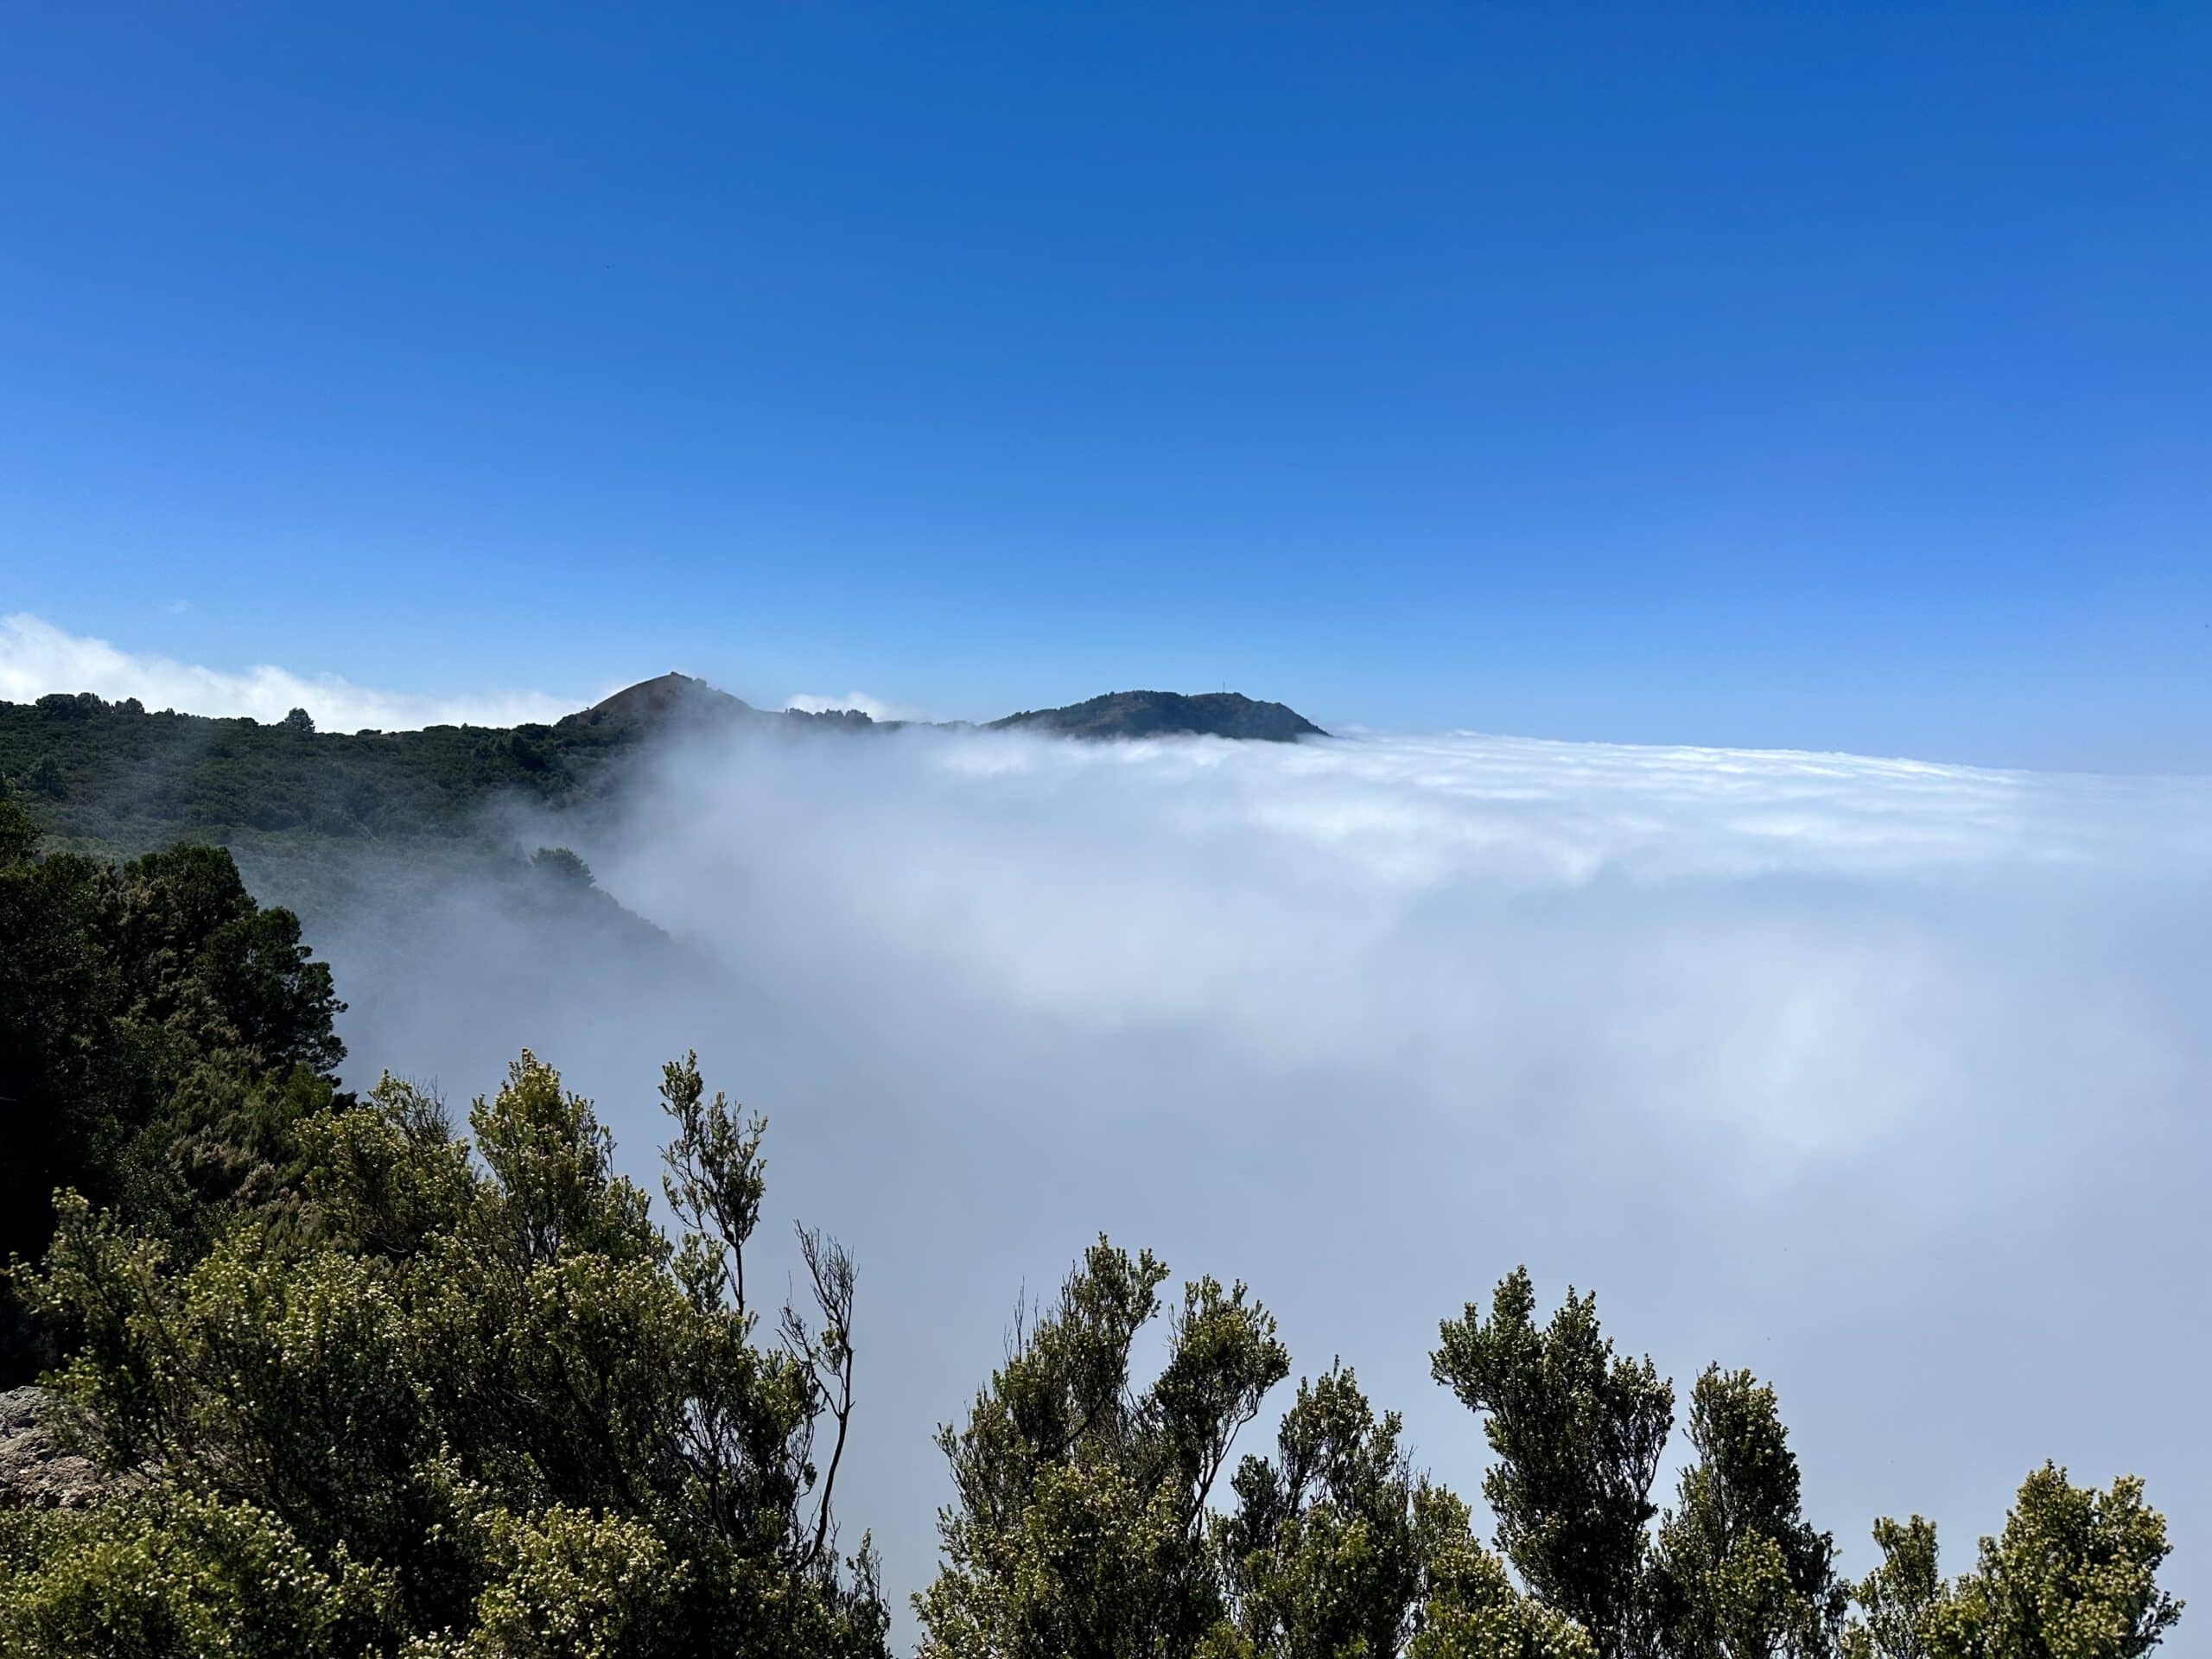
El Hierro - Clouds over the Cumbre - Camino de la Virgen
Section Cruz de los Humilladeros to Santuario Nuestra Señora de los Reyes (Camino de la Virgen)
After Cruz de los Humilladeros, you continue straight ahead along the slopes of the Cumbre. Slowly, you transition from the dark lava sand slopes to green and sparsely wooded areas. You walk through a gate, which you should close behind you. Then you continue downhill through meadows and fields. You are still very close to the Cumbre. Then you reach a crossroads. The path continues straight ahead at the Cumbre. However, the GR-131 Camino de la Virgen turns left.
Refilling water at the GR-131 Camino de la Virgen
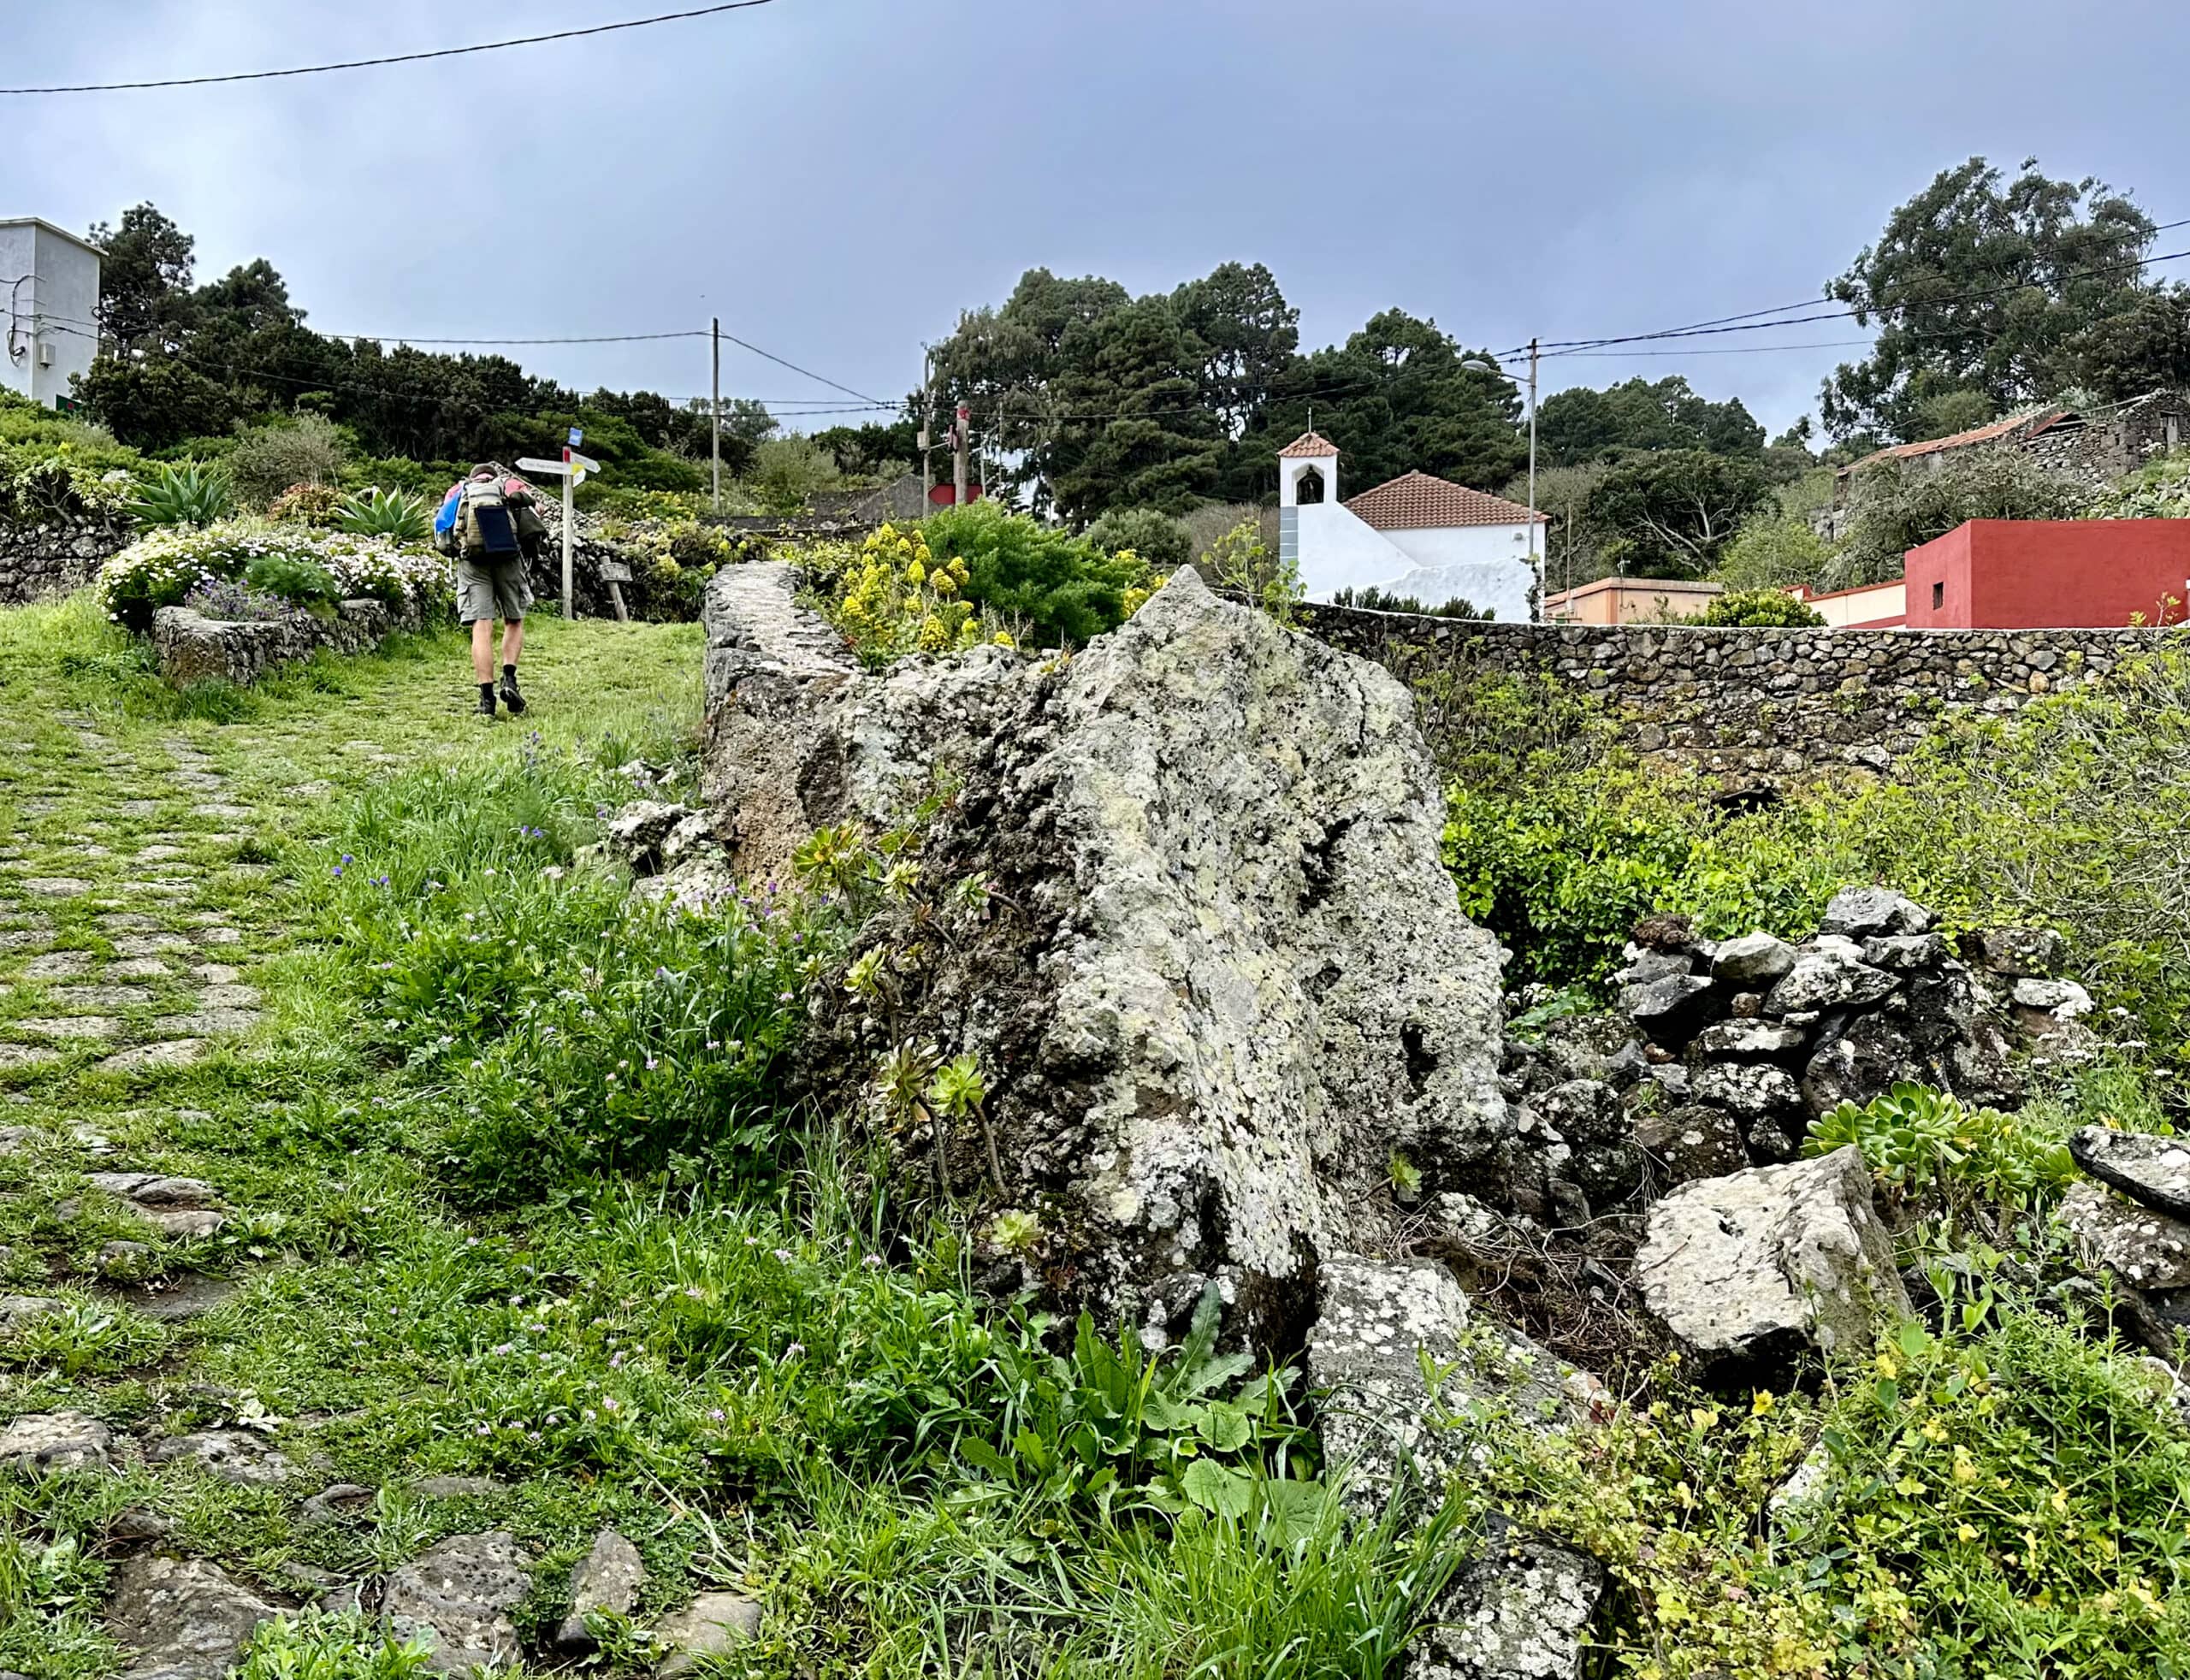
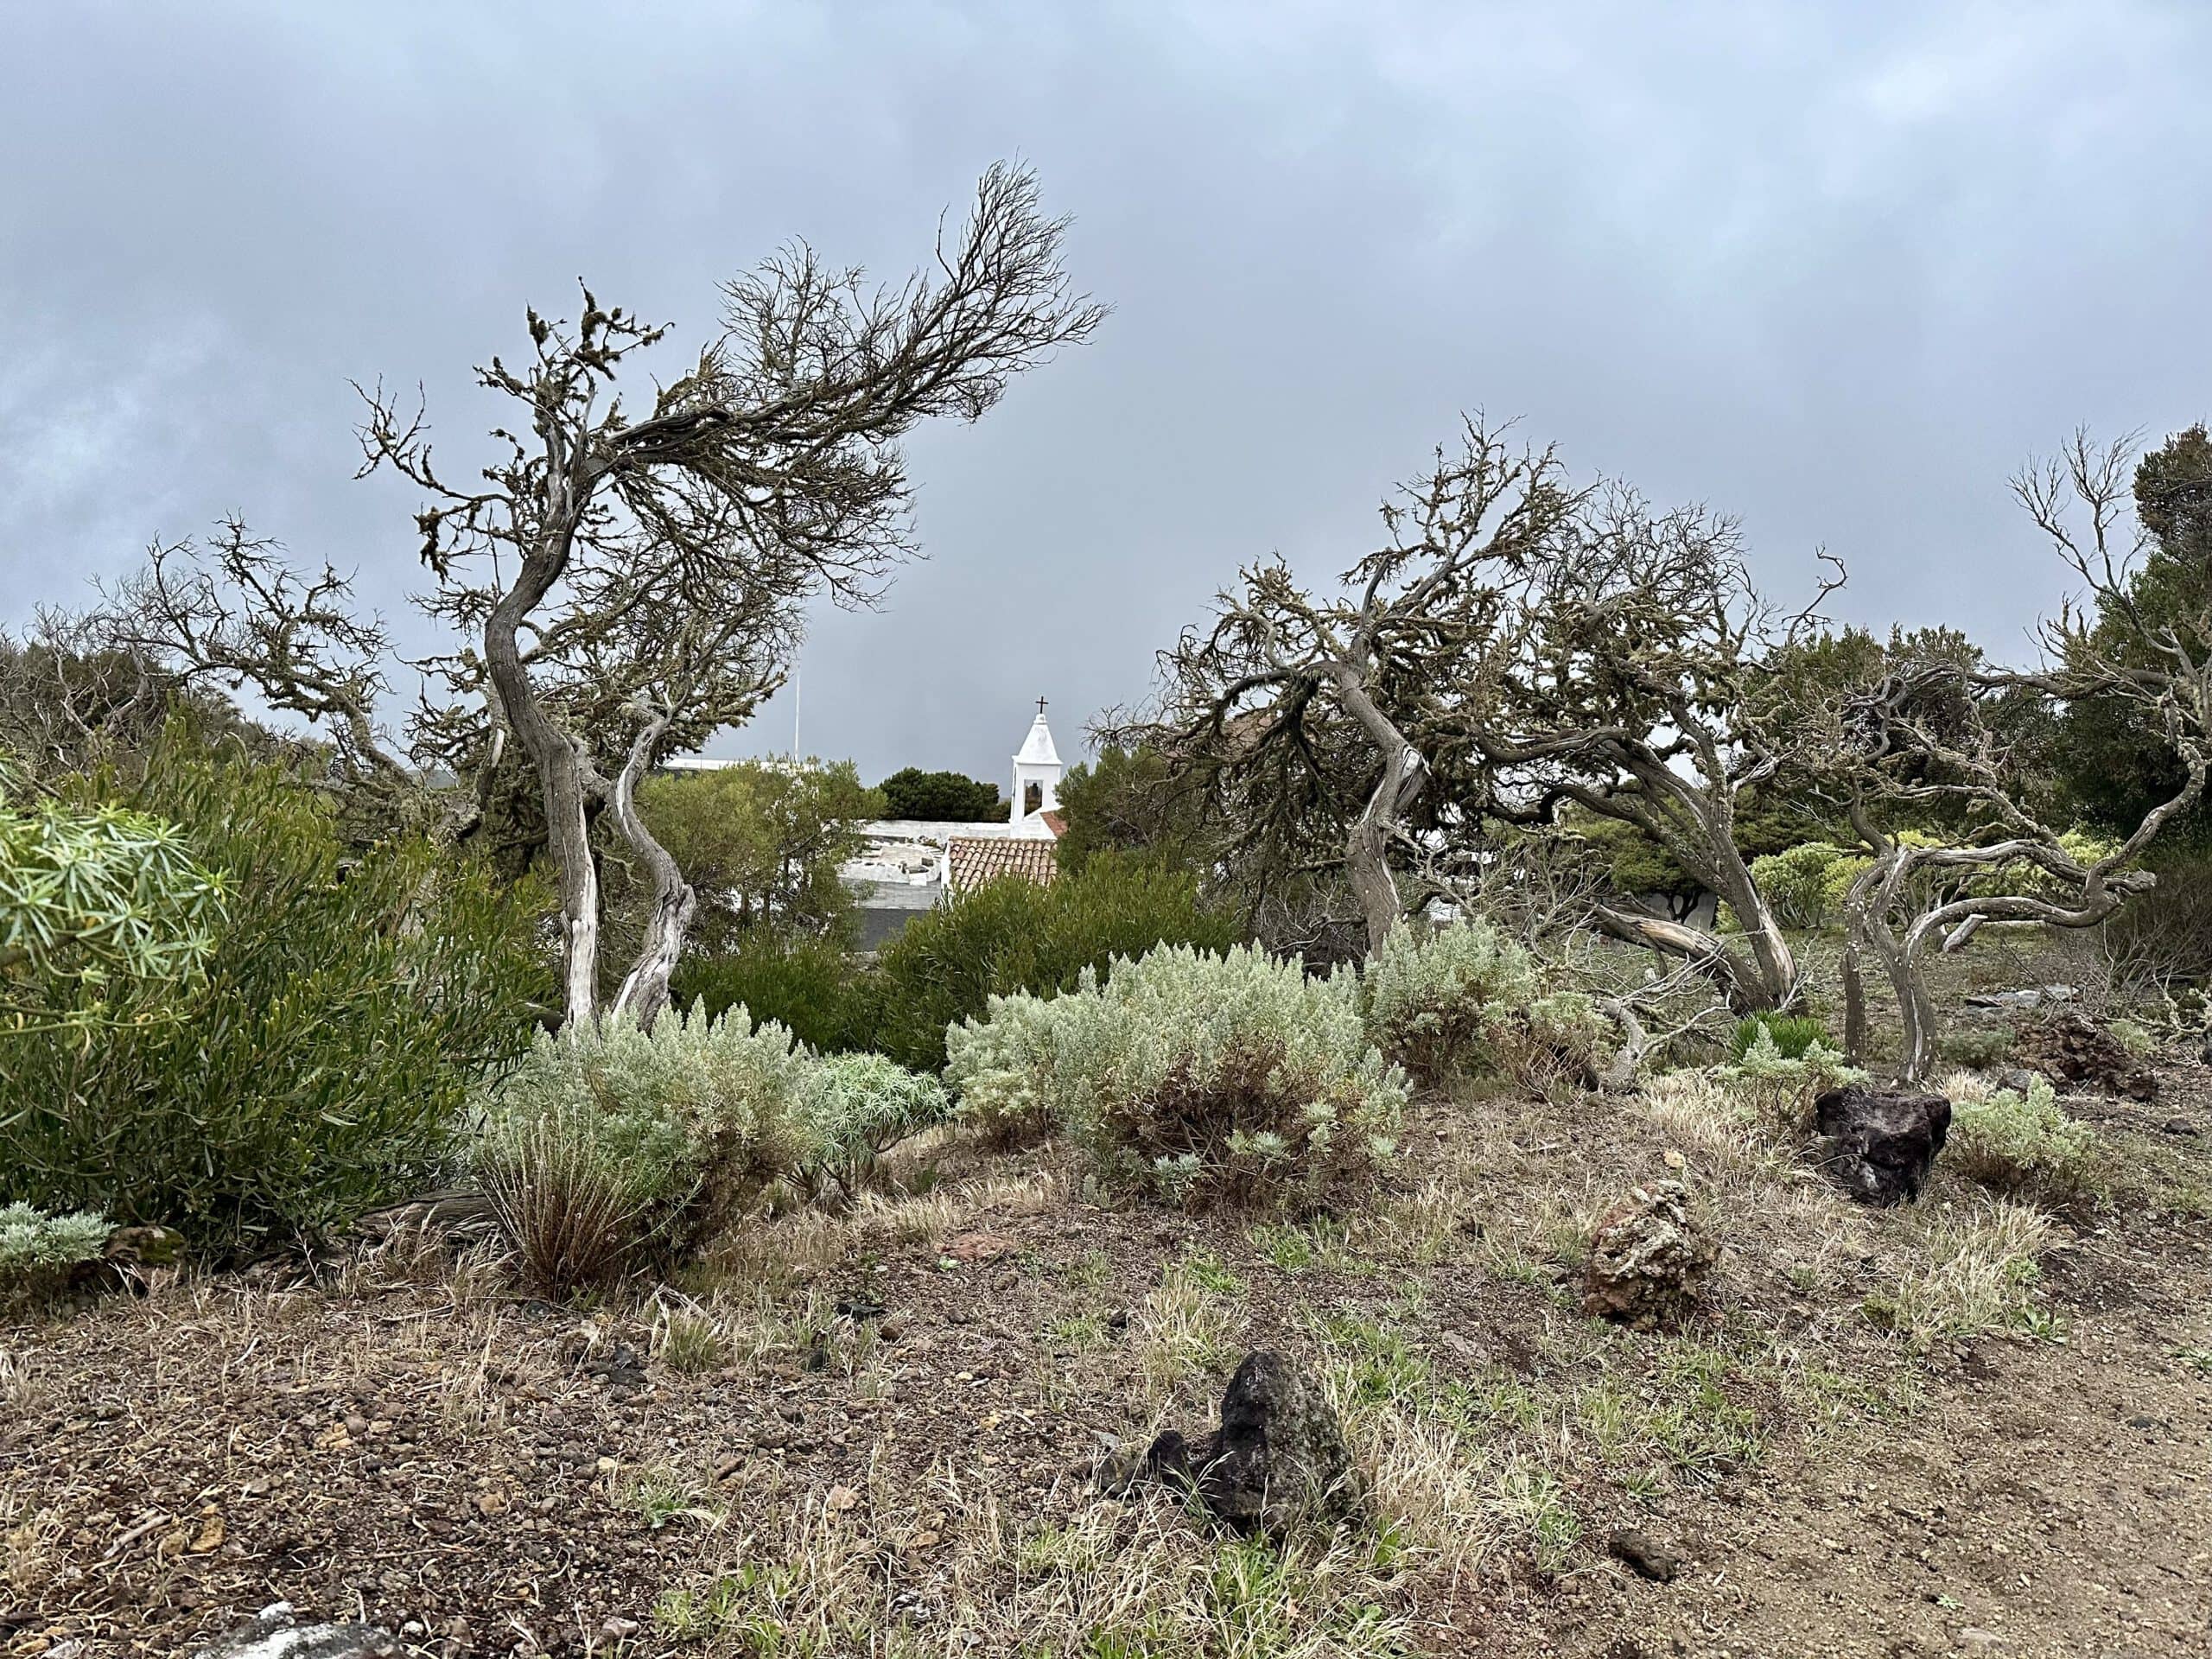
Now you hike downhill for a while through meadows and fields. You ignore a path branching off to the right. Through another gate, you finally reach the HI-506 road, which you follow to the left. You halfway circle around a mountain and finally reach the destination of the Camino de la Virgen. In front of you lies the Santuario Nuestra Señora de los Reyes. If you want to continue your way to Faro de la Orchilla, you go to the right of the road around the mountain on the signposted hiking trail. Here you can first visit the caves (Cueva de Caracol). Then the hiking trail, which branches off downhill to the left, takes you 4 kilometers to Faro de Orchilla.
At the finish of the GR-131 - Santuario Nuestra Señora de los Reyes
And finally
I hope you enjoyed the description of my hike on the GR 131 Camino de la Virgen and that it is helpful for you. I always look forward to your comments and reports of your own experiences, as well as further hints and information. Wishing you much joy on all your hikes,
Dagmar from SiebenInseln
Time to go home 🙂
Thank you for reading!
If you've found my hiking guides on SiebenInseln helpful for your Canary Islands adventures, please consider leaving a small tip. Your support is greatly appreciated and helps cover the costs of maintaining this blog.