Hoya Grande and Torre del Time – peaks with a view at the edge of the cliff
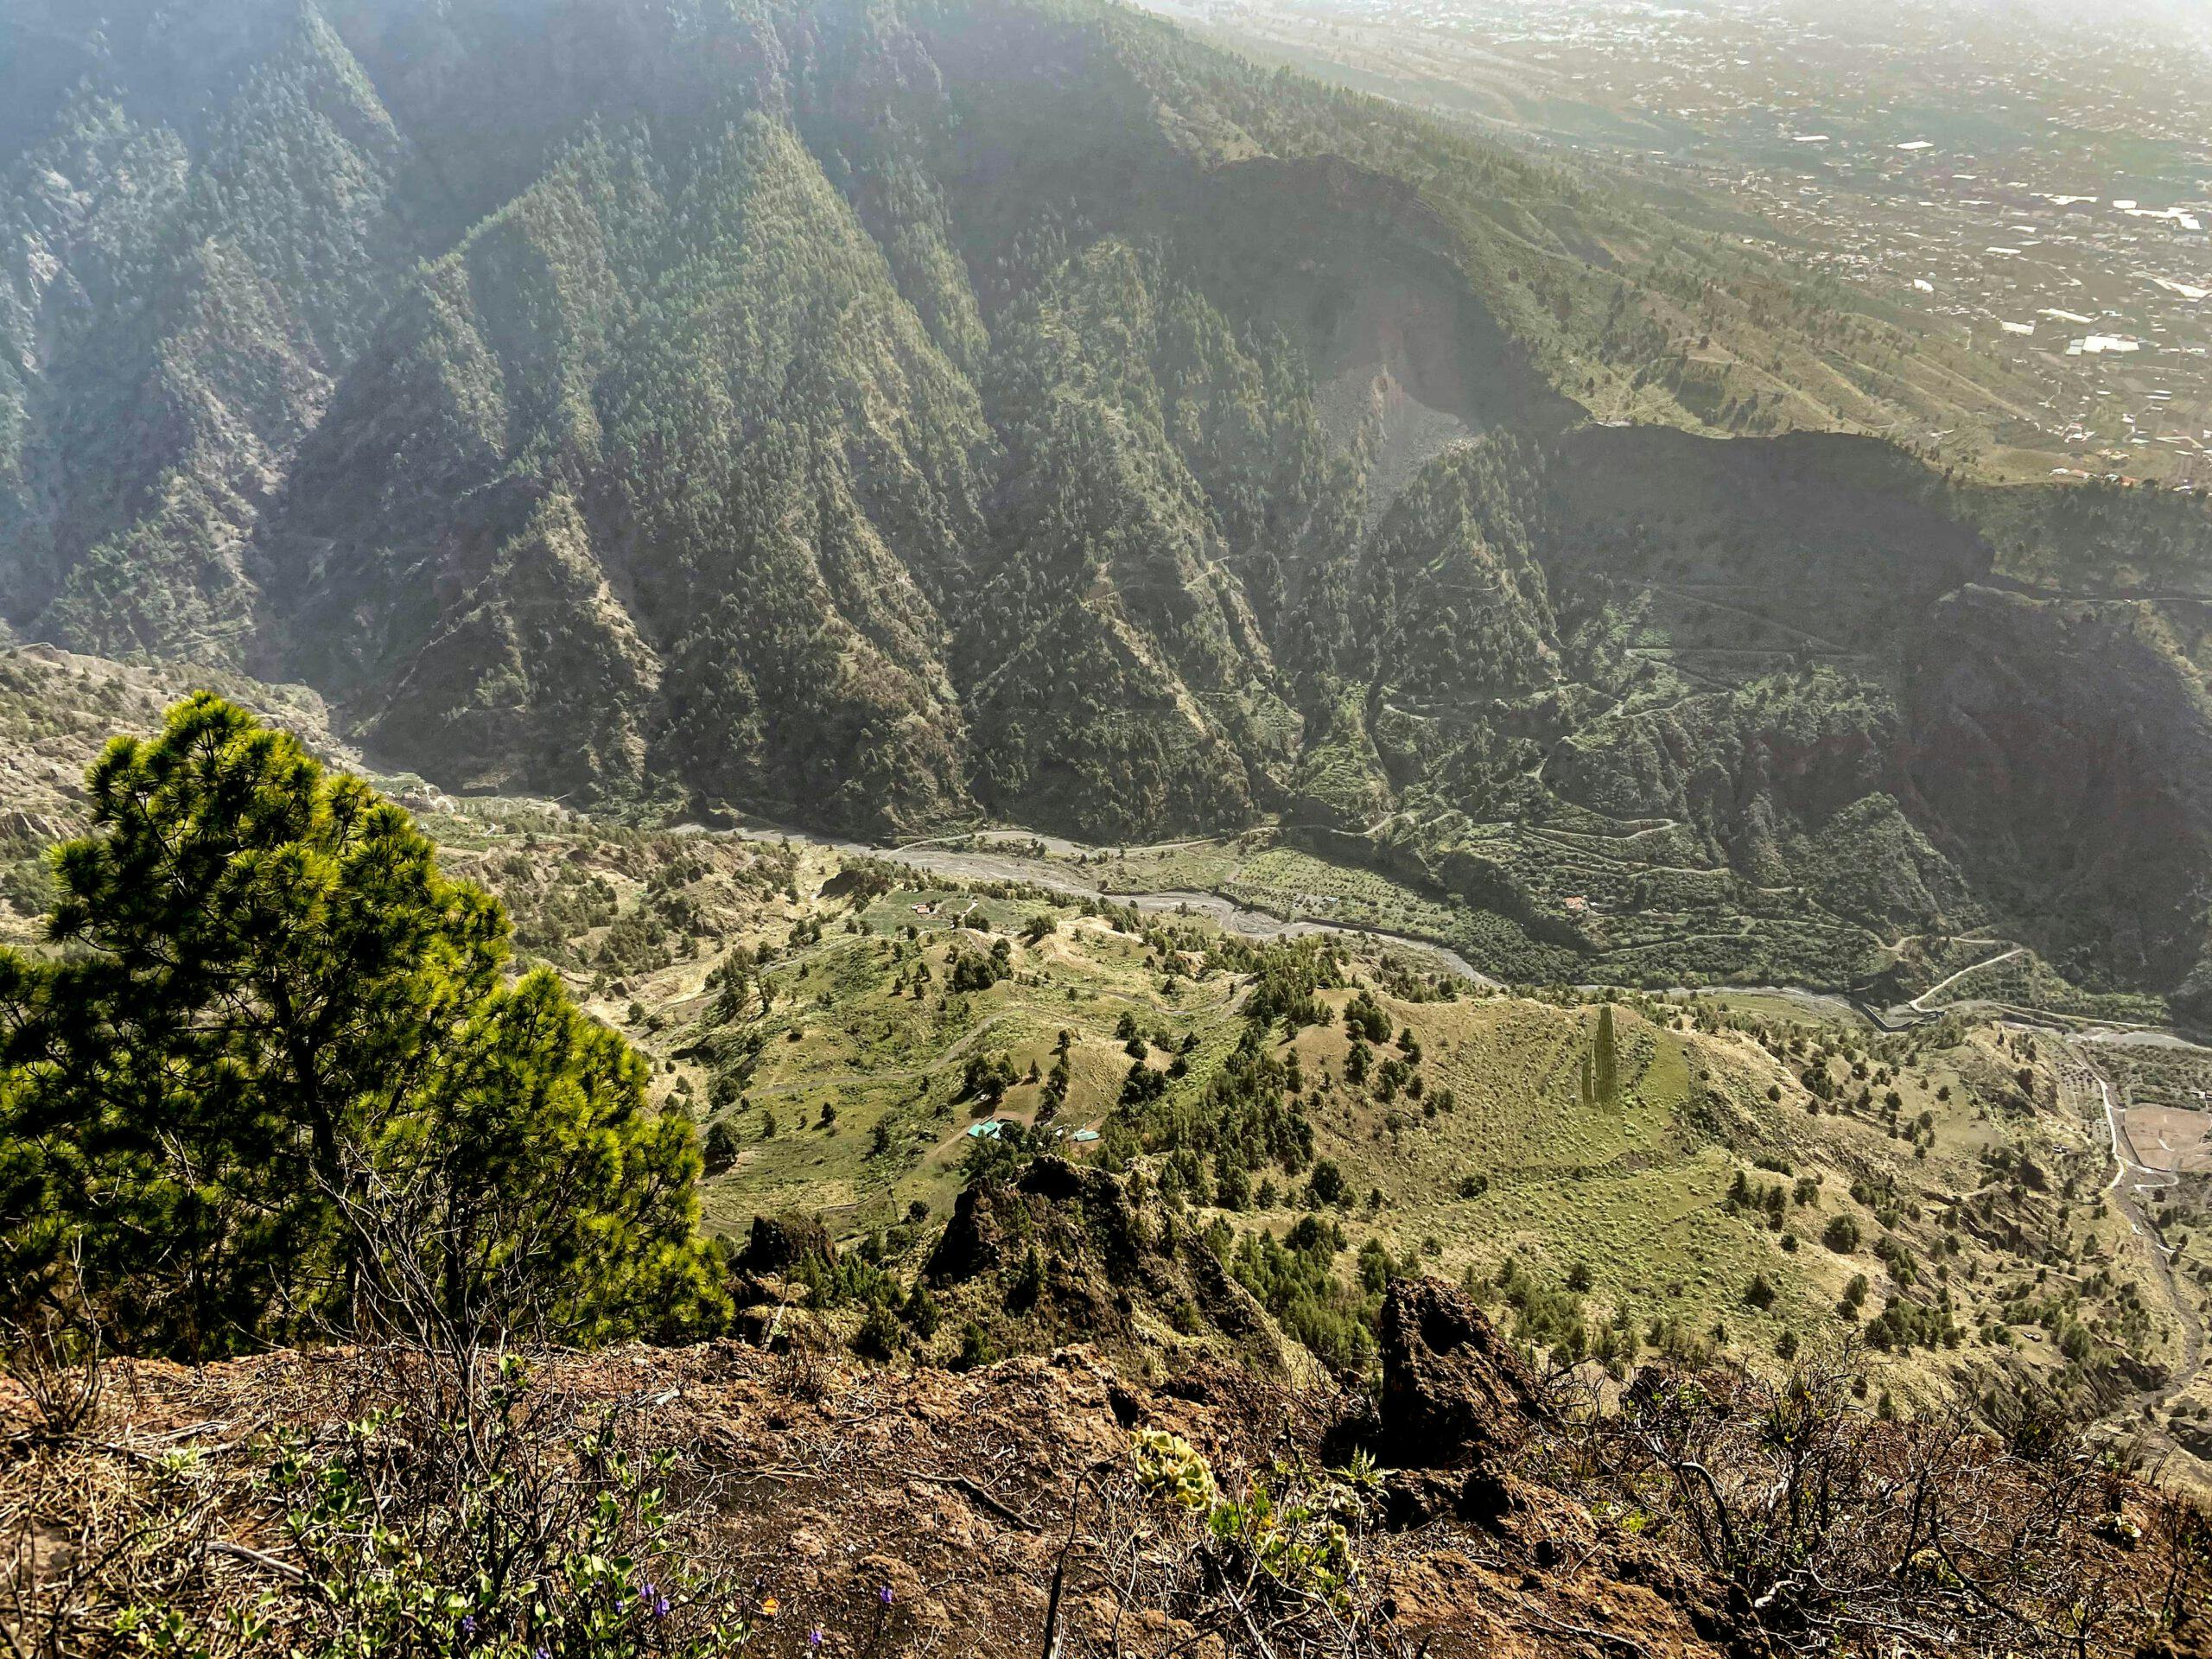
The Hoya Grande peak, with its 1,387 metres of altitude, is part of the rock walls surrounding the Angustias Gorge. You will reach this peak on this hike and have a beautiful view from there. Afterwards you can see the Caldera de Taburiente, the Barranco de Angustias and the Ariadne Valley opposite, as well as the Atlantic Ocean. You can also enjoy all the views again on this hike from the fire protection tower Torre del Time, which you will pass a little later.
Map

terraced vineyards on the way back
On this beautiful, but also strenuous mountain hike, you walk along the edge of the Caldera de Taburiente. I described a longer hike on the upper edge of the caldera in the article Pico de la Nieve. The rim high above the caldera is also part of the famous Transvulcania run. You can read more about it in the article Ruta de los Volcanes. In my opinion, any hike on the impressive rim high above the caldera – whether short or long – is worth it. Because the views always compensate you for the arduous ascents. 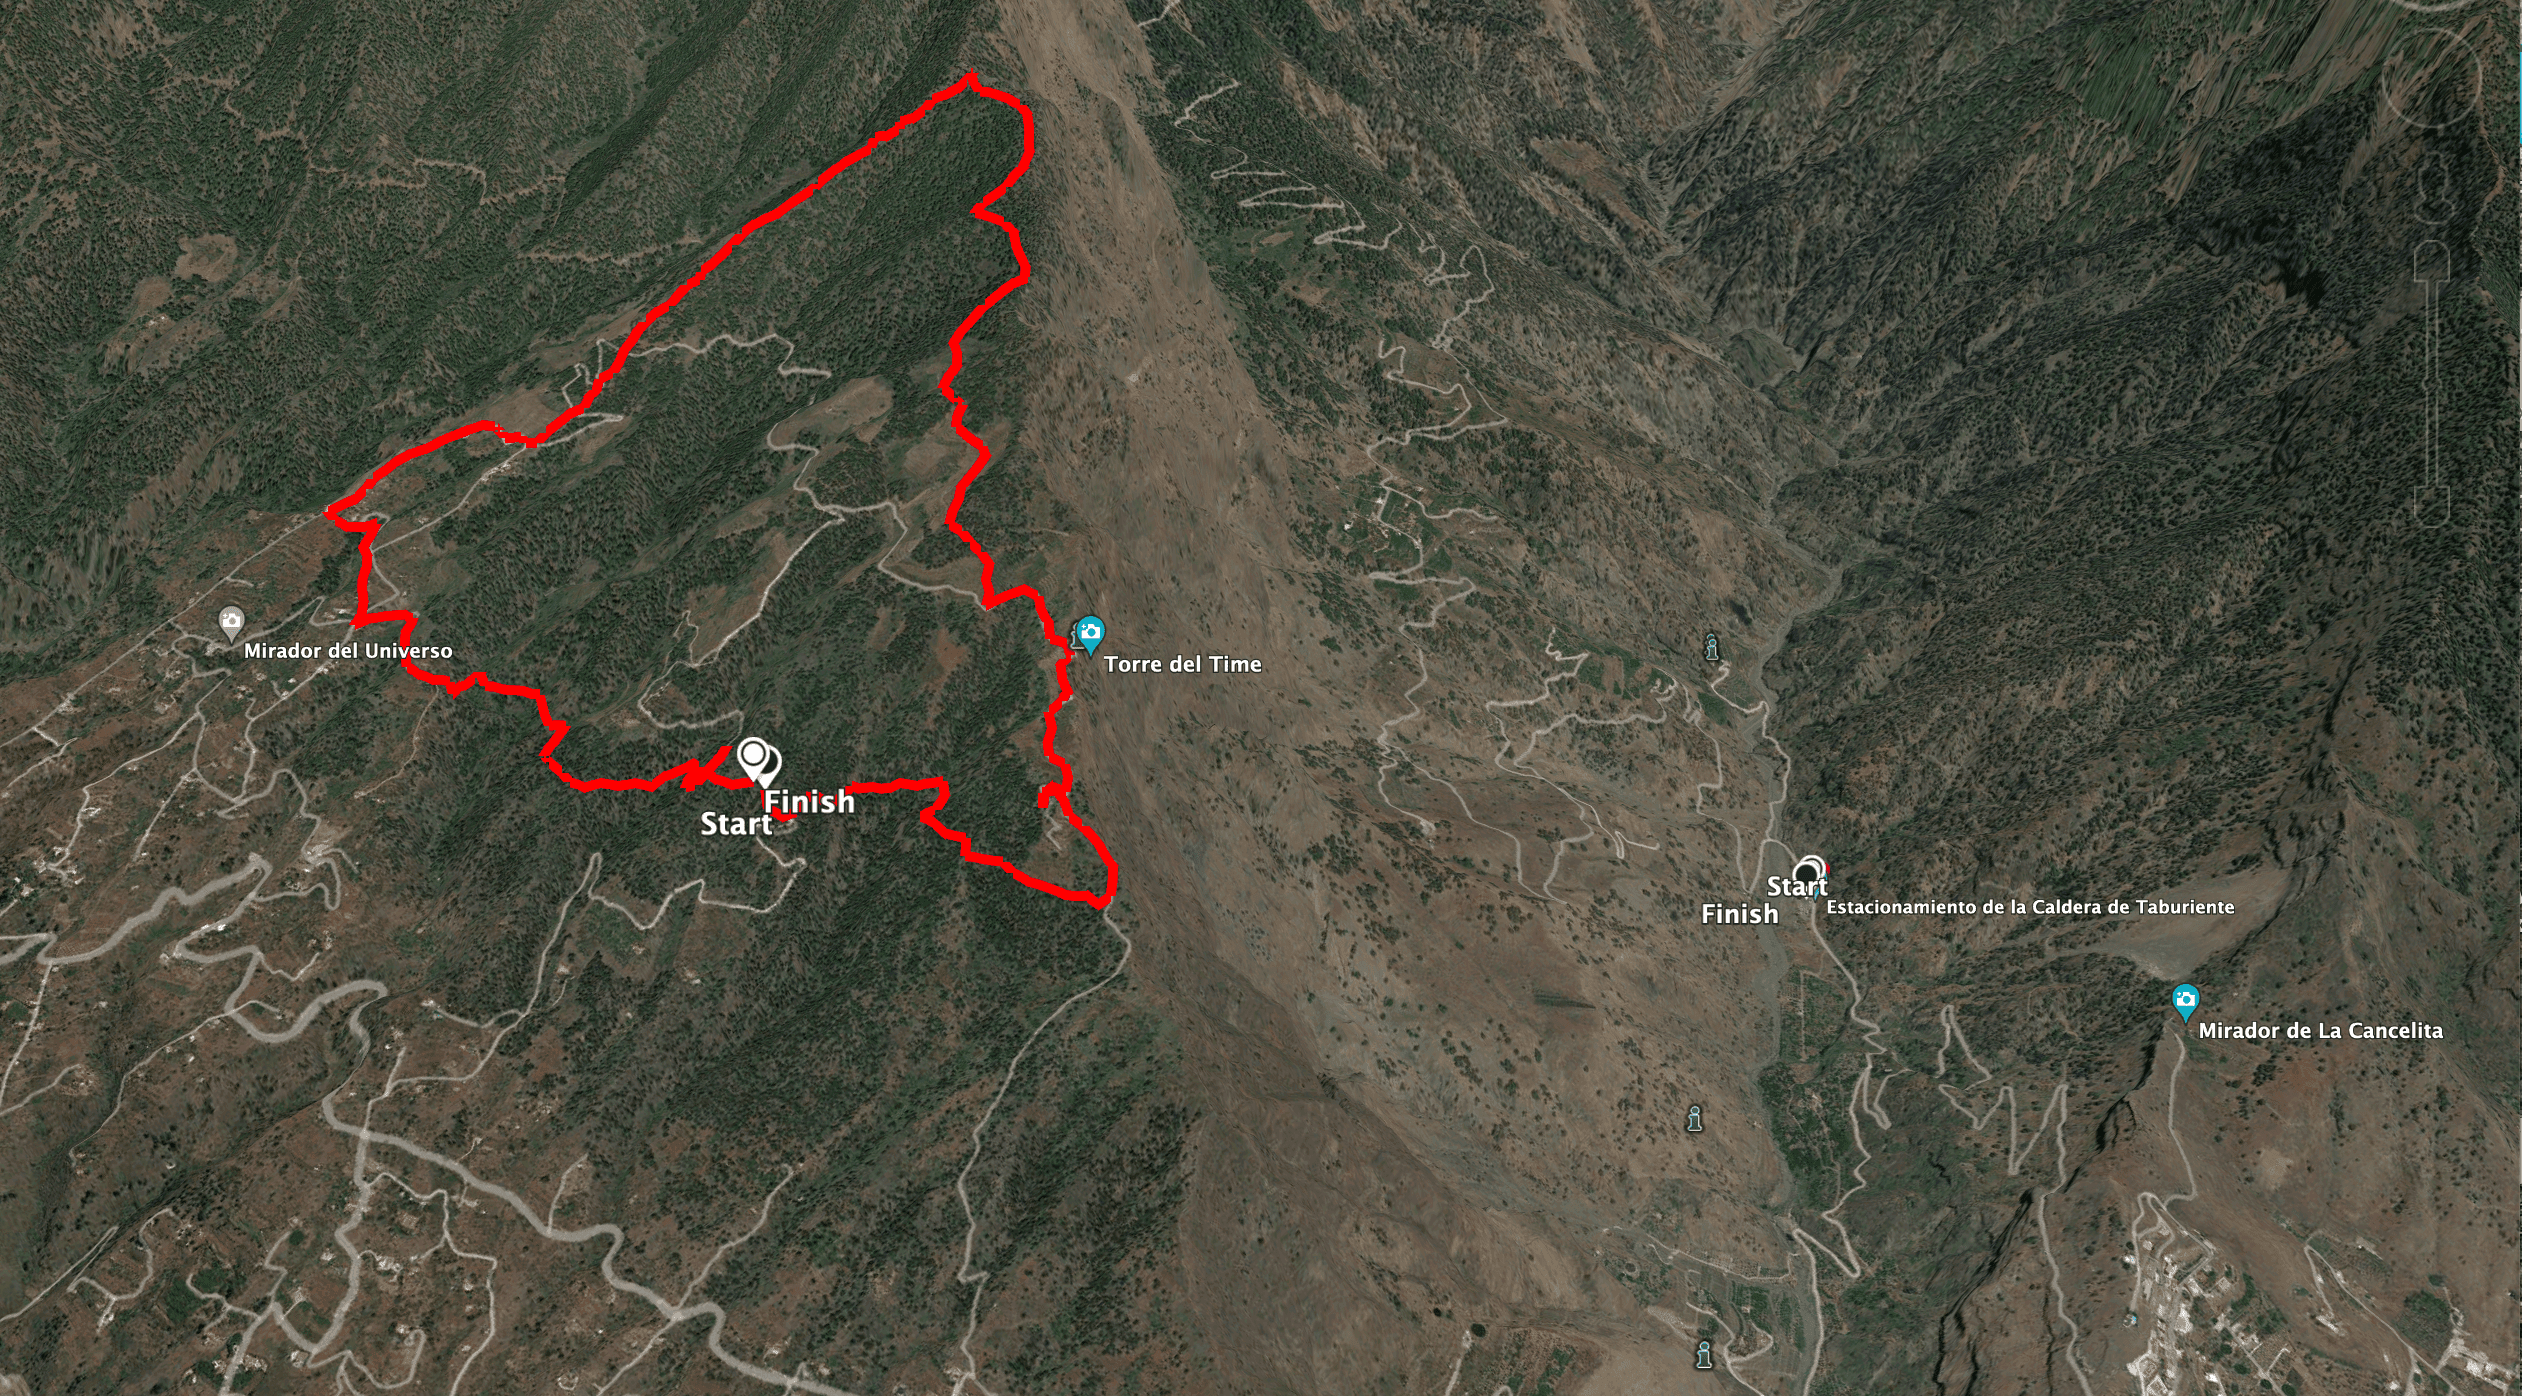
Hoya Grande and Torre del Time Hike Track
General information about the Hoya Grande and Torre del Time hike
Starting point and approach
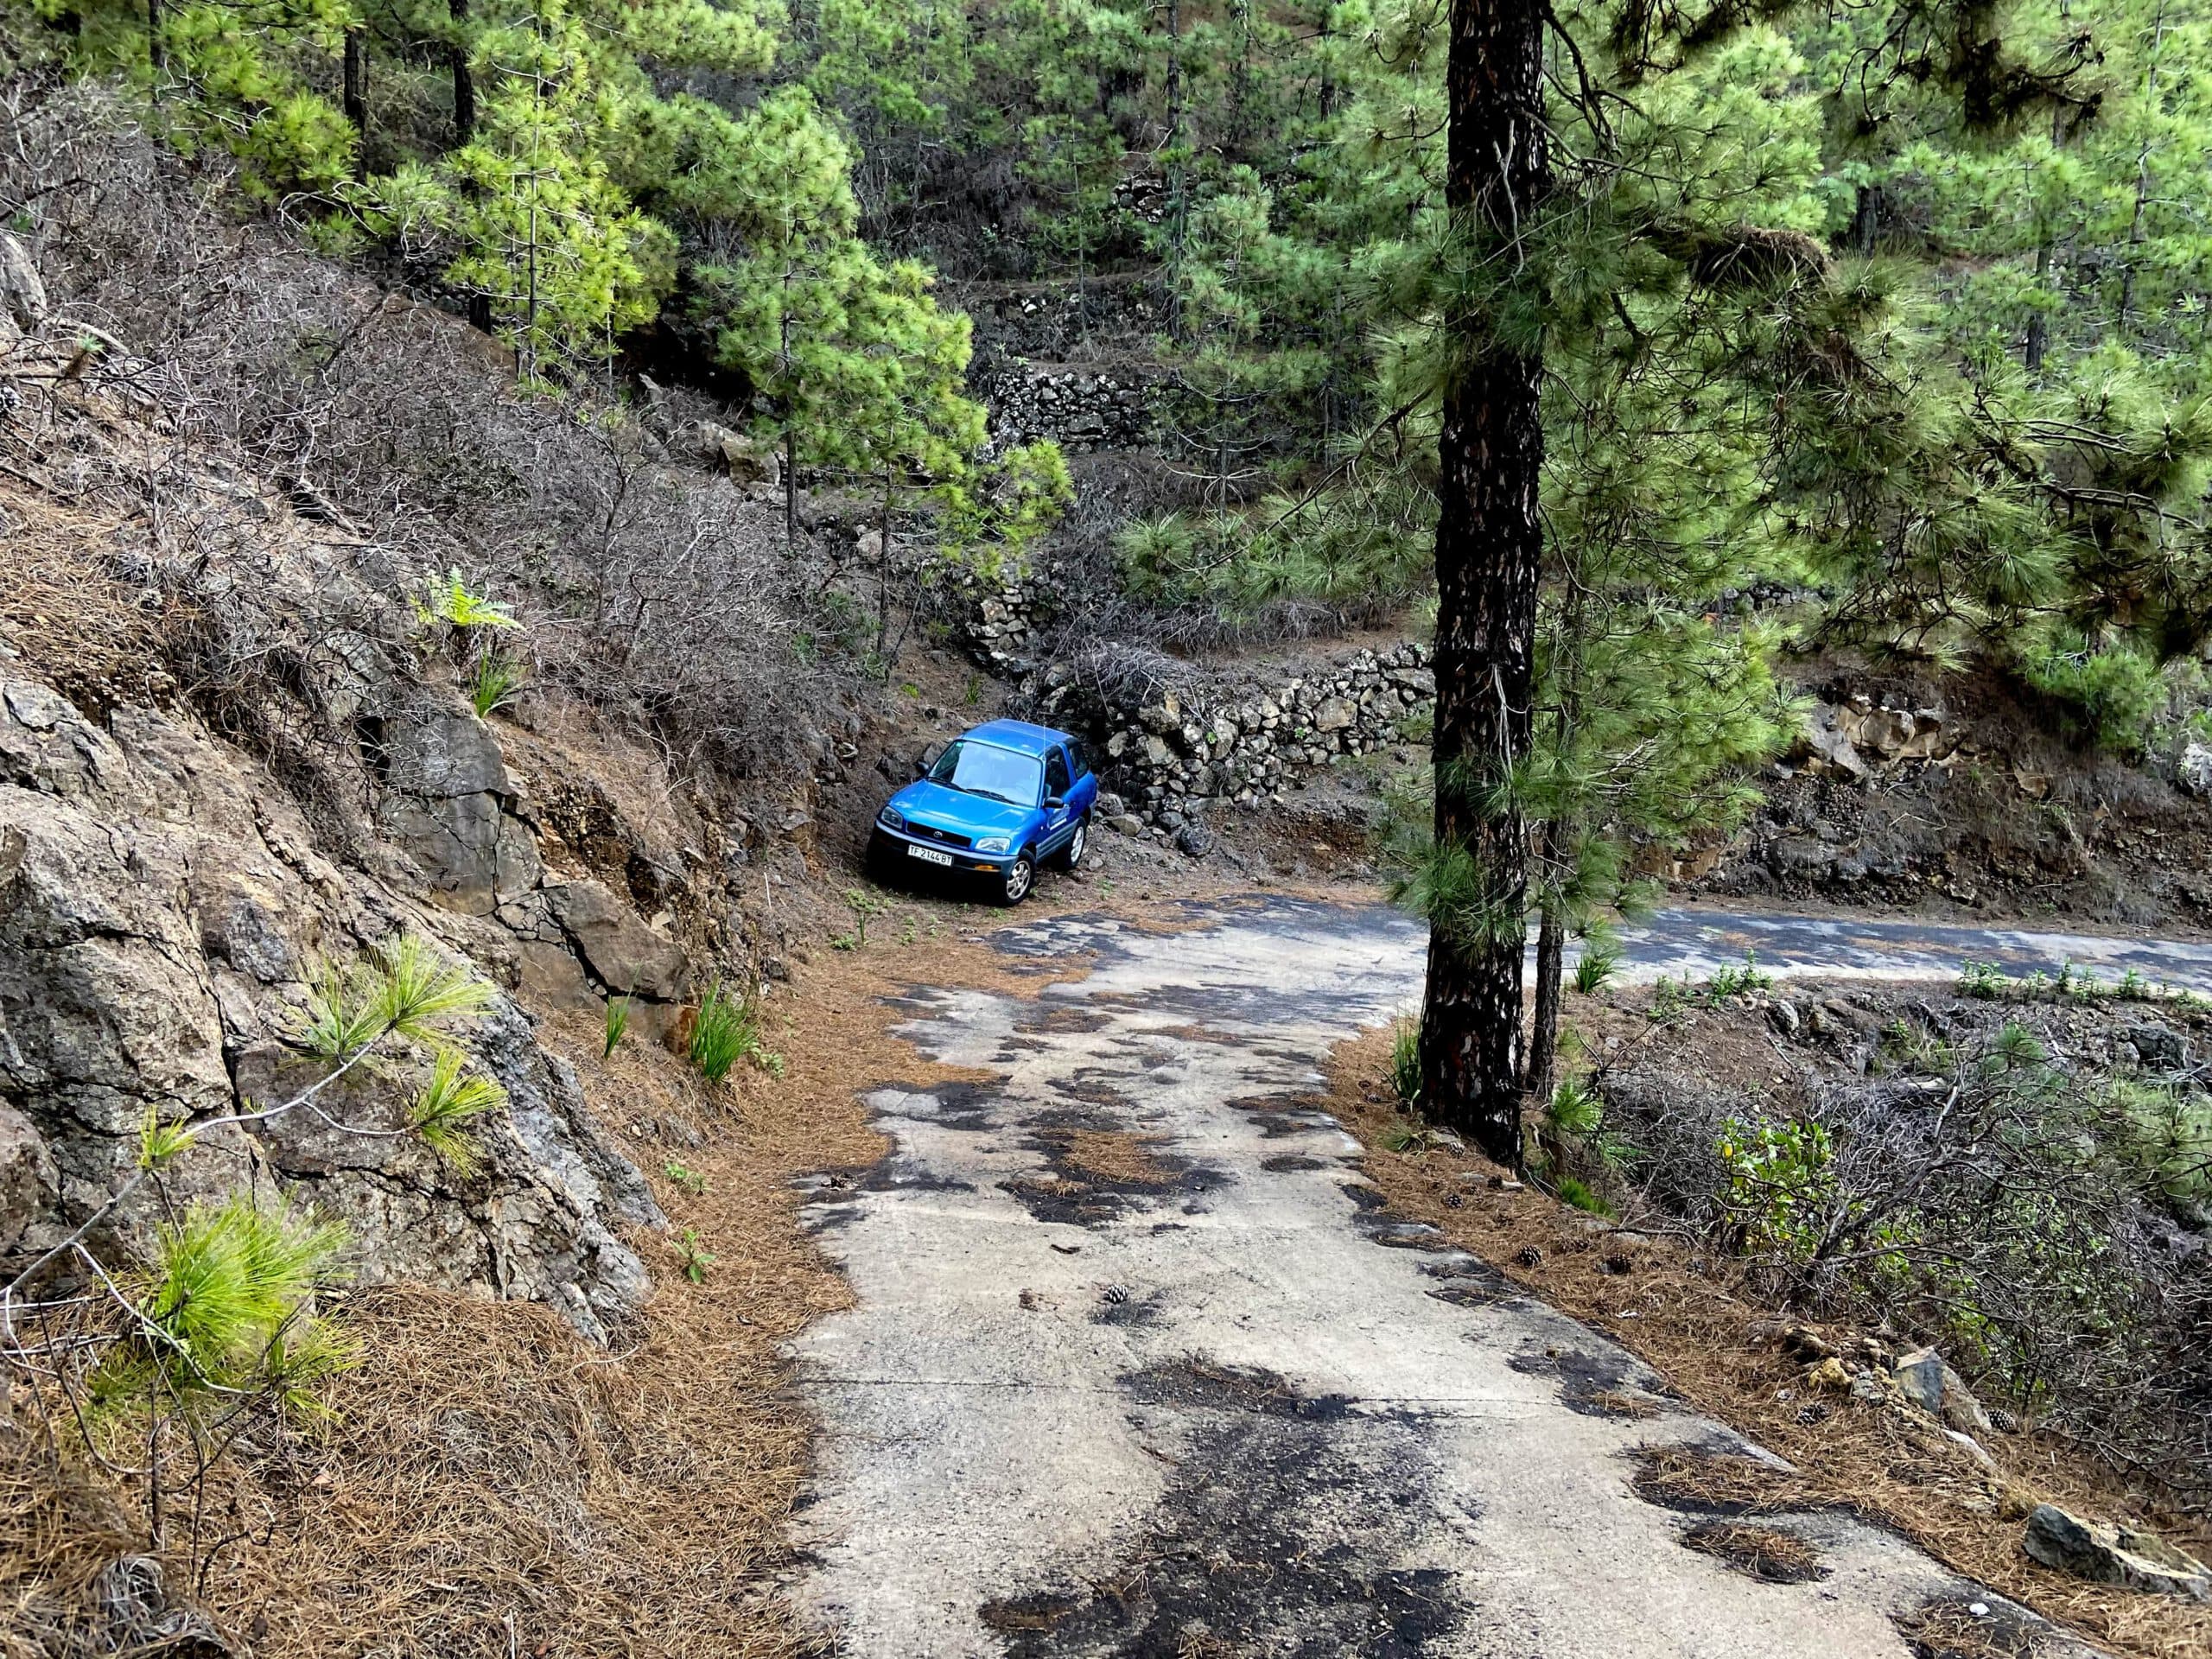
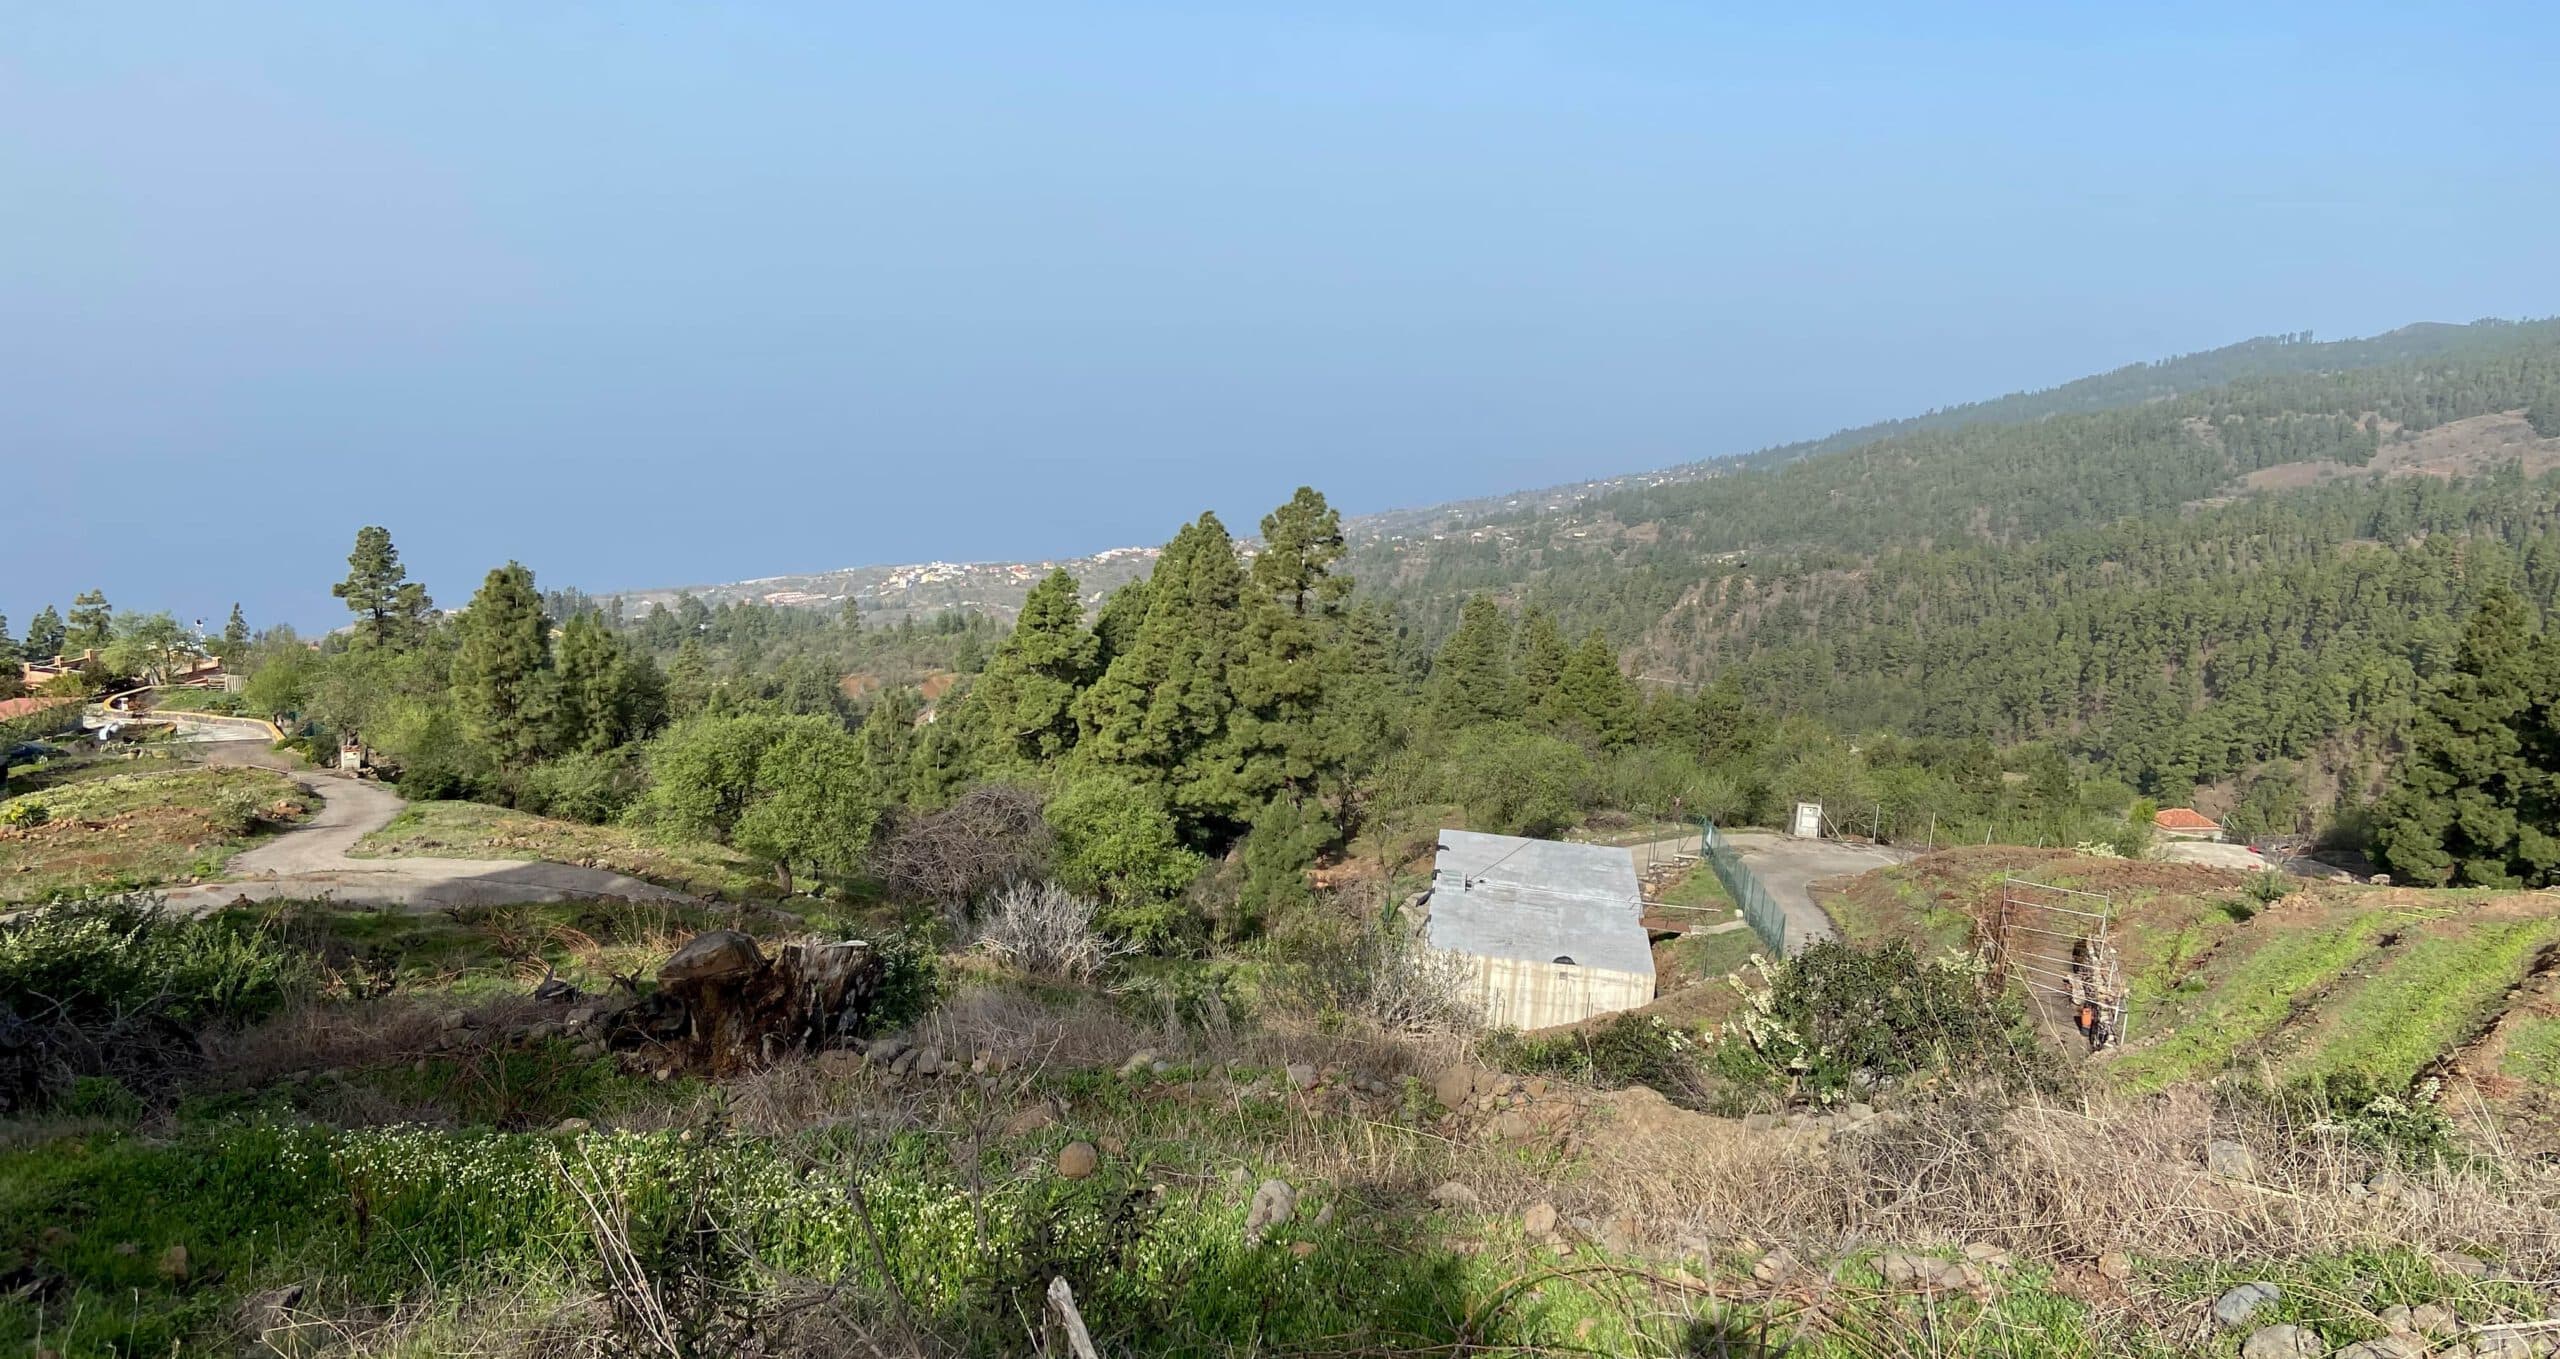
The starting point of the hike is a dirt road high above the towns of La Punta and Jesús.
GPS data: 28.694789, -17.930023.
Starting point piste
Arrival by car
You come via the LP-1 and, depending on the direction, turn off the road towards the mountains at El Jesús or La Punta. I cannot describe the exact route from here, as you have to take various dirt roads and tracks. The best way to get to the starting point is to use the GPS data. However, as this is a circular walk, you can of course start at any other starting point on the route. From El Jesús you can also walk or drive up towards Mirador del Universo and start the hike from there.
Arrival by bus
There is no bus to the starting point of the hike. Bus number 110 passes by La Punta and the Mirador del Time below the Torre del Time. So you could get to the hiking loop from there. You can find more details on the Tilp homepage. Alternatively, you could take a taxi from the bus stop towards the hiking route. Time
I don’t like to give general times for hiking tours, because the times are very individual. We needed about 3 hours and 45 minutes for this hike with an extensive rest at the summit.

Altitude profile of the Hoya Grande hike and Torre del Time
Altitude difference and route length
Article summary and large selection of GPS hiking tracks
Sign up for my newsletter now and get exclusive access to my collected GPS tracks as well as all the brief information about my articles.
Sign up nowThe difference in altitude is about 650 metres and the route is about 9.5 kilometres long.
Requirement
Basically, this hike is doable and runs mostly on good hiking trails. However, there is a very steep uphill trail that really requires stamina, endurance and a little sure-footedness.
Refreshment
There are no restaurants, bars or shops along the entire route. Therefore, take enough water and food with you if necessary.
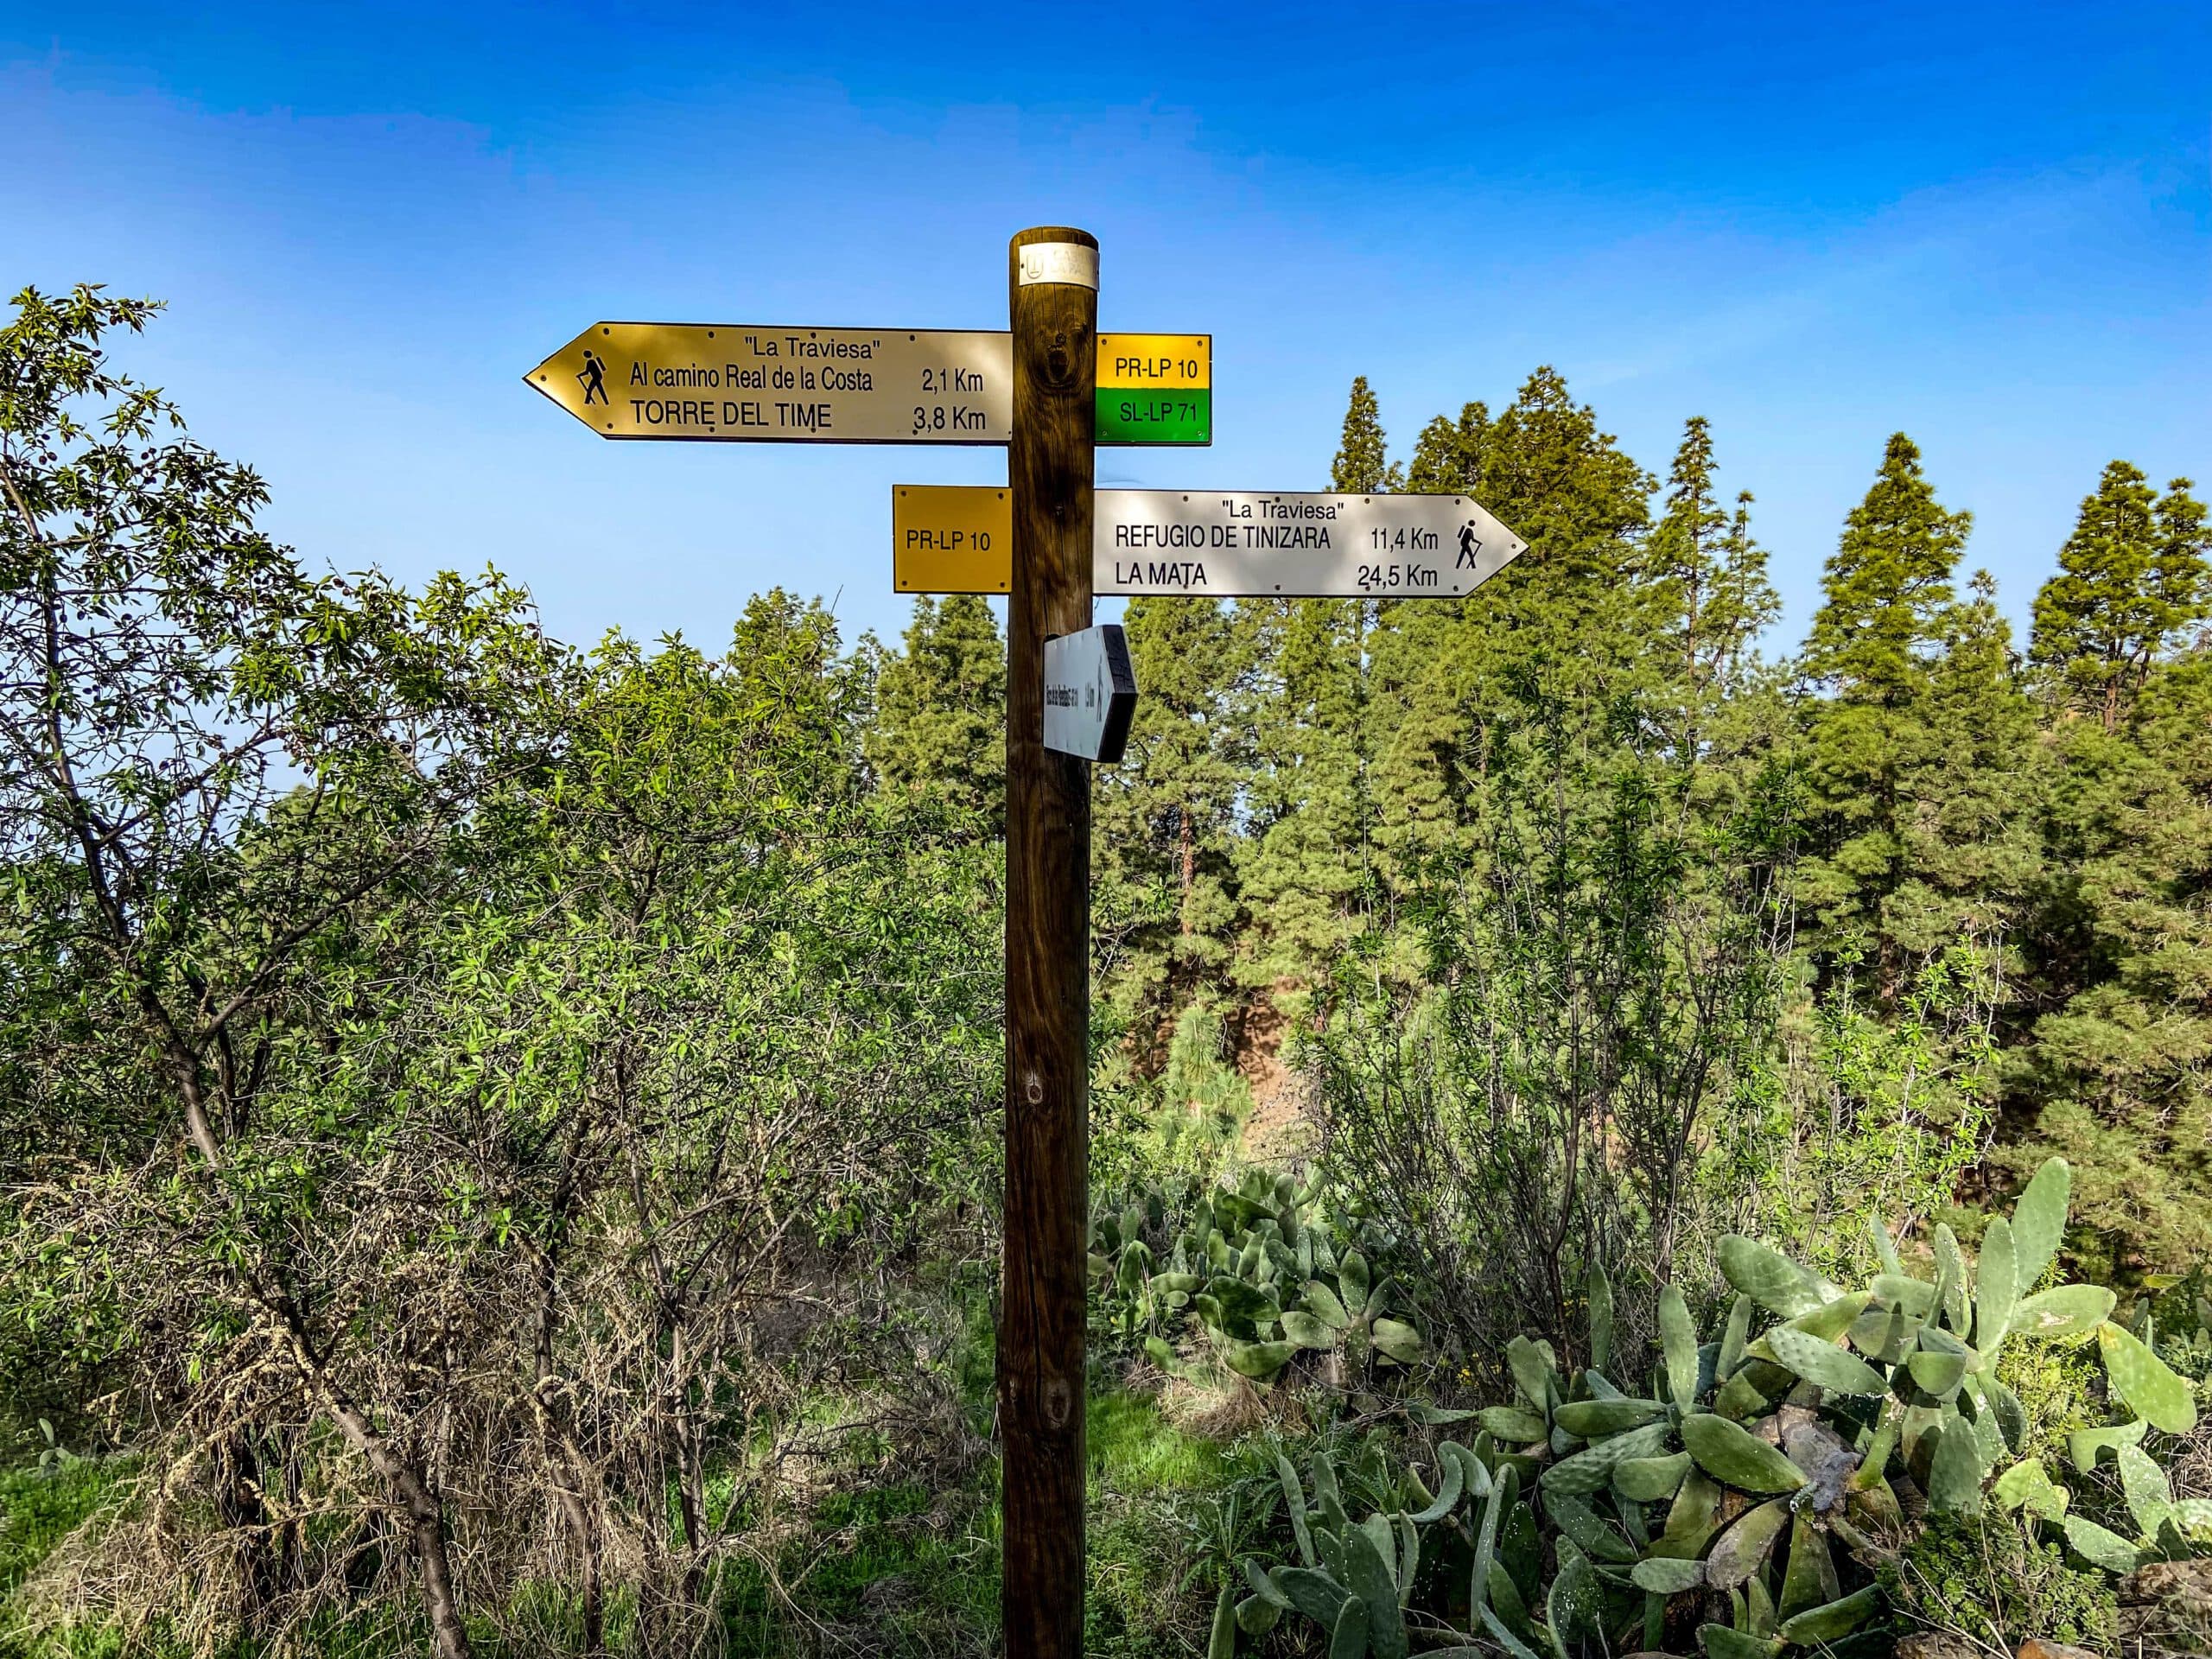
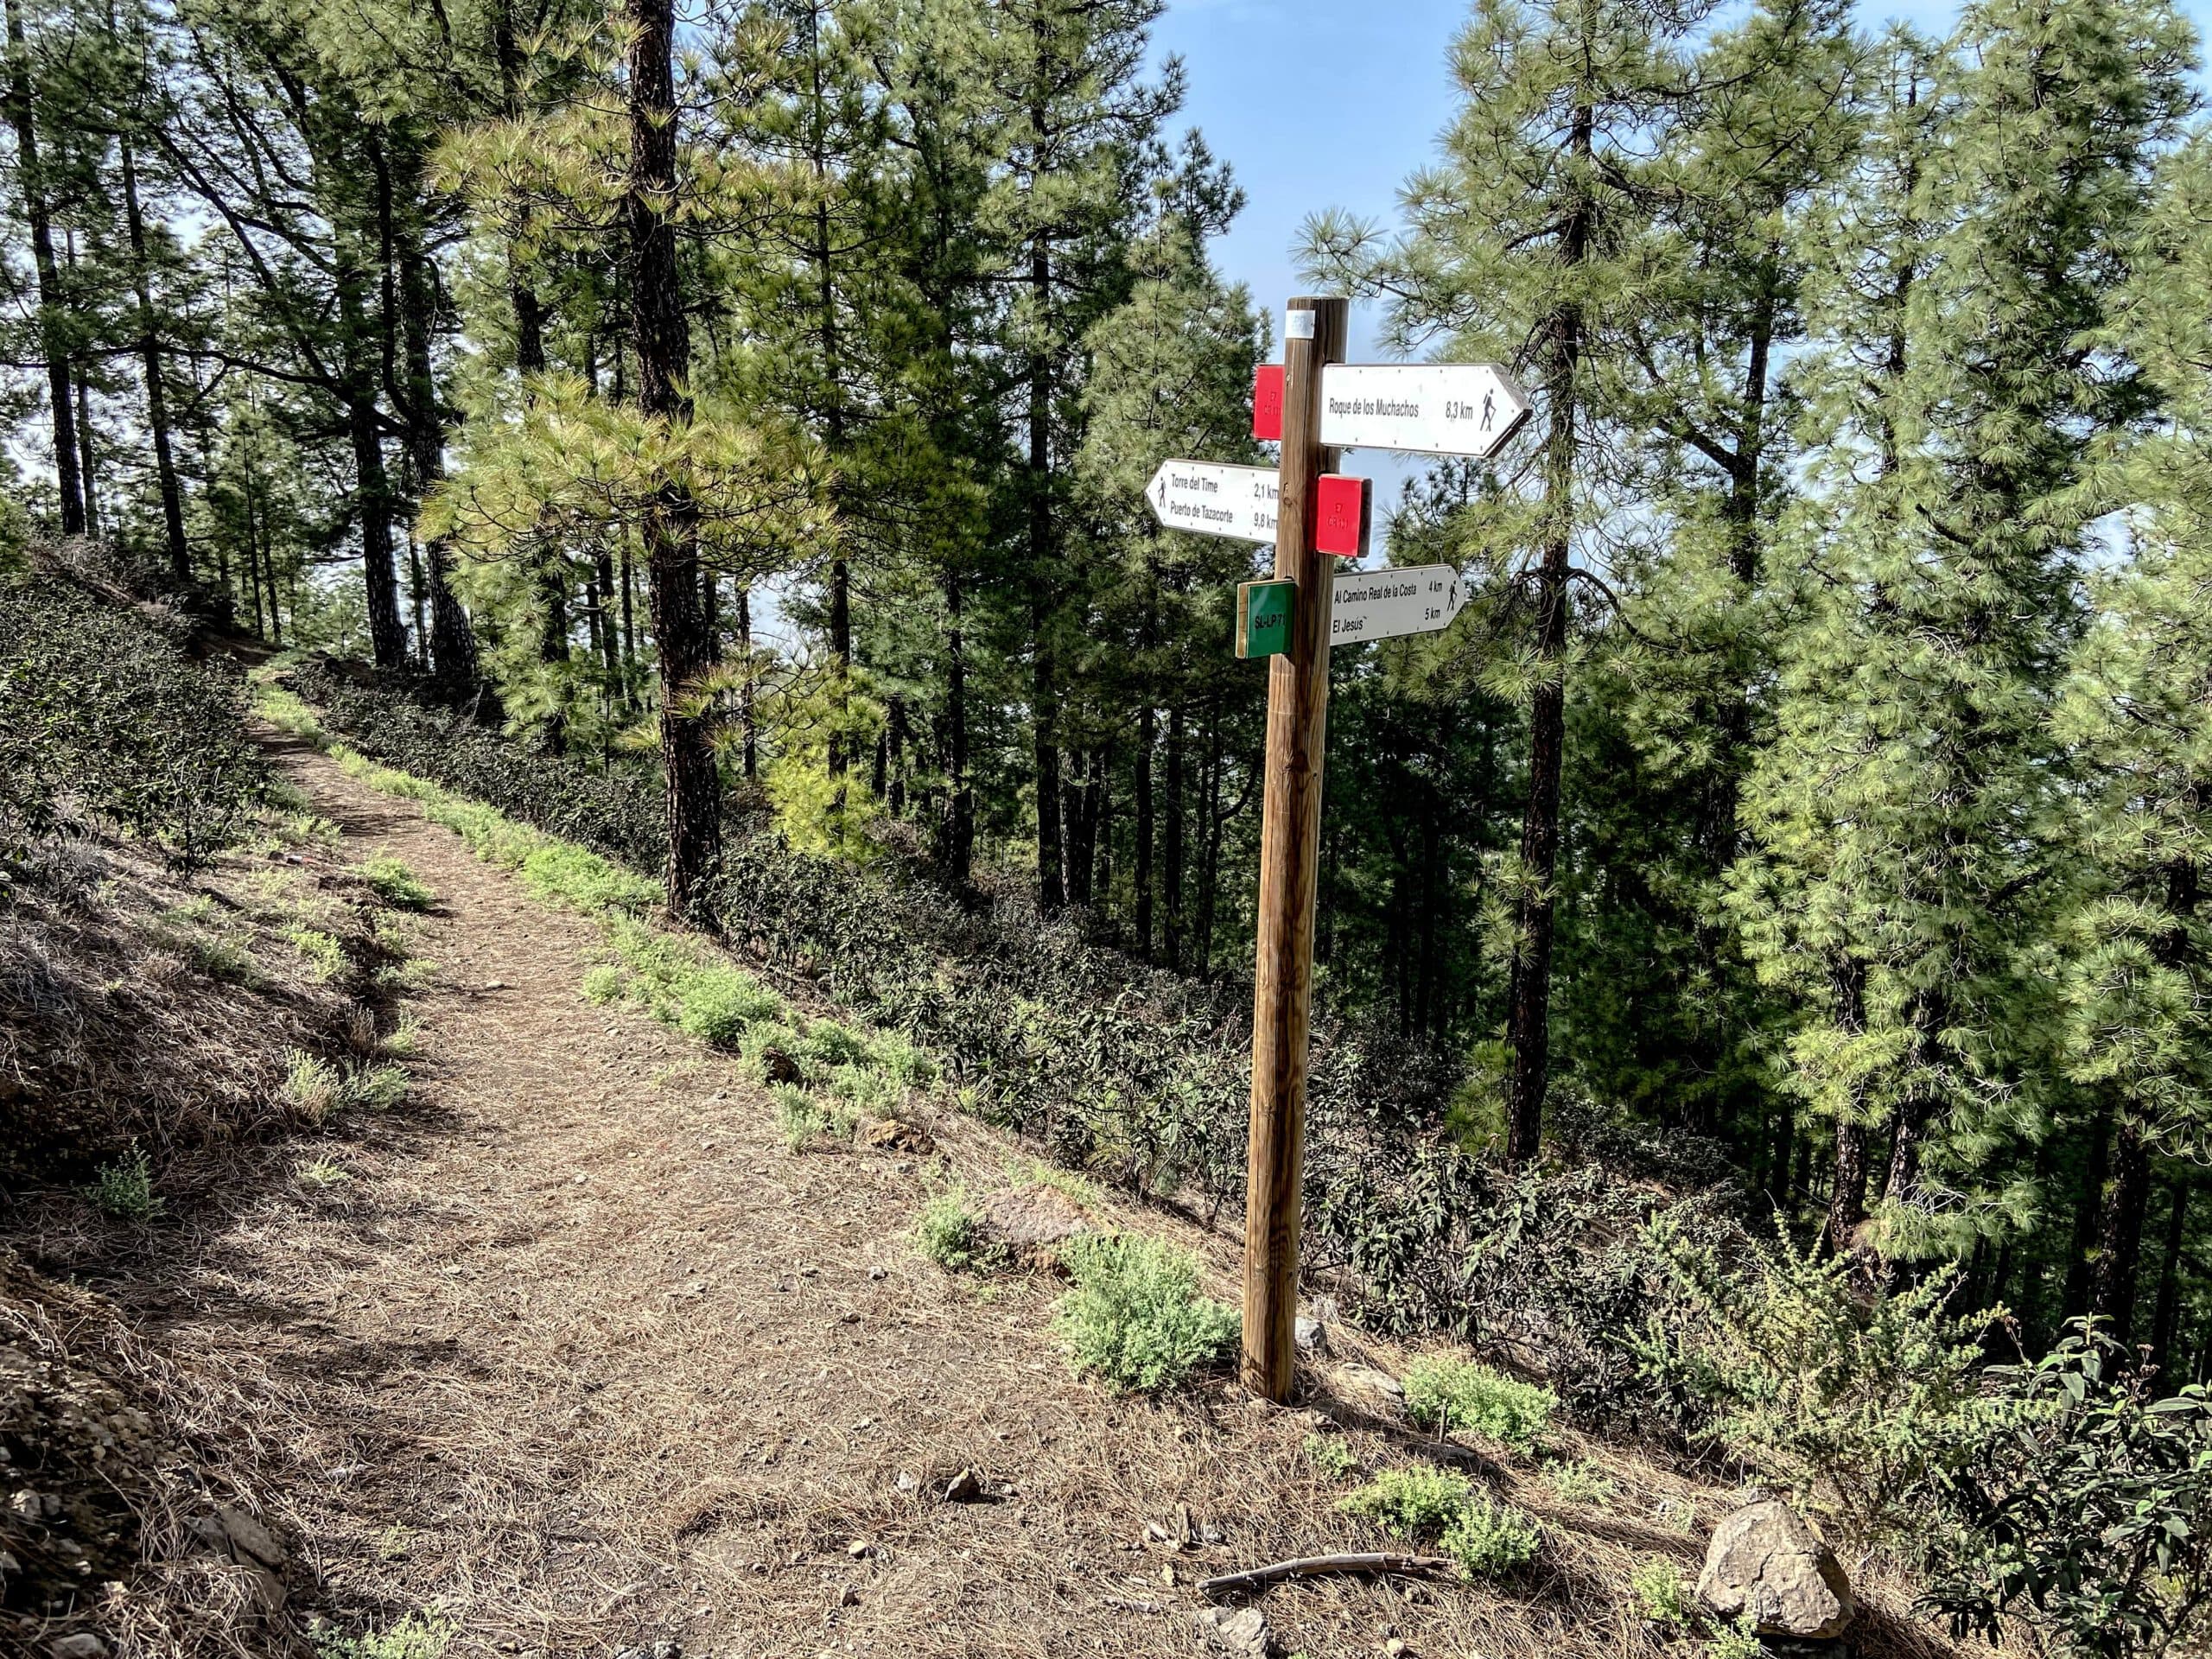
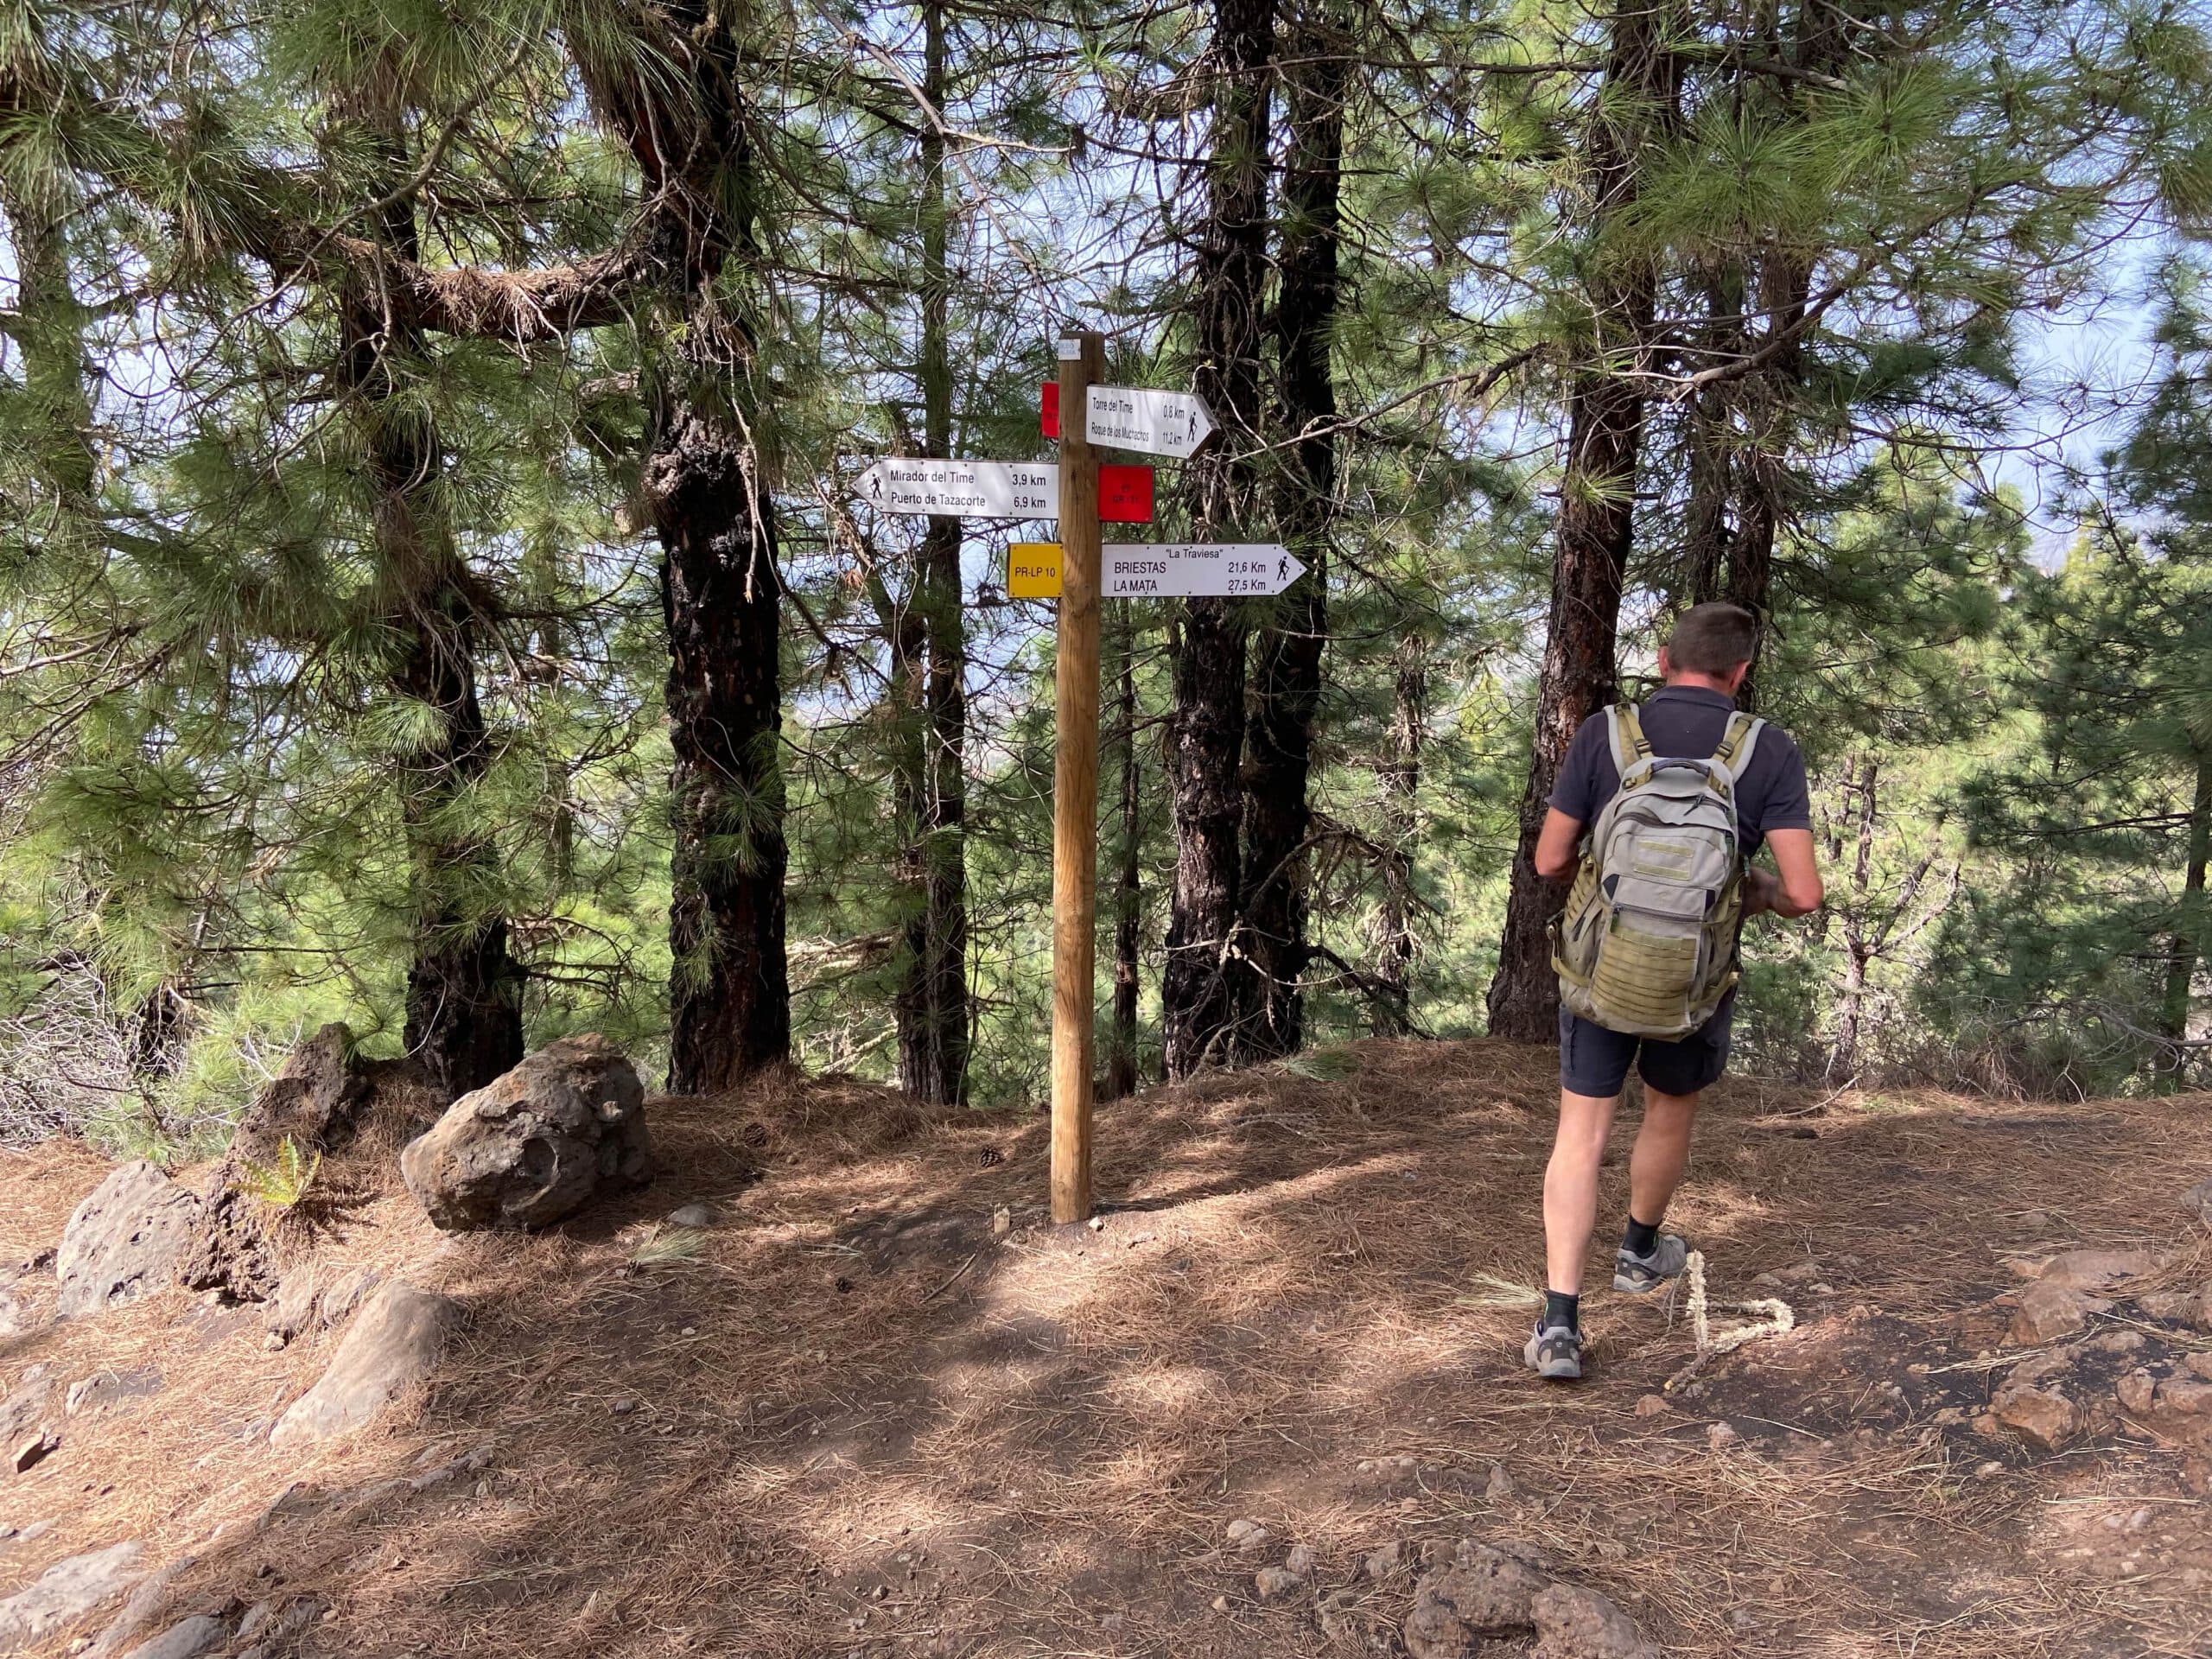
Hiking signs in the direction of Torre del Time
Variantes
This tour can be combined well with various other hikes and circular walks in the vicinity. The length can be extended if you start from El Jesús, La Punta or the Mirador del Time. However, you will then have to cope with a few more metres in altitude.
If you like hiking on the rim high above the caldera, you can also continue in both directions on the GR 131 hiking trail along the rim. Up you go to Roque de los Muchachos. And downhill, near the edge, you can also reach the Mirador del Time or Playa de Tazacorte. However, these are routes that should only be undertaken by very fit hikers or mountain runners.
Another beautiful round tour in the vicinity starts in Tijarafe and takes you to the well-known Pirate Bay. 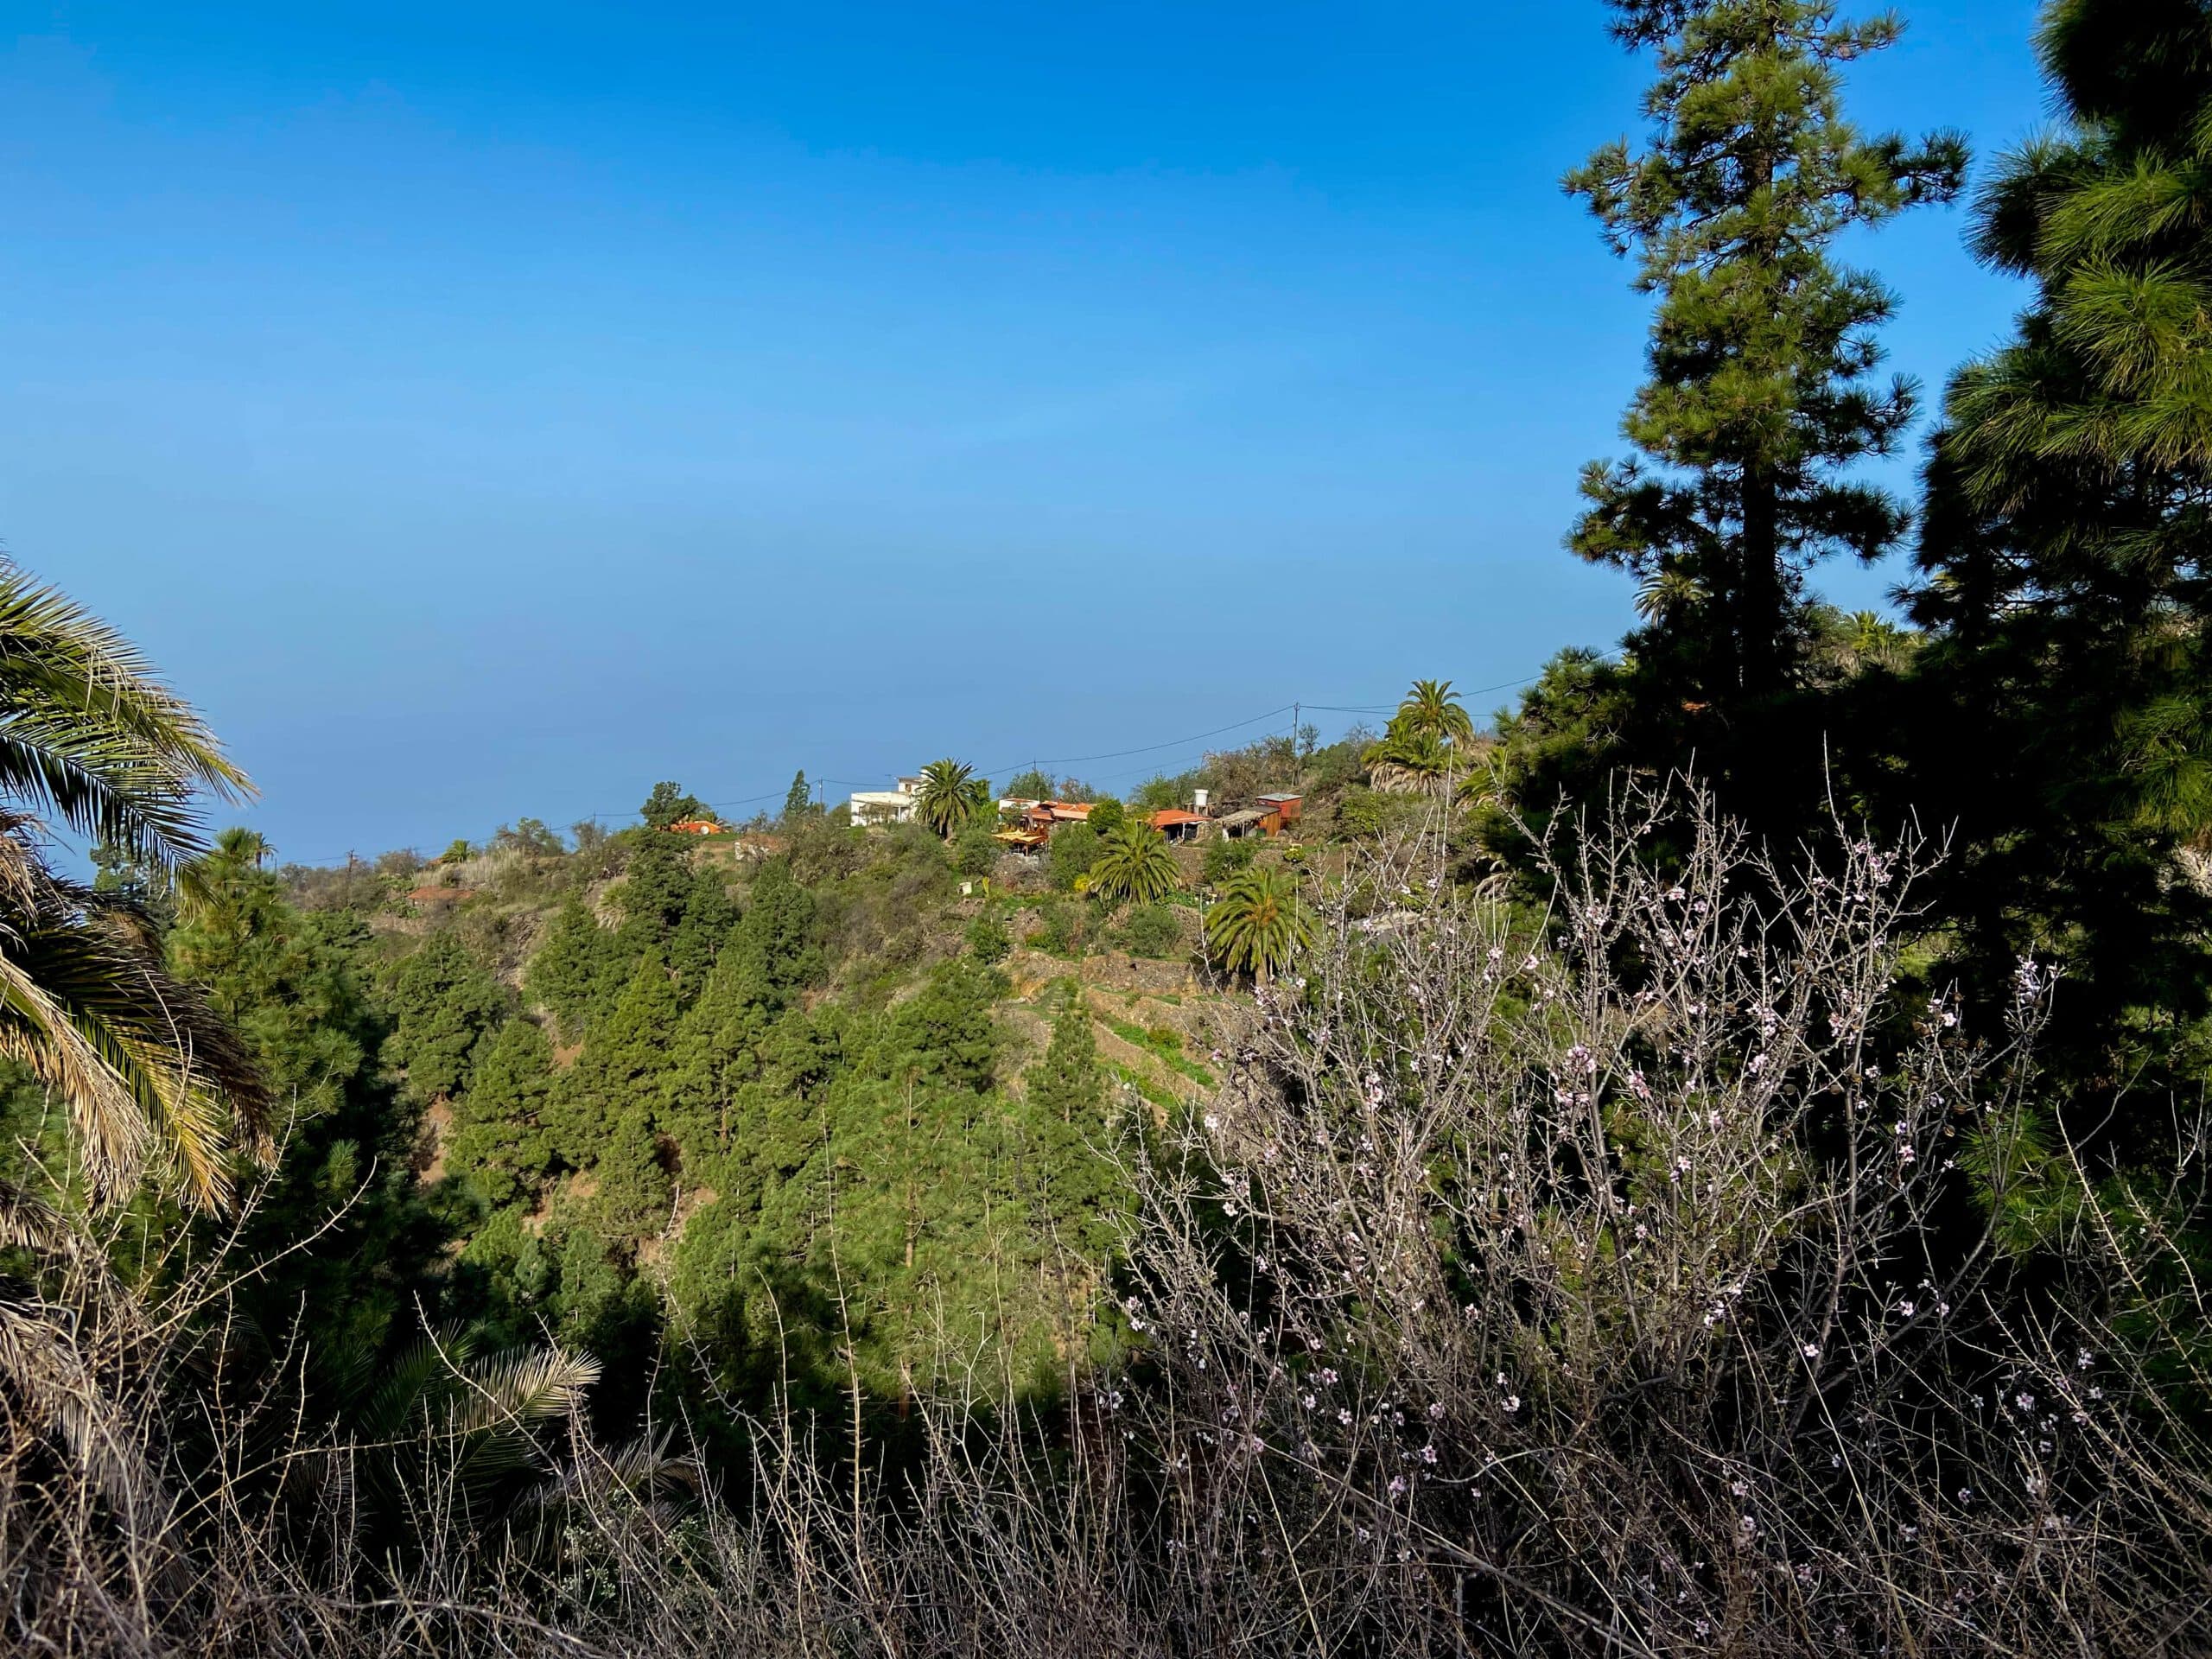
Small hamlet of El Pinar
Hike Hoya Grande and Torre del Time
Route section starting point runway to El Pinar
You start your hike at the starting point described above on the wide track. This is the Camino La Traviesa (marked PR-LP 10, white and yellow). From the starting point, follow the path uphill for a short while. At the first bend to the right, a path branches off to the left down through the forest into a barranco. At the bottom, cross the barranco and climb up again on the other side of the gorge on a path along the slope. You will pass a cave.
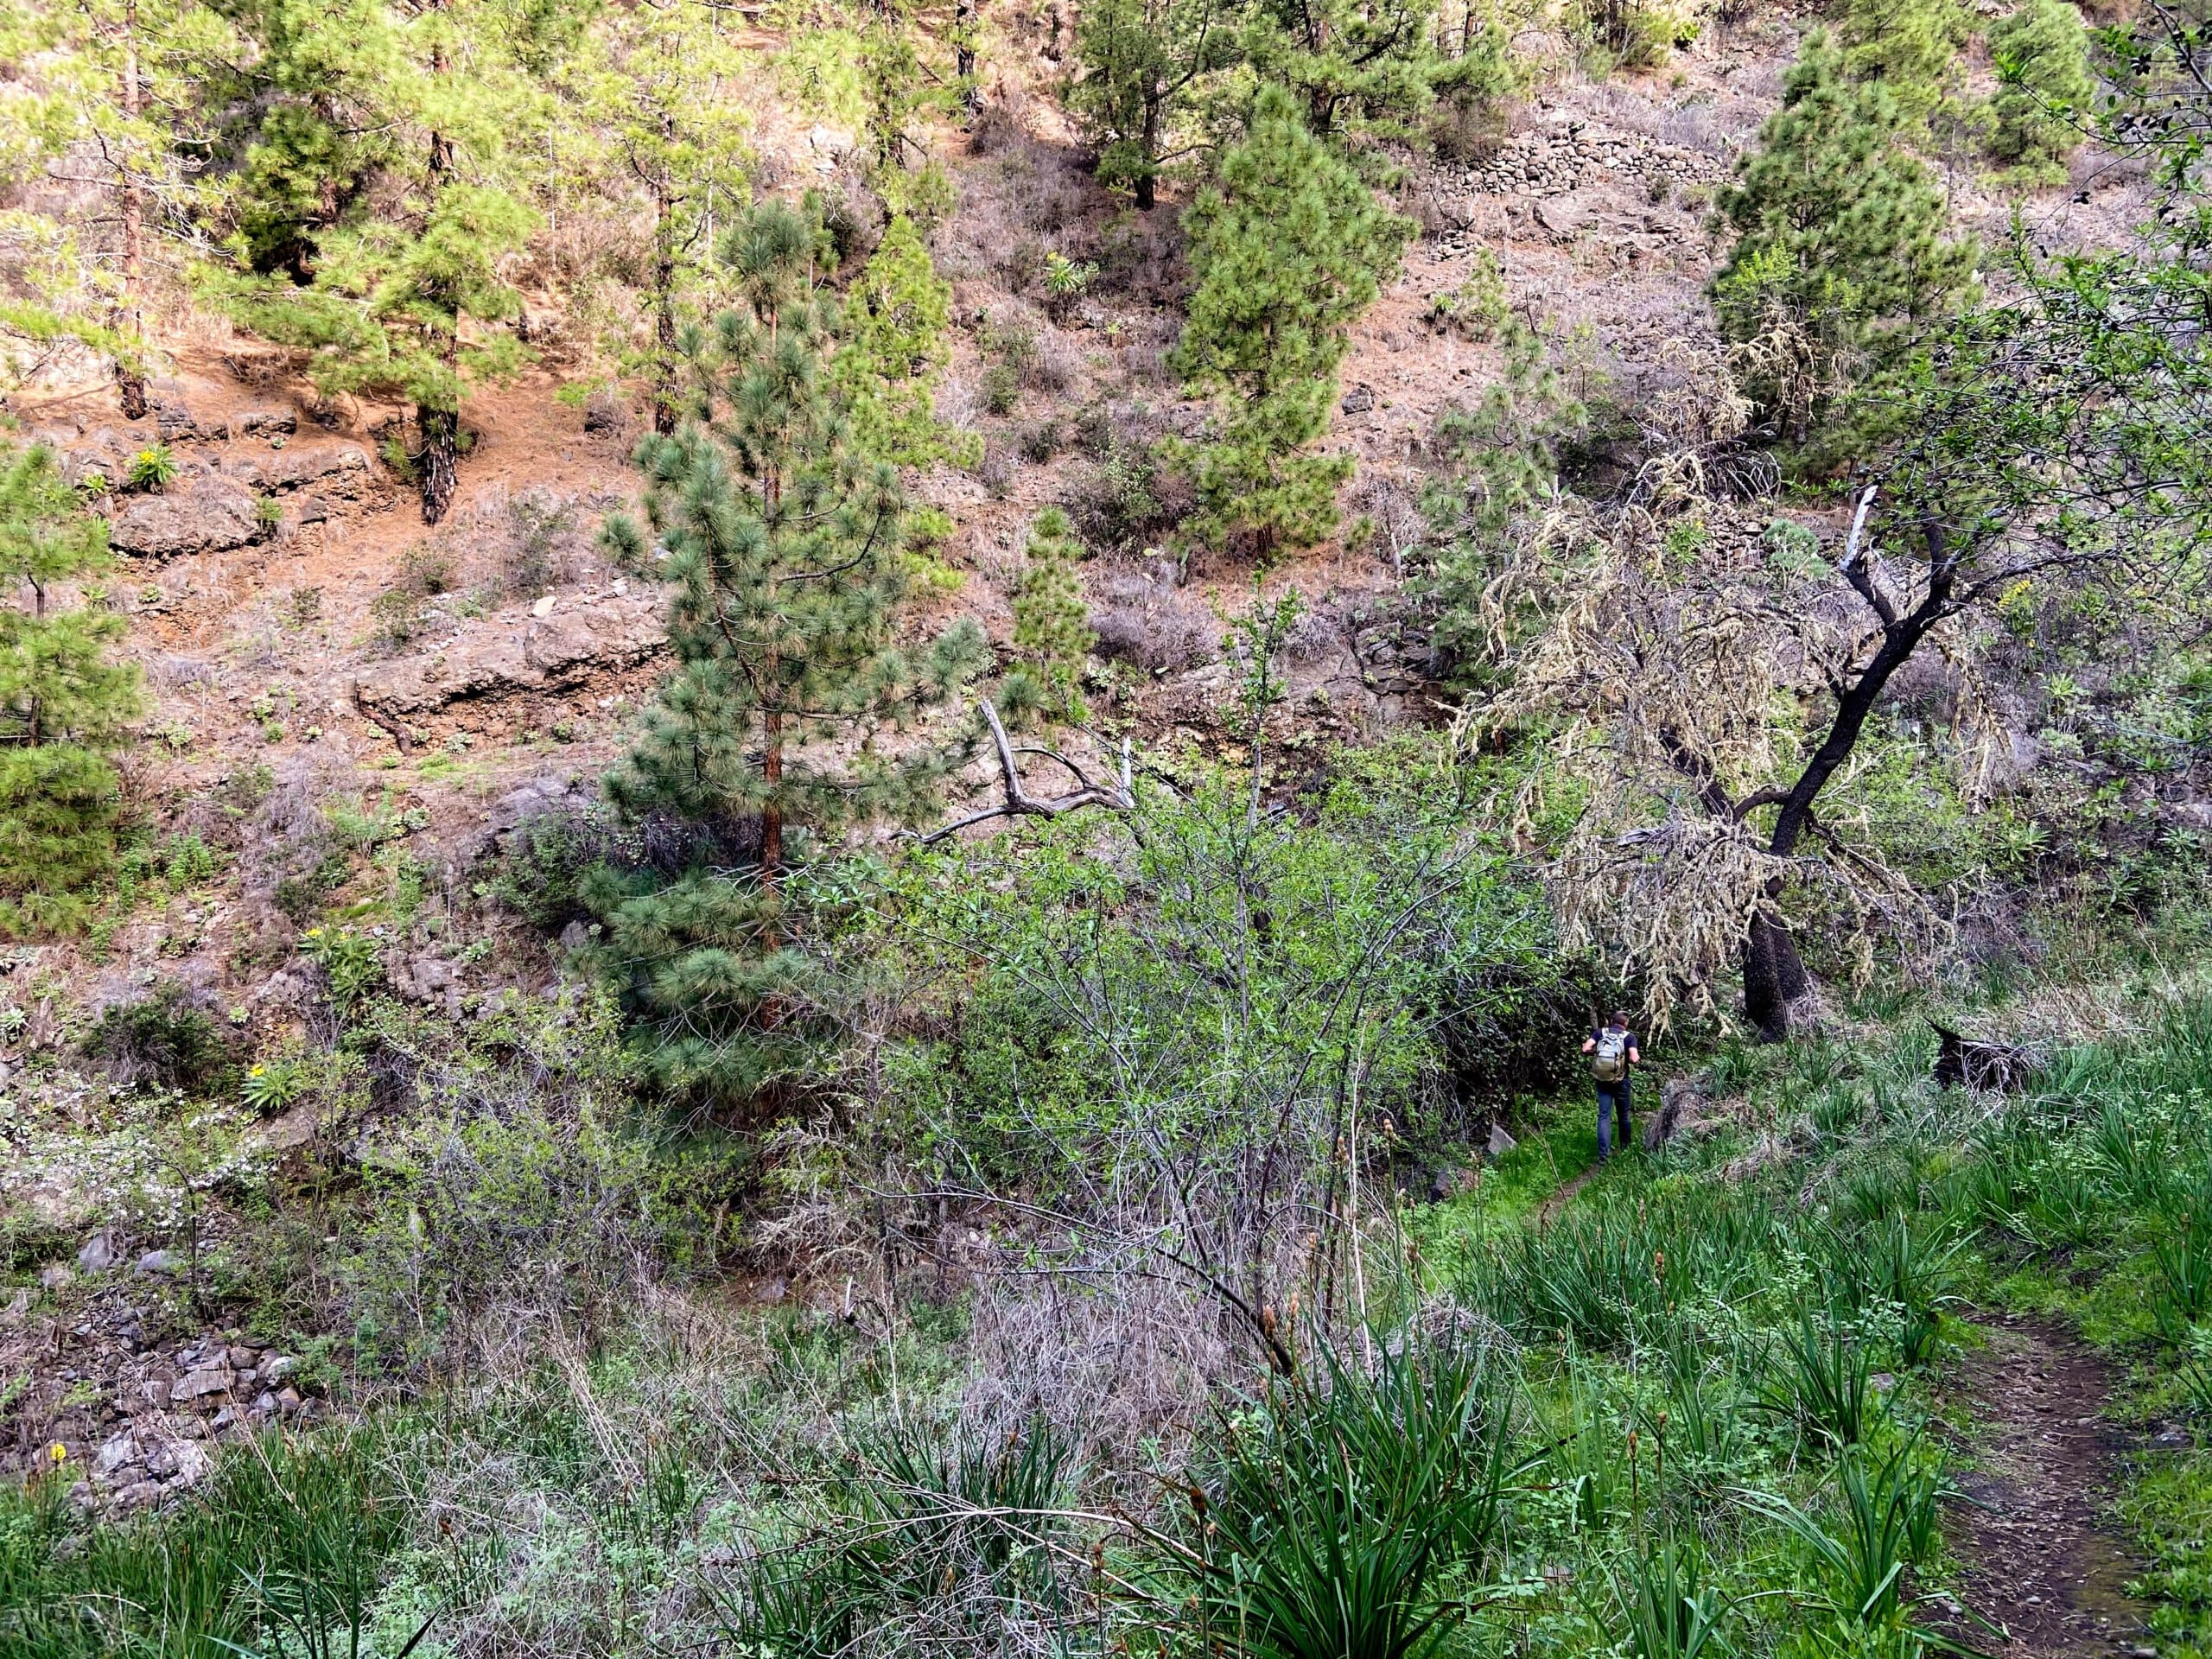
Hiking trail through some green gorges
Continue around a ridge and descend into another barranco. After climbing up the other side of the gorge, you reach a ridge. From there, the path follows the slope for a while. You can already see the houses of El Pinar in front of you. Once again you cross a barranco overgrown with plants. You climb up the other side and reach a road. From here, follow the road and you will soon reach the hamlet of El Pinar.
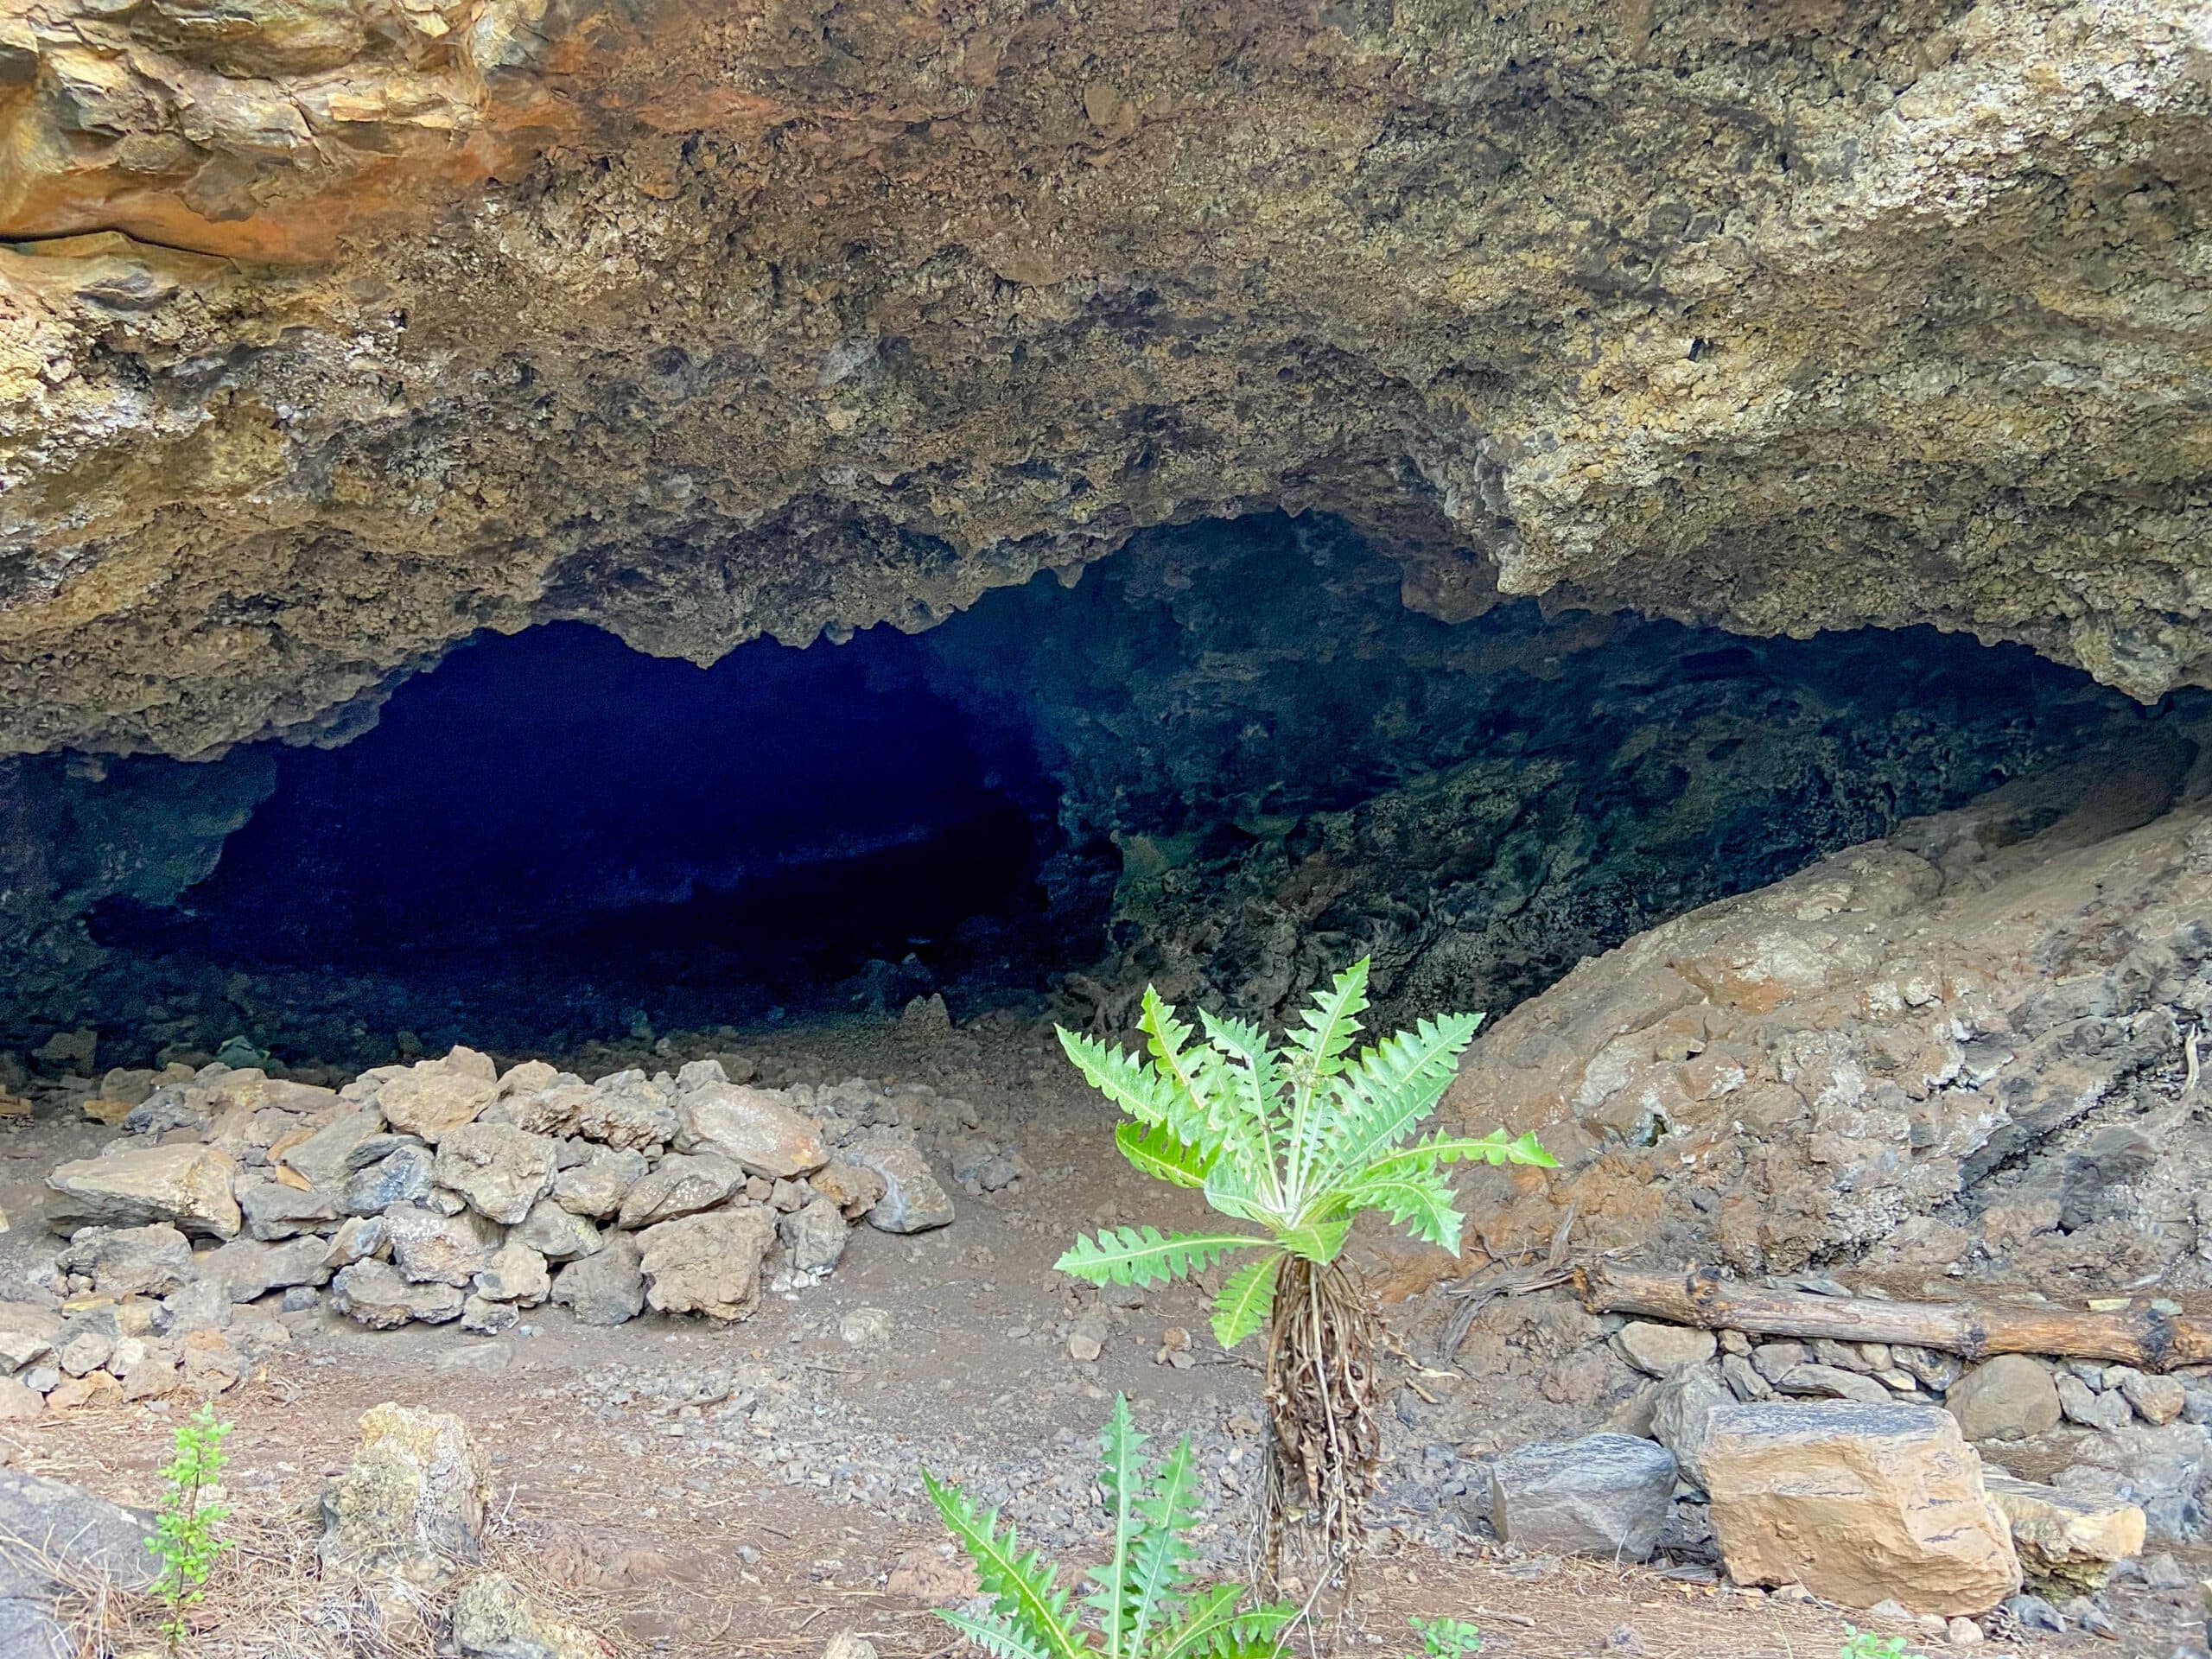
Caves in a gorge along the way
El Pinar section to end of roadway crossing
In the hamlet of El Pinar, you come to a road and footpath junction. Turn right uphill onto the road, which after a short while becomes a camino. The trail runs gently along the slope, crosses a small ravine and then rejoins the El Pinar road. At a T-junction, turn right uphill. You follow the Camino El Pinar road for quite a while.
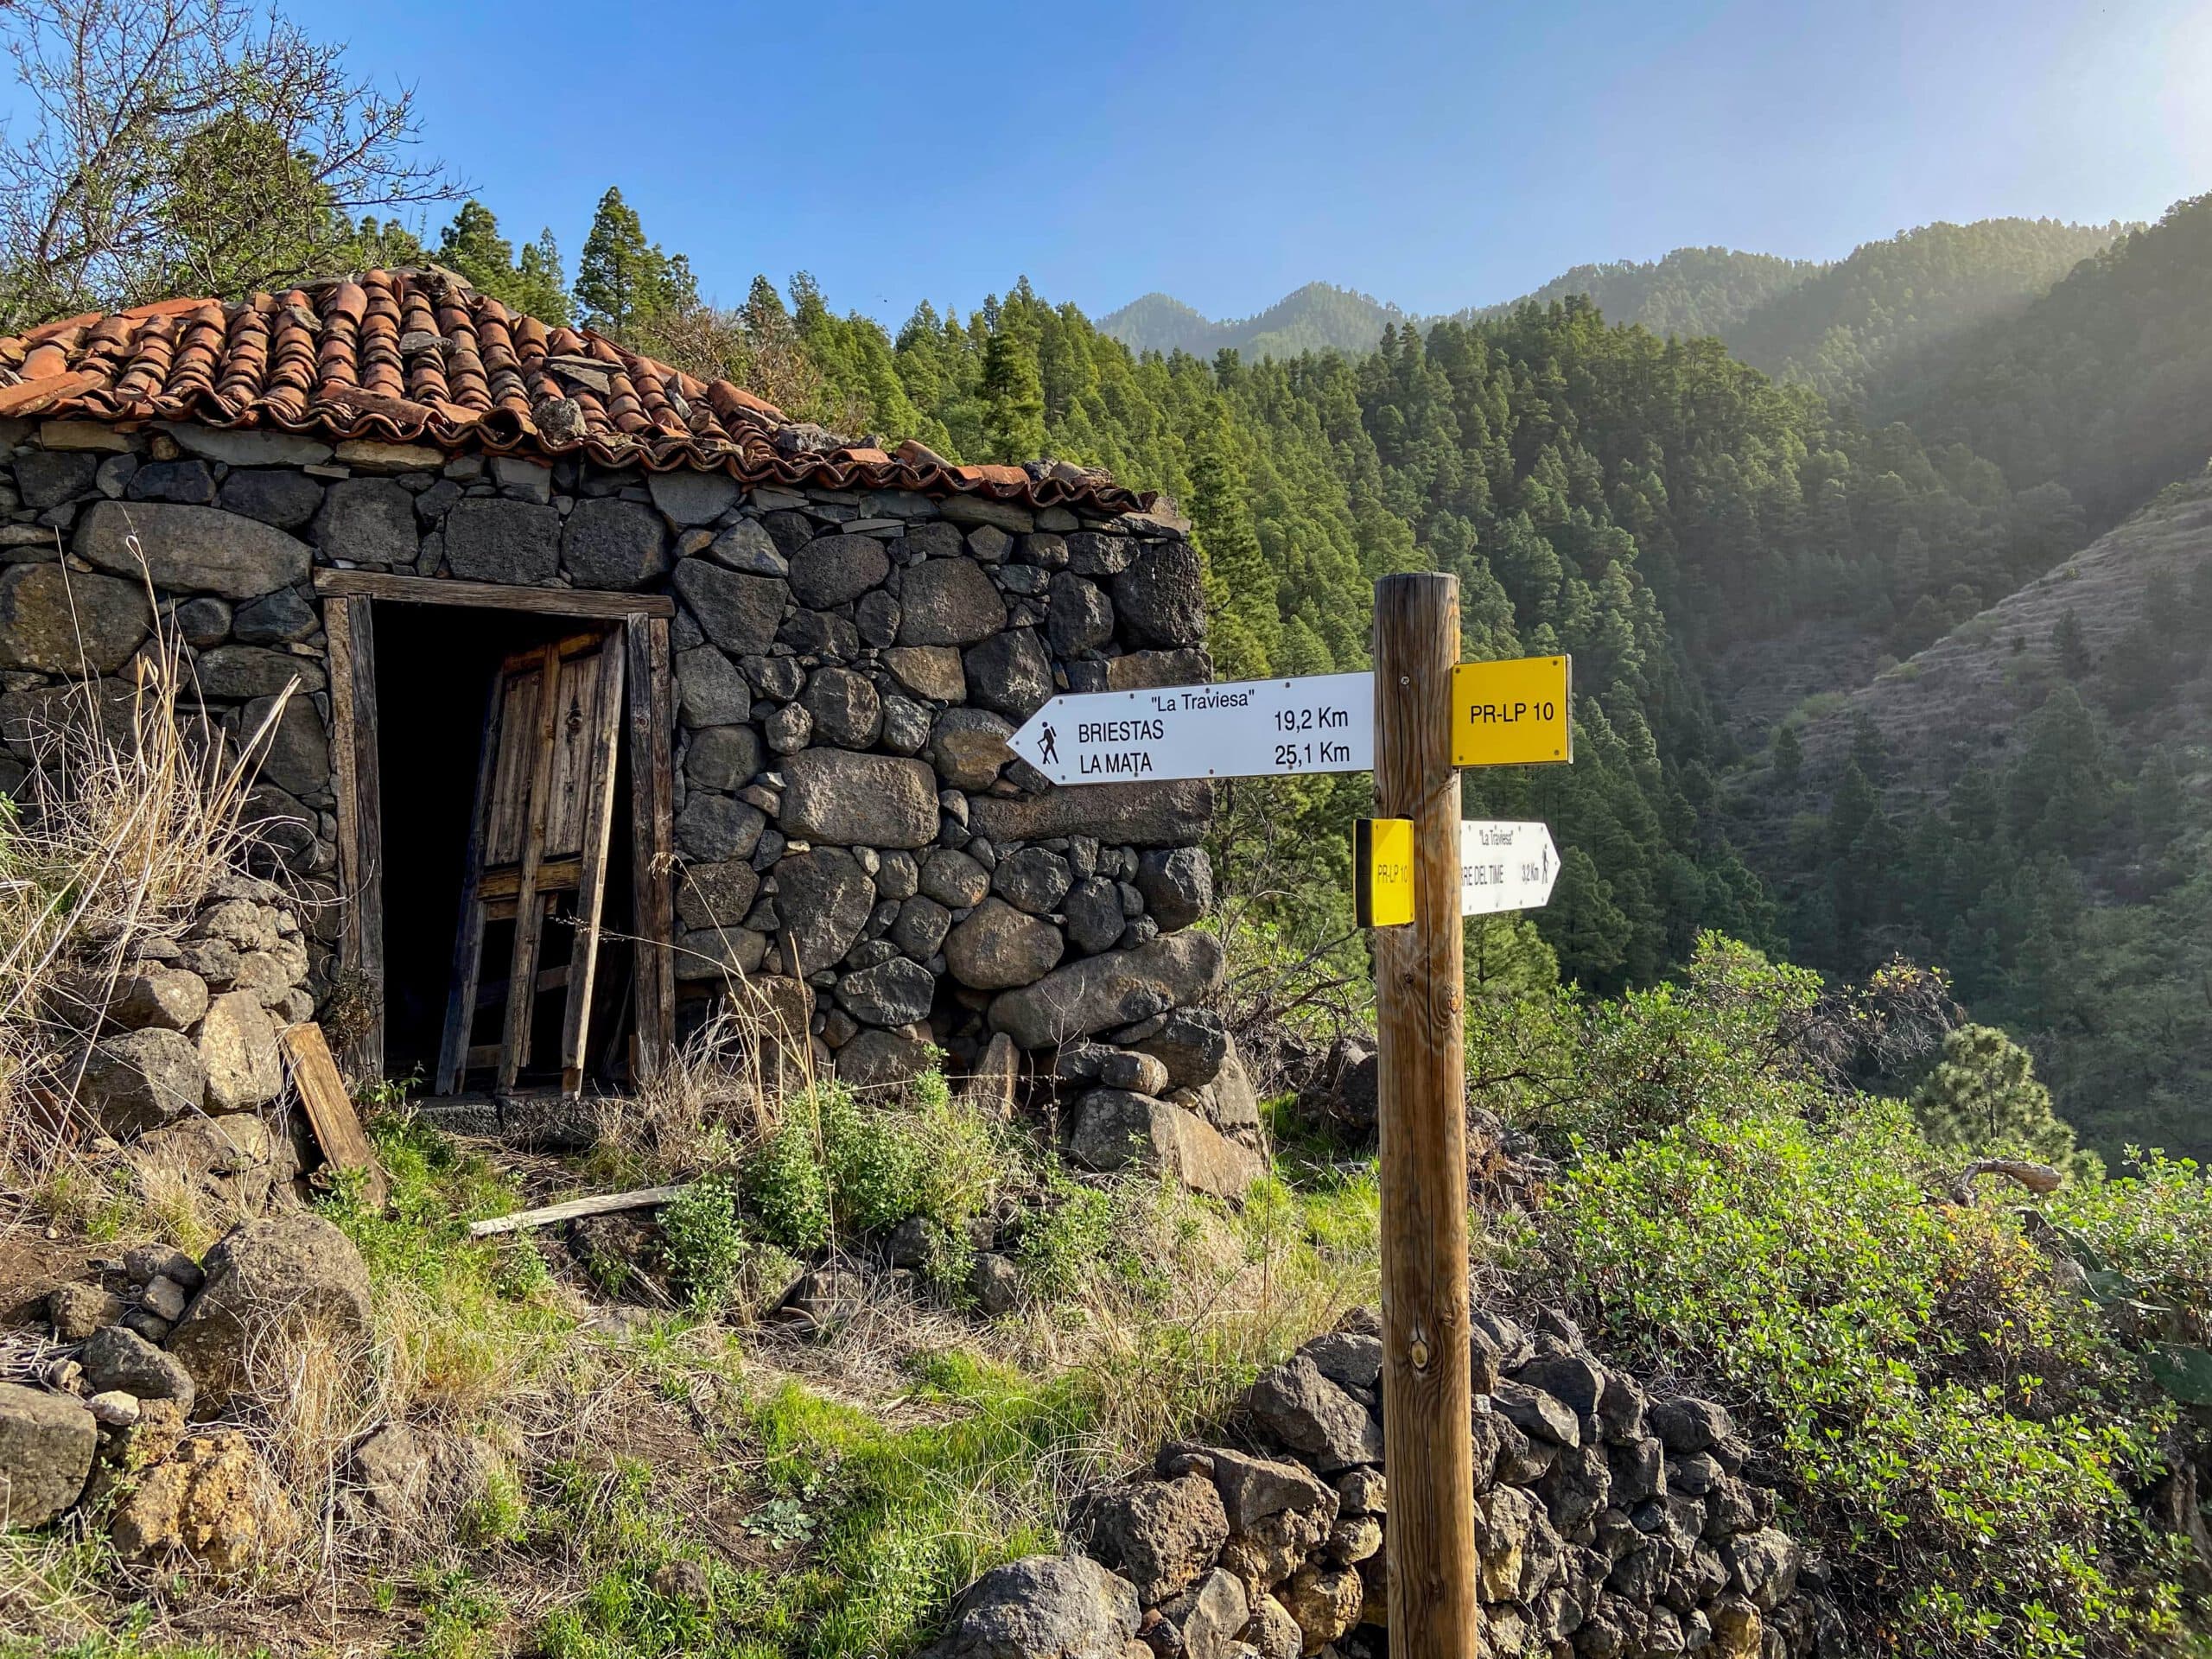
Old house along the way and signposting of the PR-LP 10
Article summary and large selection of GPS hiking tracks
Sign up for my newsletter now and get exclusive access to my collected GPS tracks as well as all the brief information about my articles.
Sign up nowEventually you will pass a water reservoir. Shortly afterwards, the road forks. A few metres before, an excellent hiking trail branches off uphill to the left. Follow it uphill on the partly steep and partly very stony path. The hiking trail shortens the road. For this reason, you will cross the road four times during the ascent. The hiking trail continues on the opposite side of the road.
View from the ascent path down to the coast and small hamlets
Route section End of crossing of roadway to ridgeway in the direction of Hoya Grande
While the road branches off to the right to Torre del Time, you hike straight up through the sparse pine forest. This part is actually the most strenuous part of the hike. There is no end in sight to the path along the way. And at first it goes up steeply on the ridge on a path that is difficult to recognise. Later, the path also goes up a few times on steep serpentines. But then you have made it and reached the ridge path high above the caldera.

Steep ascent path through the forest towards the caldera rim
Here you have reached the highest point of the hike, 1500 metres in altitude. From now on, in addition to a rest at the summit, you can also enjoy the most magnificent views down into the Barranco Angustias and the Caldera de Taburiente. You are now on the GR 131 trail (marked in white and red). Continue to the left on the high trail towards Roque de los Muchachos. However, keep to the right towards Hoya Grande and Torre del Time.
Hiking junction after the steep ascent - hiking trail on the caldera rim
High trail section in the direction of Hoya Grande to Torre del Time
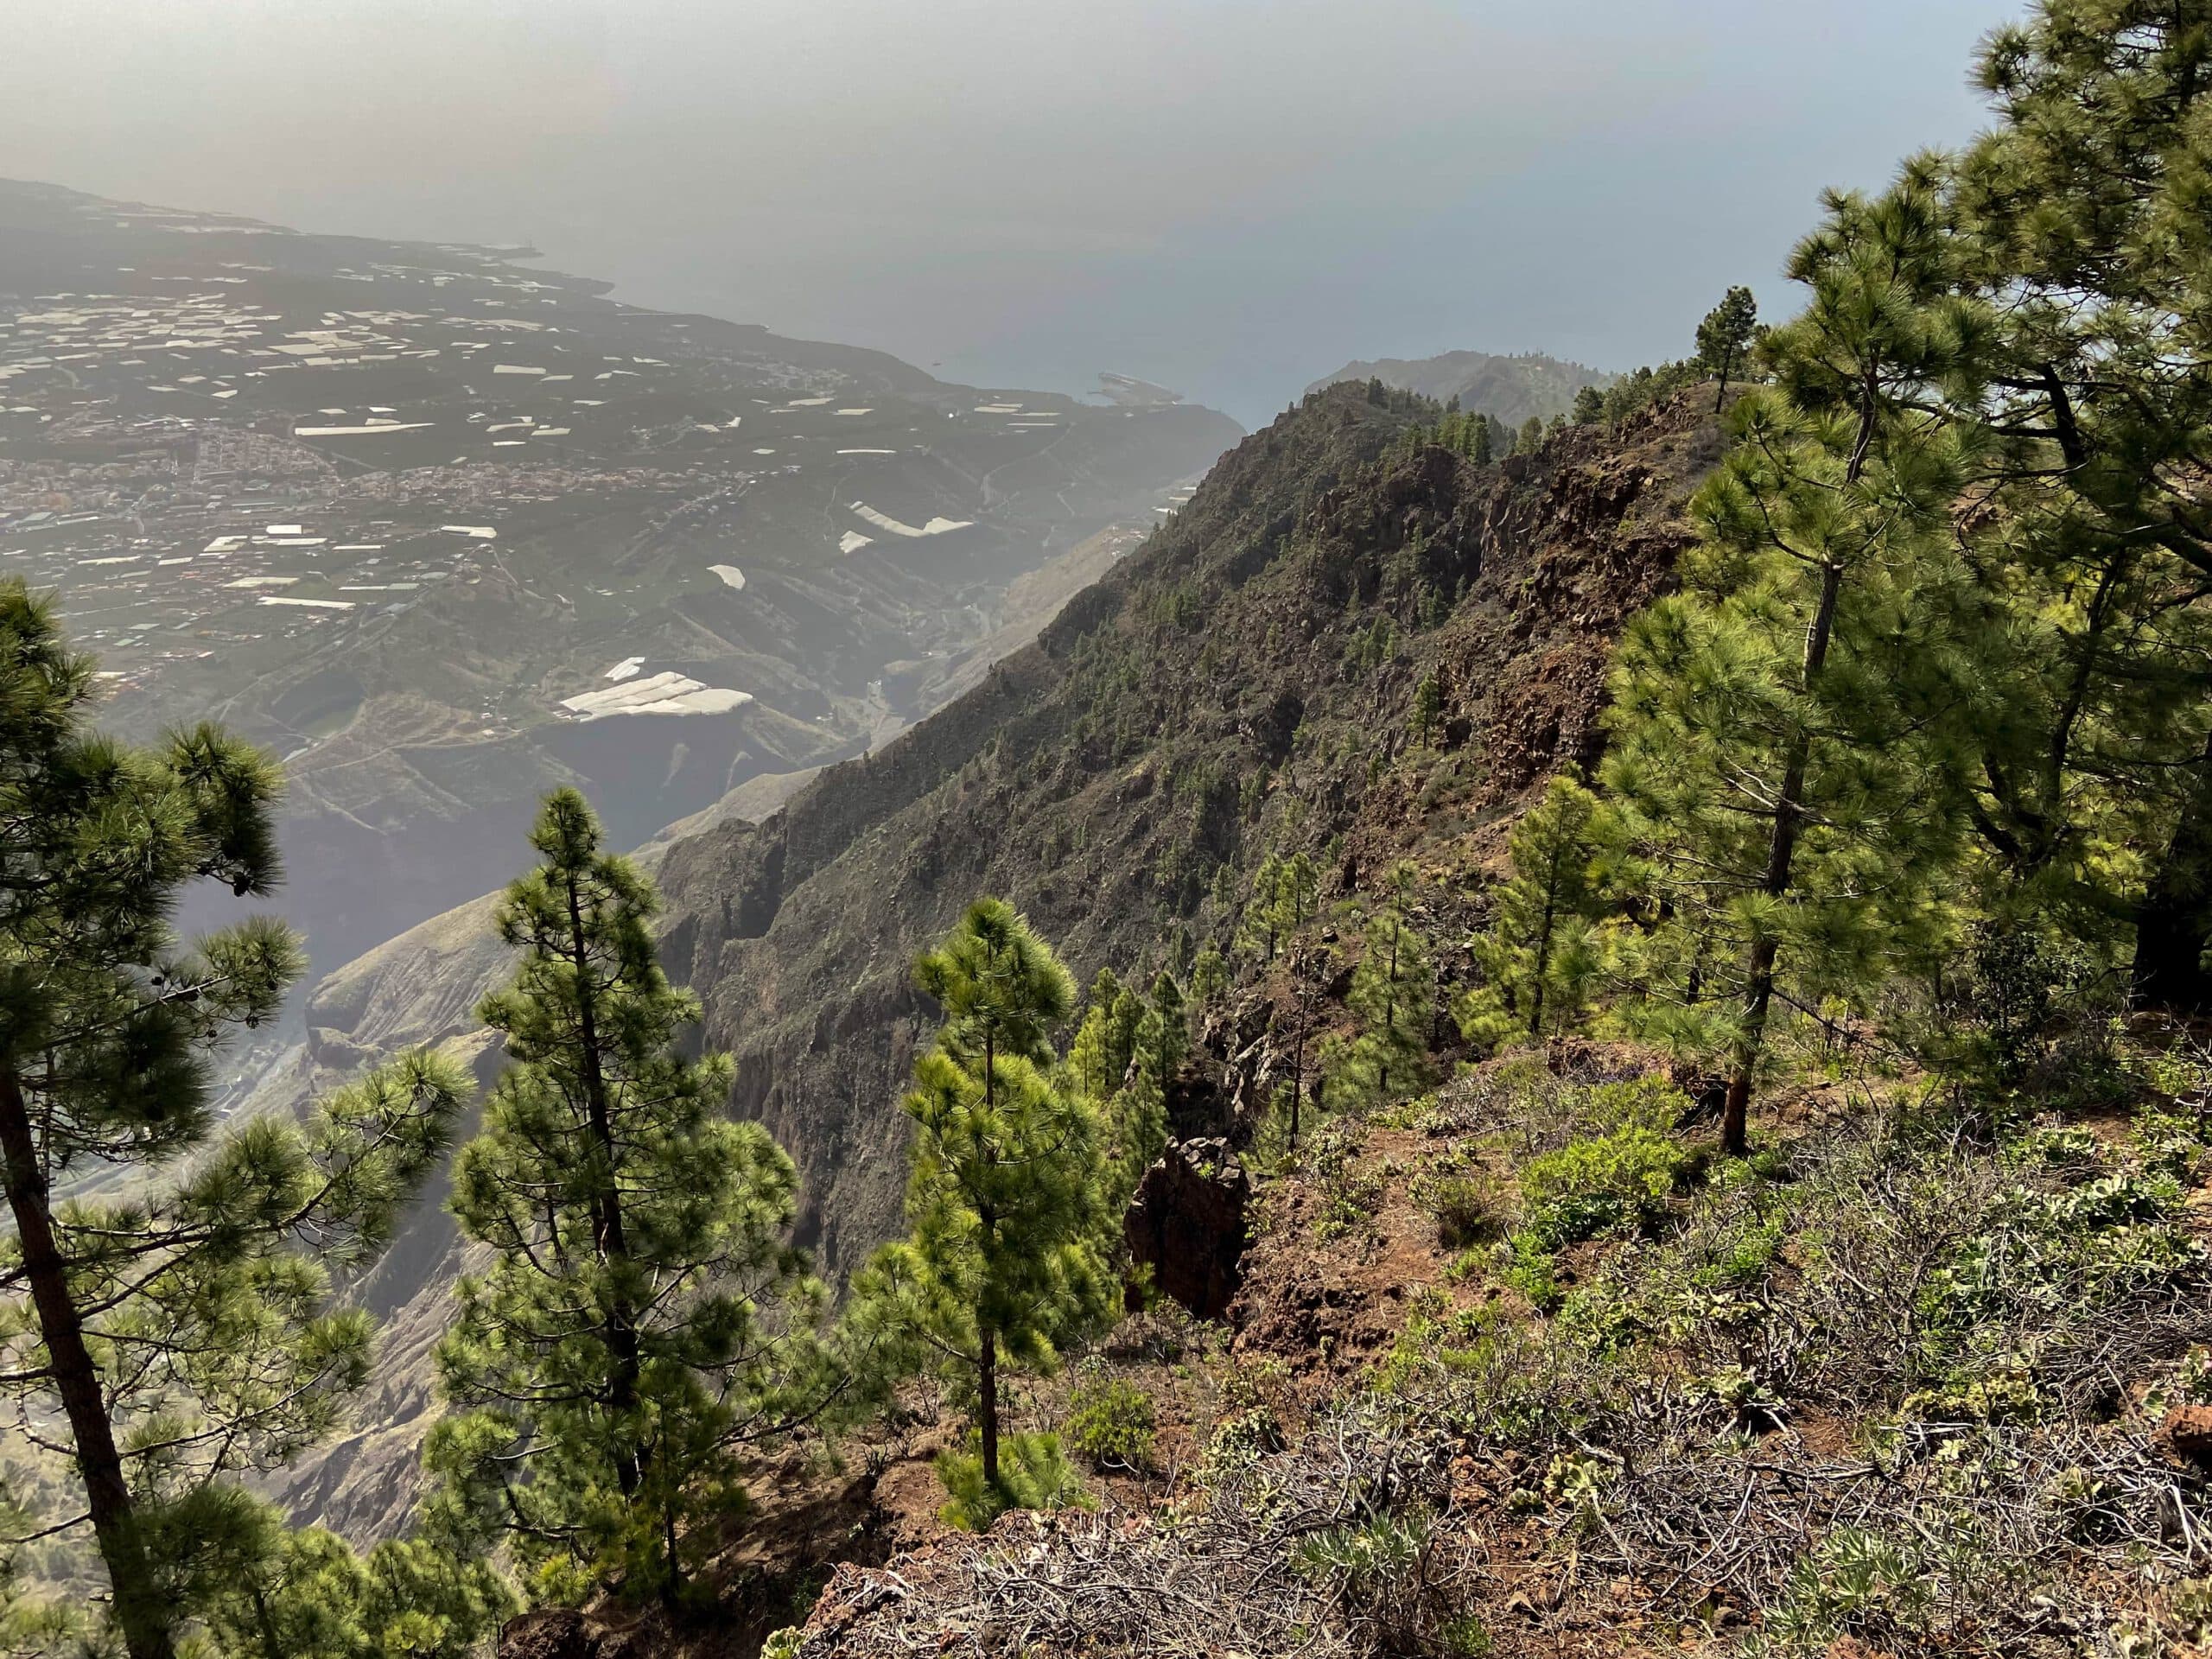
The trail always runs slightly below the ridge side. But for beautiful views, you can look down from the ridge most of the time. You pass the summit of Hoya Grande, from whose foot you still have the best views. Unless they are slightly clouded by Calima – as on my last tour there on La Palma. Nevertheless, even with Calima, the view is beautiful and unforgettable. Finally, the path turns away from the ridge a little.
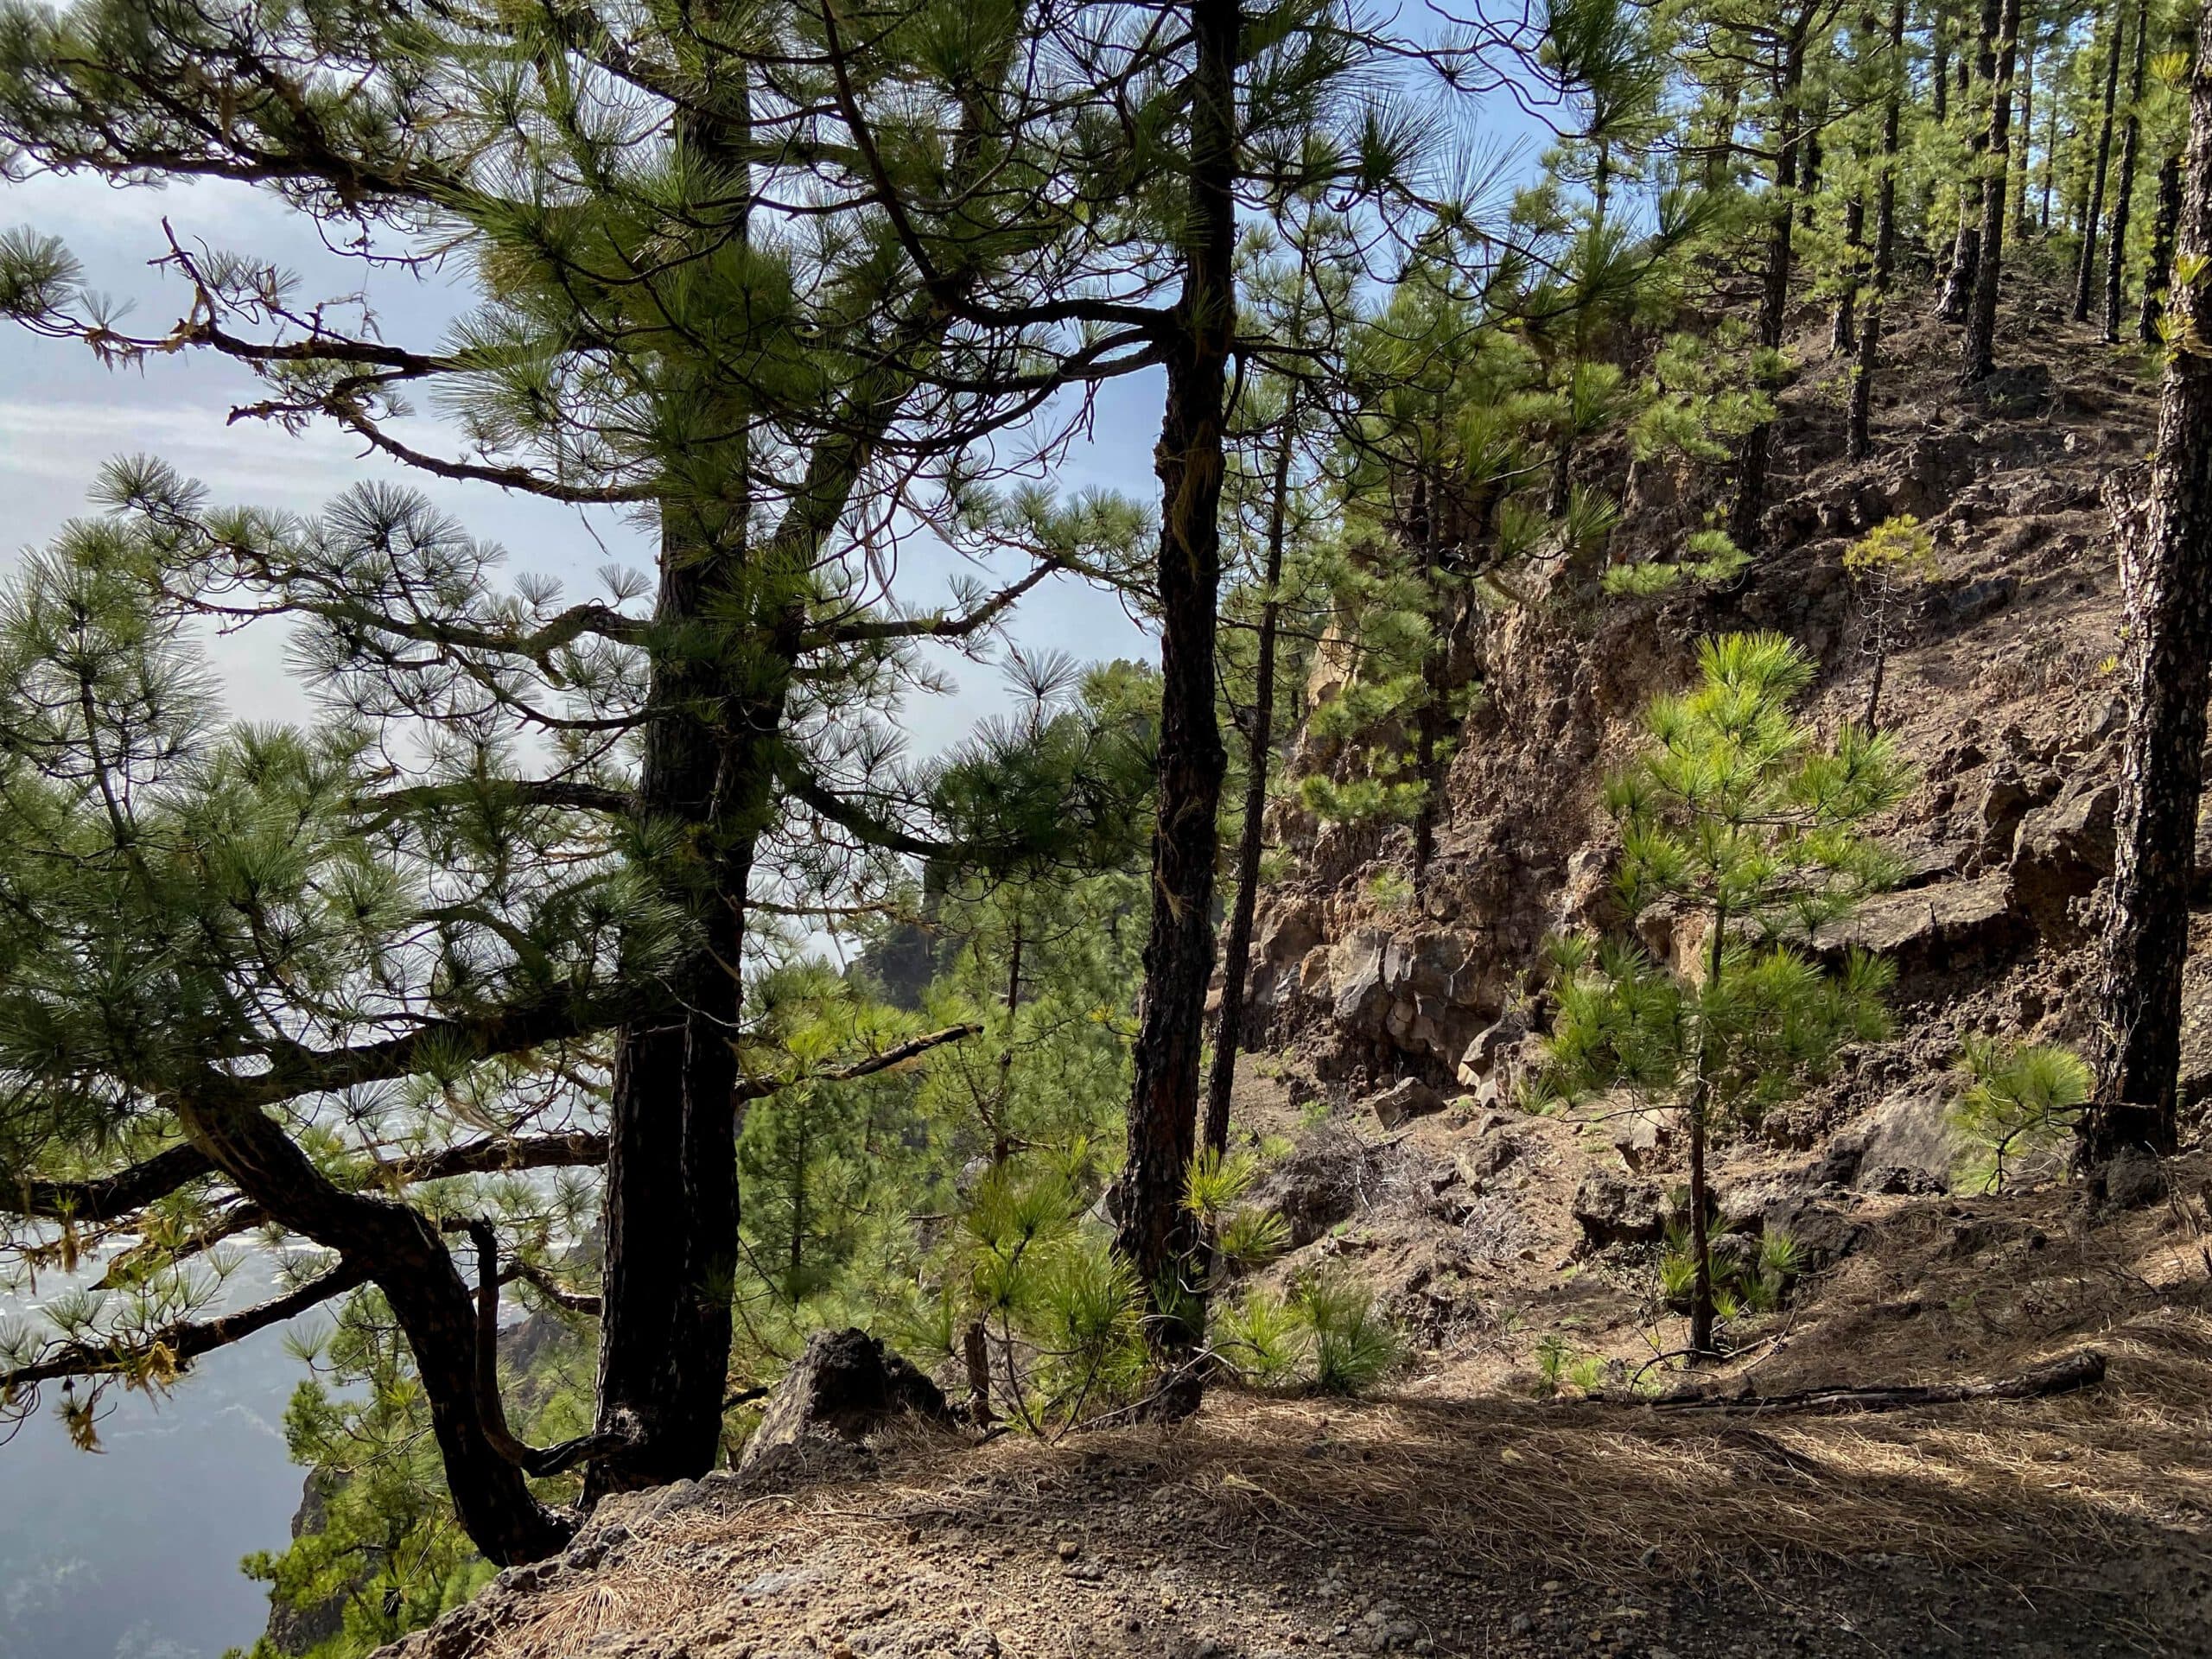
Close to the summit - Hoya Grande with a view
It runs downhill on the slope. You walk first above and then across large terraced vineyards. Finally, the path ends on the road you left before your ascent. In a short time you will have hiked around to the left to the fire protection tower Torre del Time (1160 metres altitude). Here, too, it is definitely worth stopping to enjoy the view.
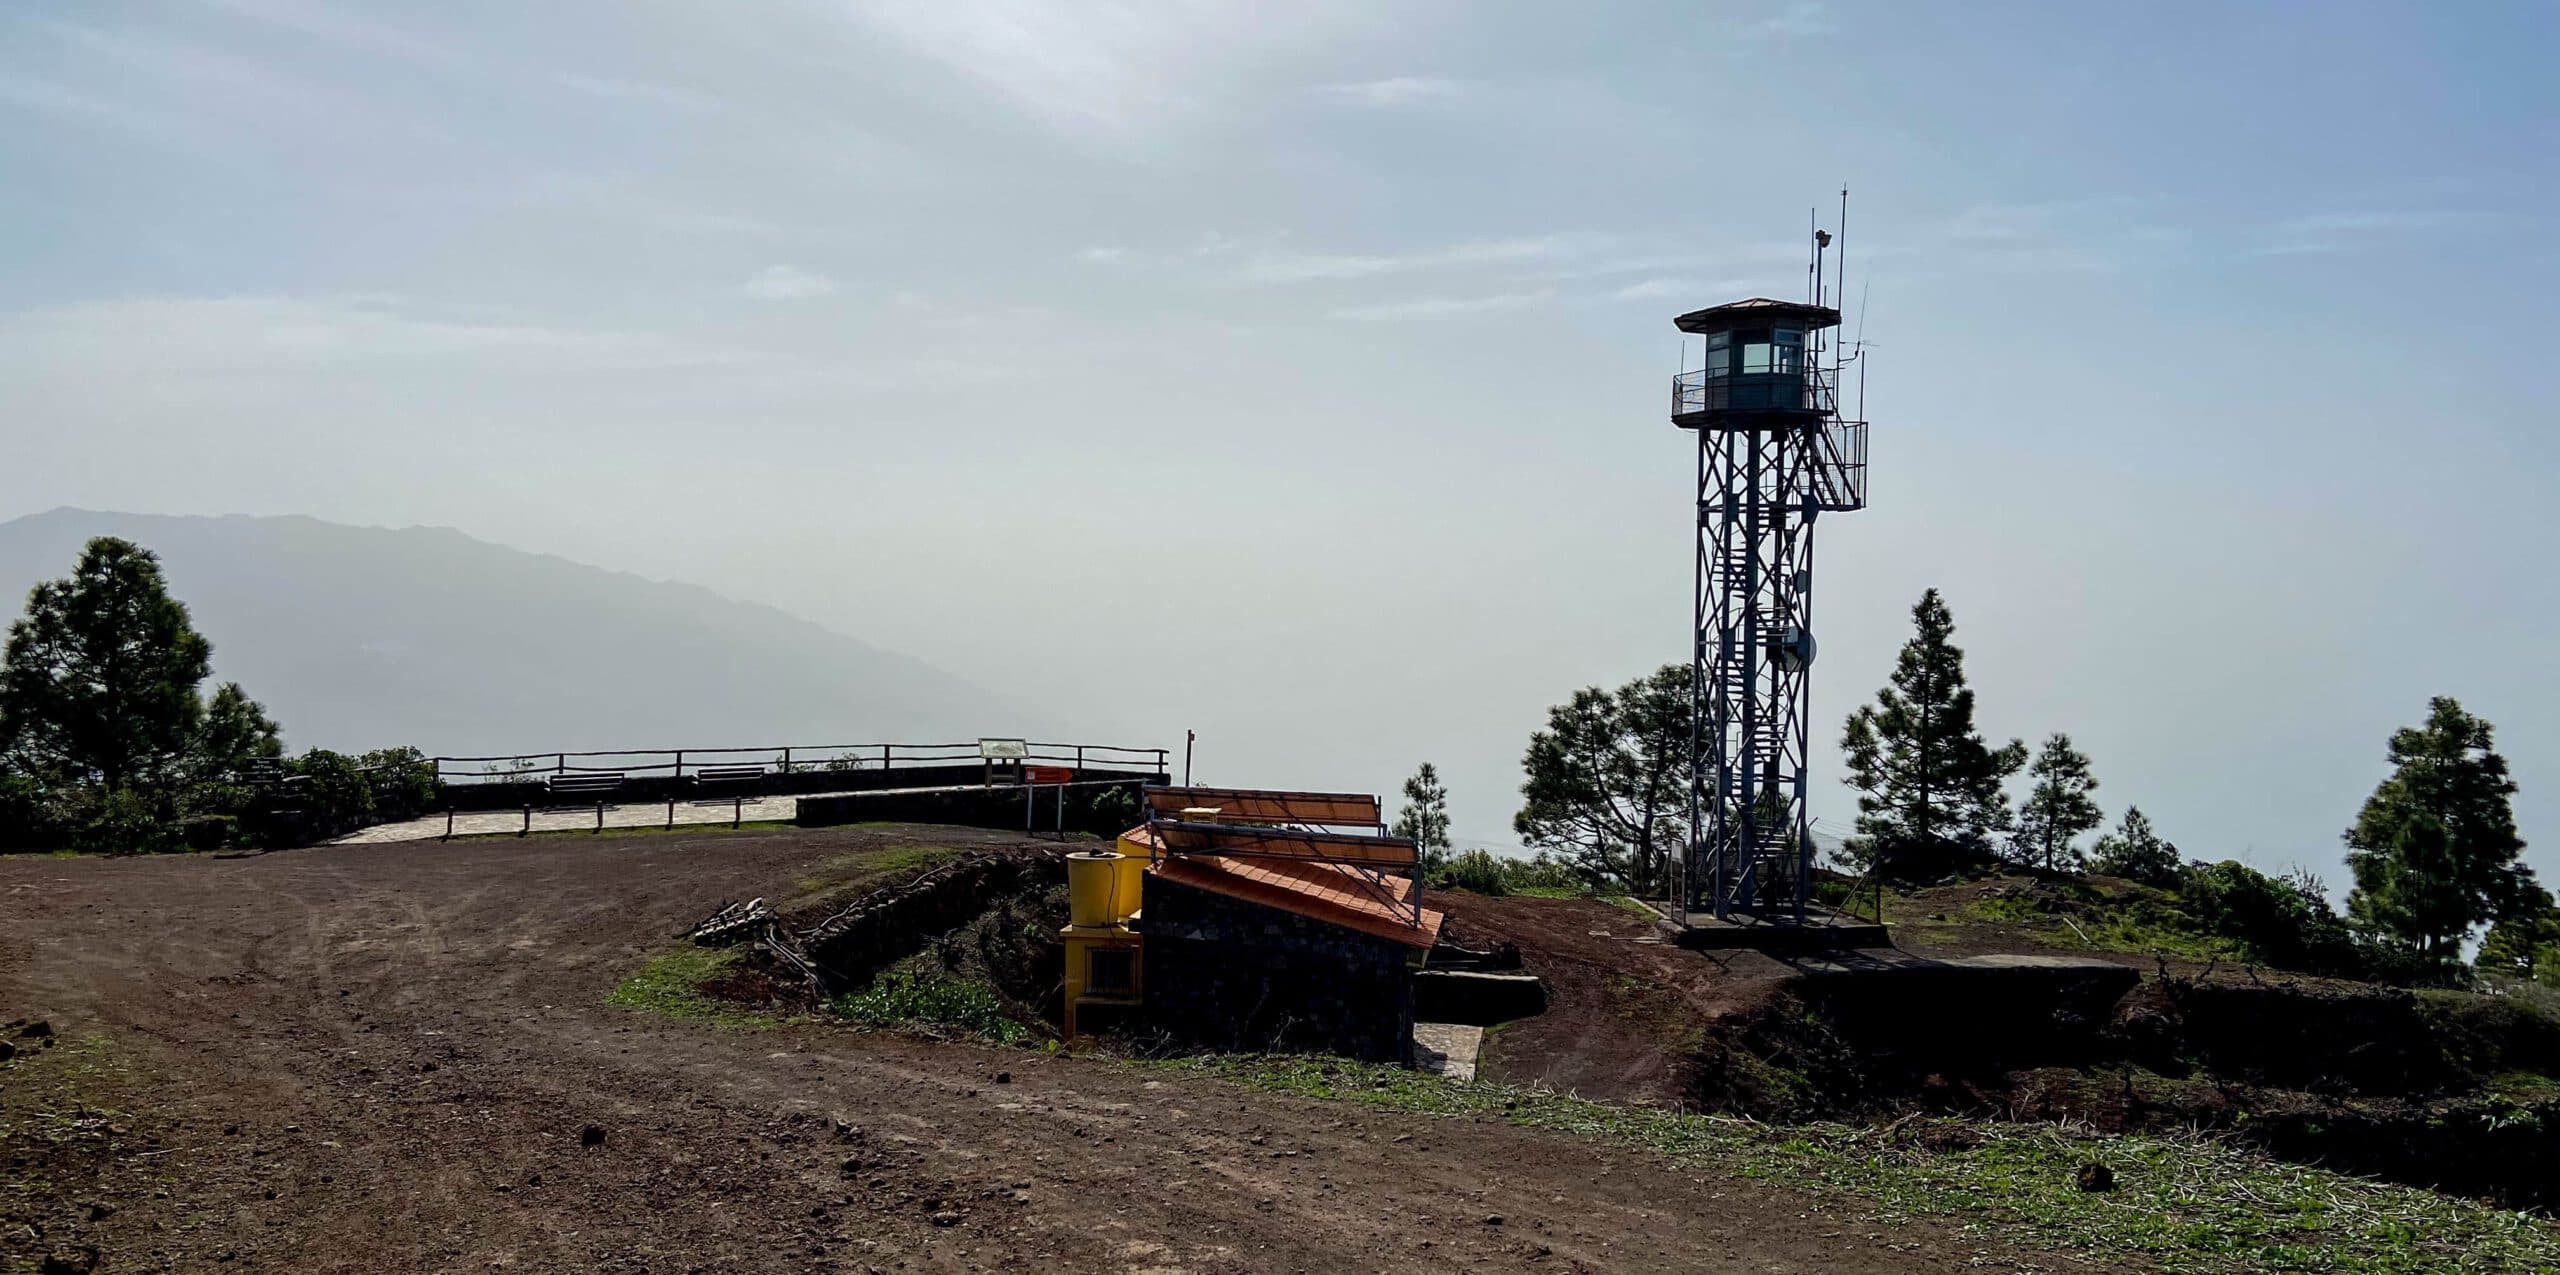
Torre del Time with viewing platform
Torre del Time section to the starting point of the hike
From Torre del Time, continue along the road. This forks after a short while. Keep to the left and follow the path close to the ridge. But then, shortly after this point, there is another fork. The main path continues straight downhill to the Mirador del Time and Tazacorte. However, keep to the right on the already familiar PR-LP 10 path (marked in white and yellow and known as Camino la Traviesa).
wonderful views from the edge of the cliff - unfortunately at Calima
From here, the trail takes you down the slope through pine forest. You will cross another ravine and after a good 15 minutes you will be back on the road where you started. Turn right on the road and after a short while you will return to your starting point.
Hiking on well signposted trails
And finally
I hope you enjoyed this short but strenuous hike on La Palma. It can actually be combined very well with many other hikes in the vicinity. You can already see this from the many hiking signs you will come across along the way. This way you can find the best hiking tour for you. Have fun on all your hiking trails,
Dagmar from Siebeninseln